After 33 years and 261,000-ish miles, my XJ has had a long and hard life. When I got it, the top end of the engine needed plenty of attention. All the bushings for the suspension and steering were worn out, all the drivetrain bearings were beyond their service life and now it’s time to address the last pieces of comfort and safety equipment. My seats and seat belts are begging for retirement. My seats have lost any bit of comfort – to the point that a cinder block would be considered an upgrade. My seatbelts no longer retract more than 6″ from where they are when it’s being worn. Both these issues cause serious safety concerns for me when I’m out on a trail. One serious roll over could potentially cause me to be thrown from the Jeep or just tumbled around the interior when the seat belt fails to hold me in.
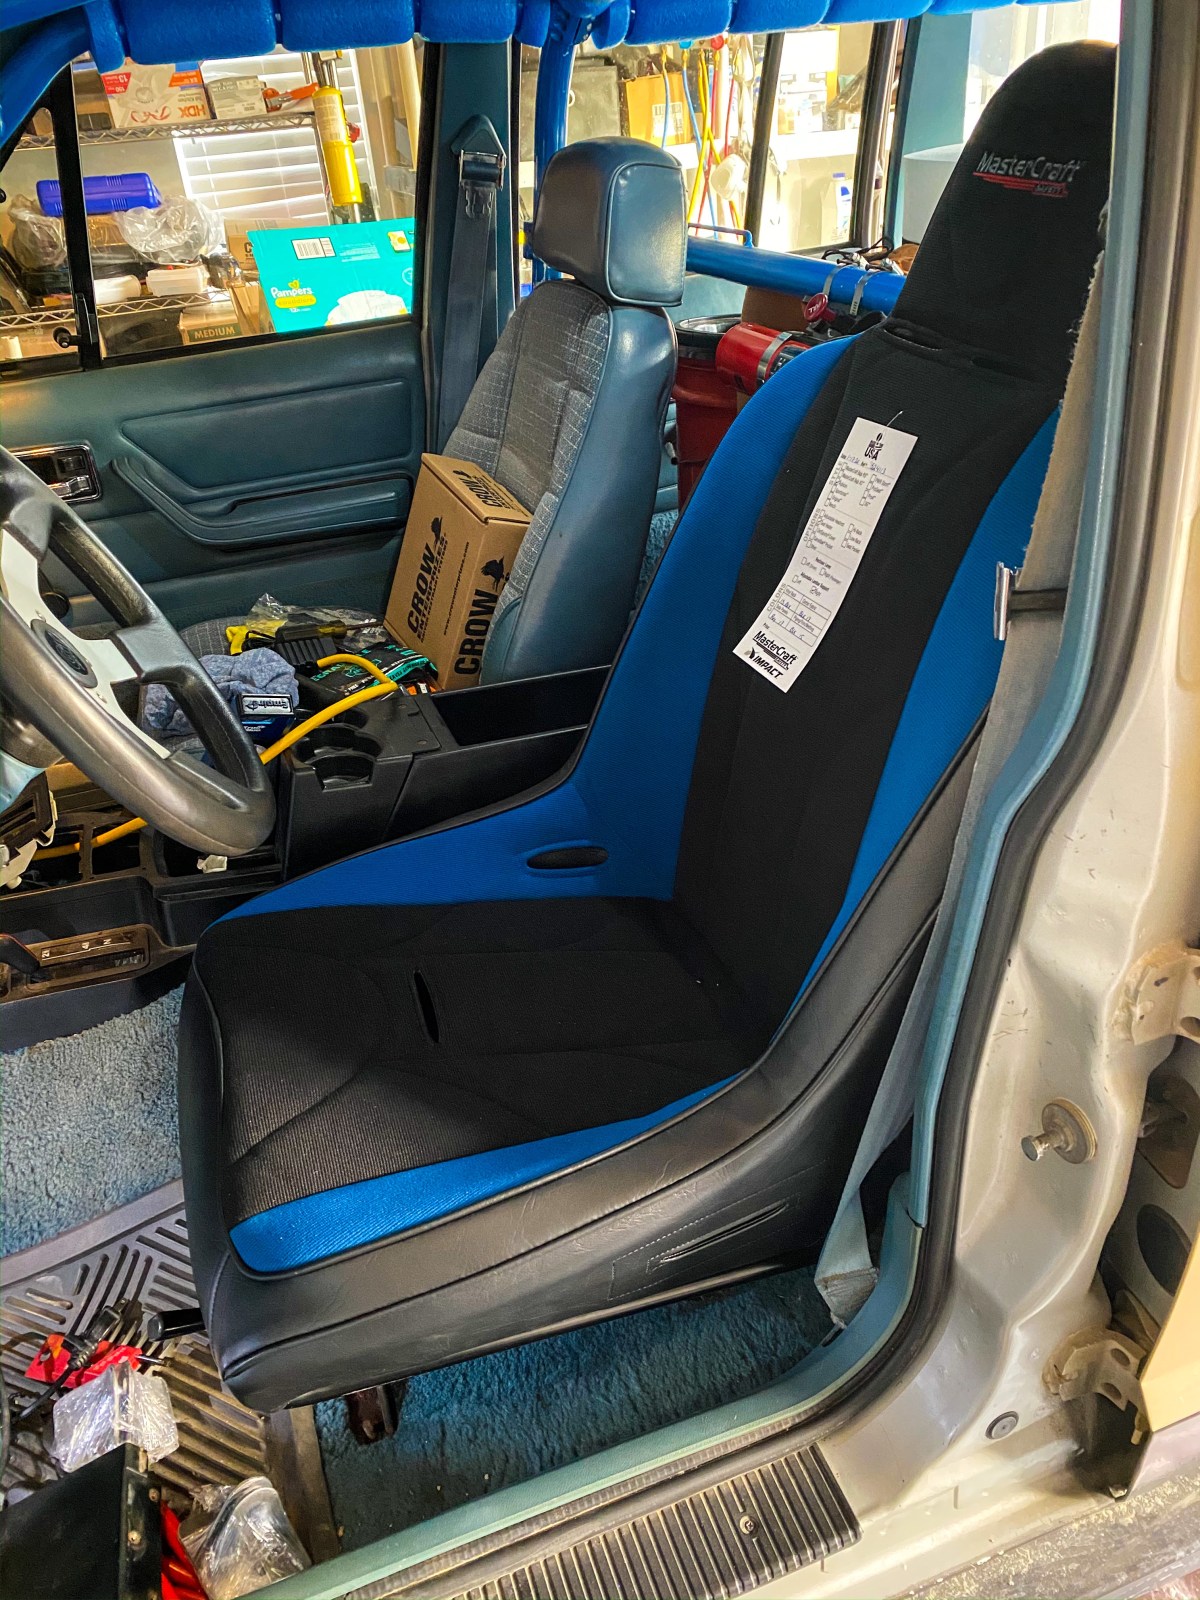
So, what’s the solution? New suspension seats and a four point harness for the driver and passenger. Now came the hard part; choosing which seat I wanted. There are plenty of great seat manufacturers out there and Kartek has a great selection that you can test-sit in to find the one that’s right for you. I chose to go with the tried and true, Mastercraft Rubicon seats. They are a full suspension seat with plenty of options to choose from. Check out their website for full options list. On mine, I chose black and blue seats with adjustable lumbar support and seat heaters for each seat. The seats are competitively priced, but adding options really brings the price up per seat. The pre-installed heater alone was a $175.00 addition per seat. However, they will be worth it down the road and I like my wife to have some creature comforts when she goes out with me. My stock heater works OK, but the additional seat heaters should help keep her from freezing in the winter time. On to the install…
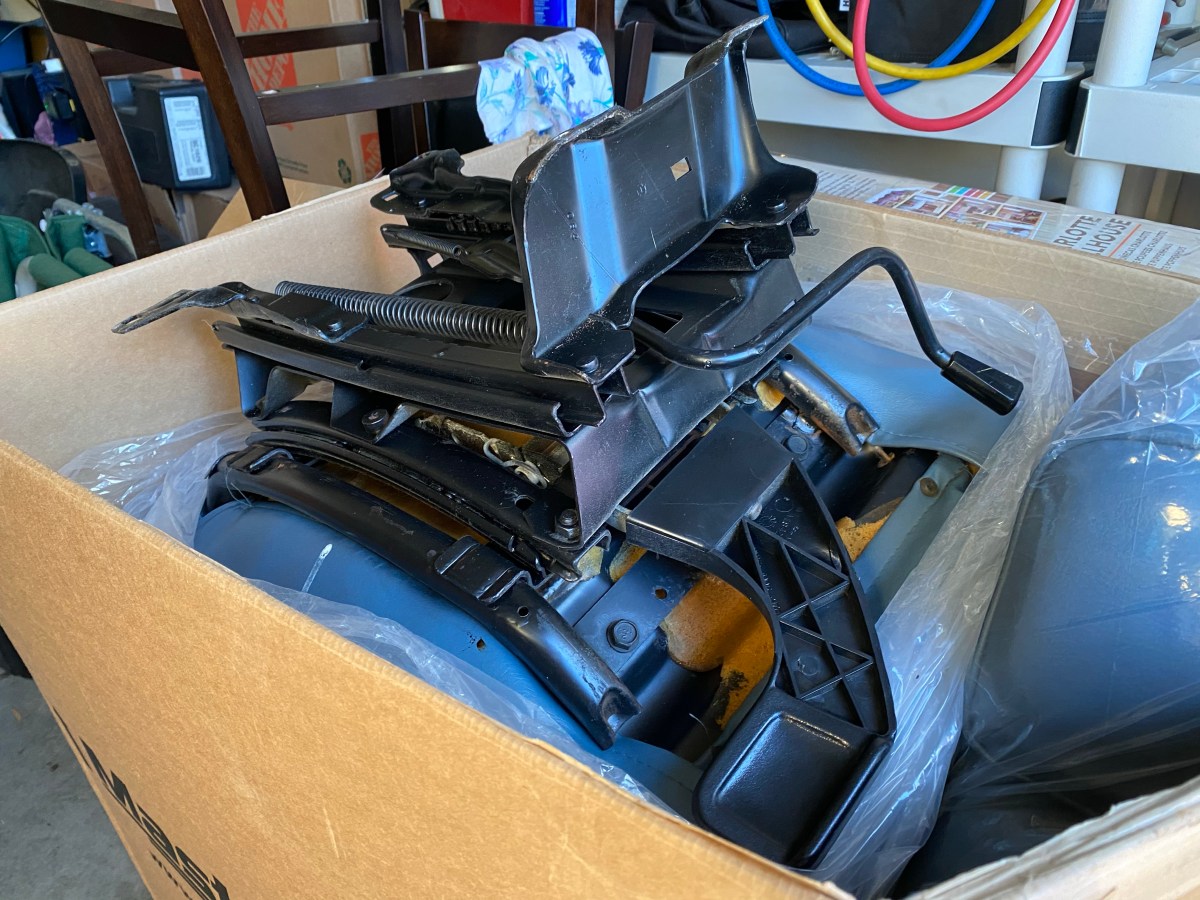
To remove the seats, there were two 13mm nuts on the front bracket and two 13mm bolts on the back brackets. Removing these nuts and bolts allows the seat to lift right out.
The seats that came with my XJ had the option for sliding forward and backward, as well as tilting the seat, which presented a problem. Along with the seats, I also ordered the XJ brackets to go with it. The brackets that Mastercraft sells only work with the slide function brackets. I tried removing the stock seats and the tilt brackets, but the sliders on my model seats have different mounting locations for the adapter-bracket than the slide-only bracket. After taking a trip to the boneyard, I realized a lot of people in California had bought the Loredo and Pioneer models. The slide-only brackets, from what I’ve read, were only available on the sport (Base) model seats.
(With Tilt Functionality)

(Without Tilt Functionality)

After my search at the boneyard resulted in nothing, it was Ebay to the rescue. I was able to track down a set from a 1993 XJ at a decent price. With the sport-brackets, the Mastercraft brackets were an exact fit.
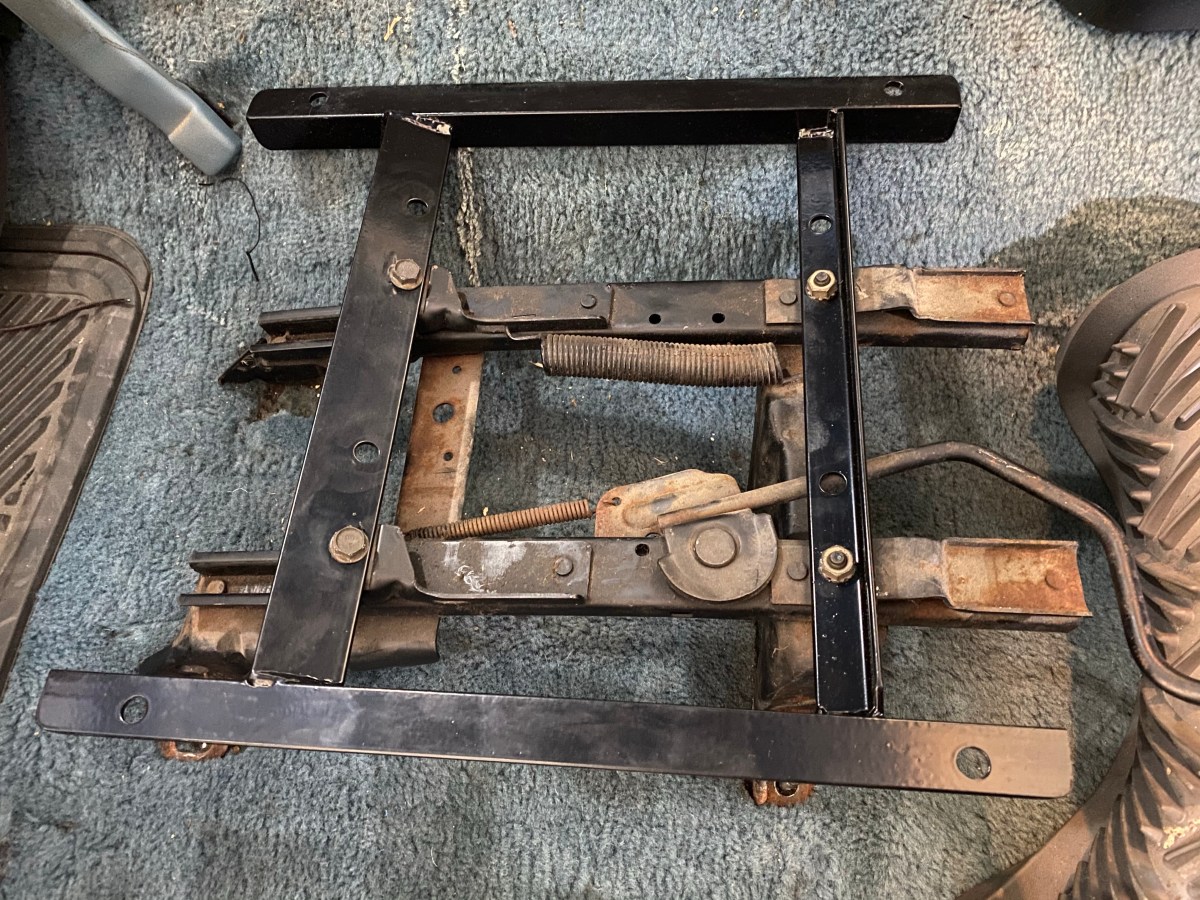
The adapter-brackets have two sets of holes for locating the seats. I chose to use the holes furthest from the transmission tunnel so the seat would sit closer to the center console and so they would have more clearance for the lumbar-support adjustment crank. At this point, I test fit the seat in the Jeep so I could locate the double sheer brackets for my harnesses and figure out a route for the seat heater wiring.
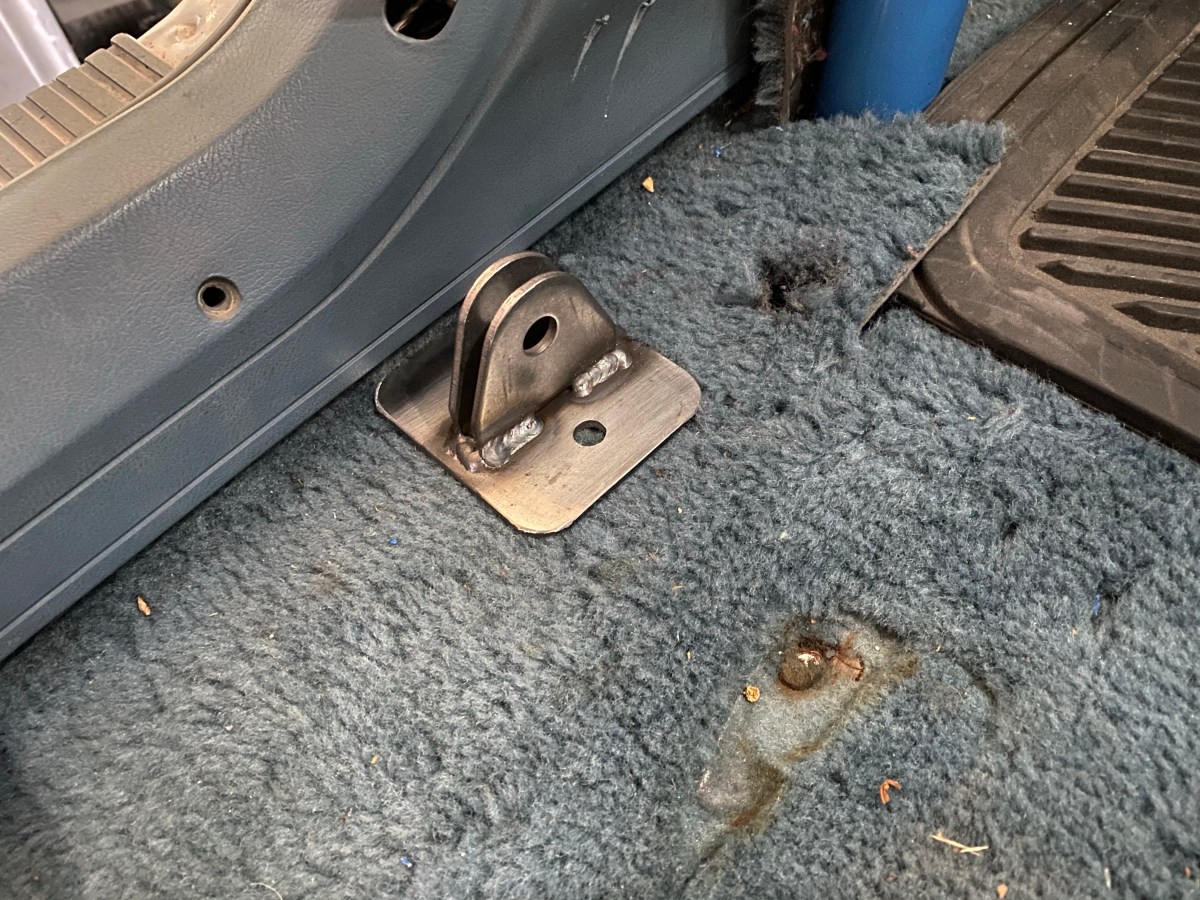
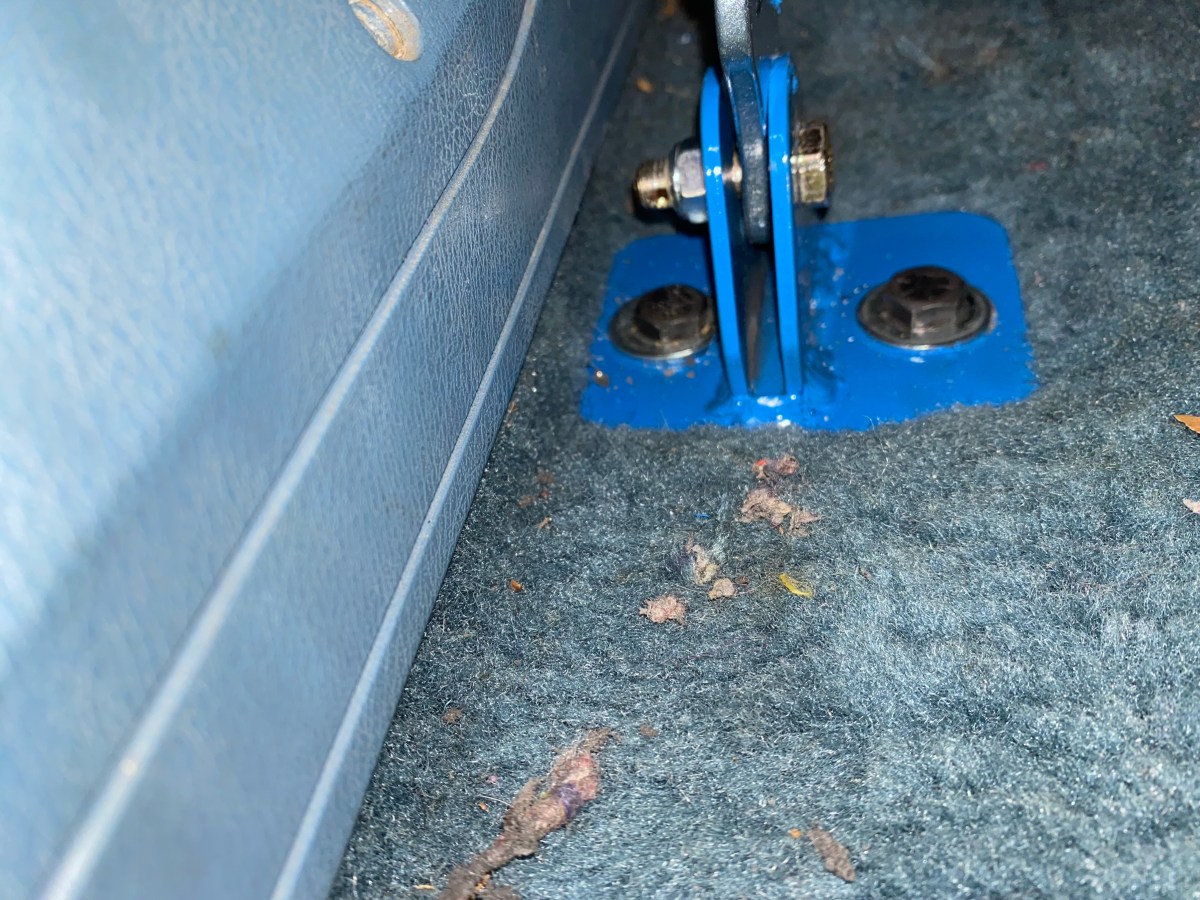
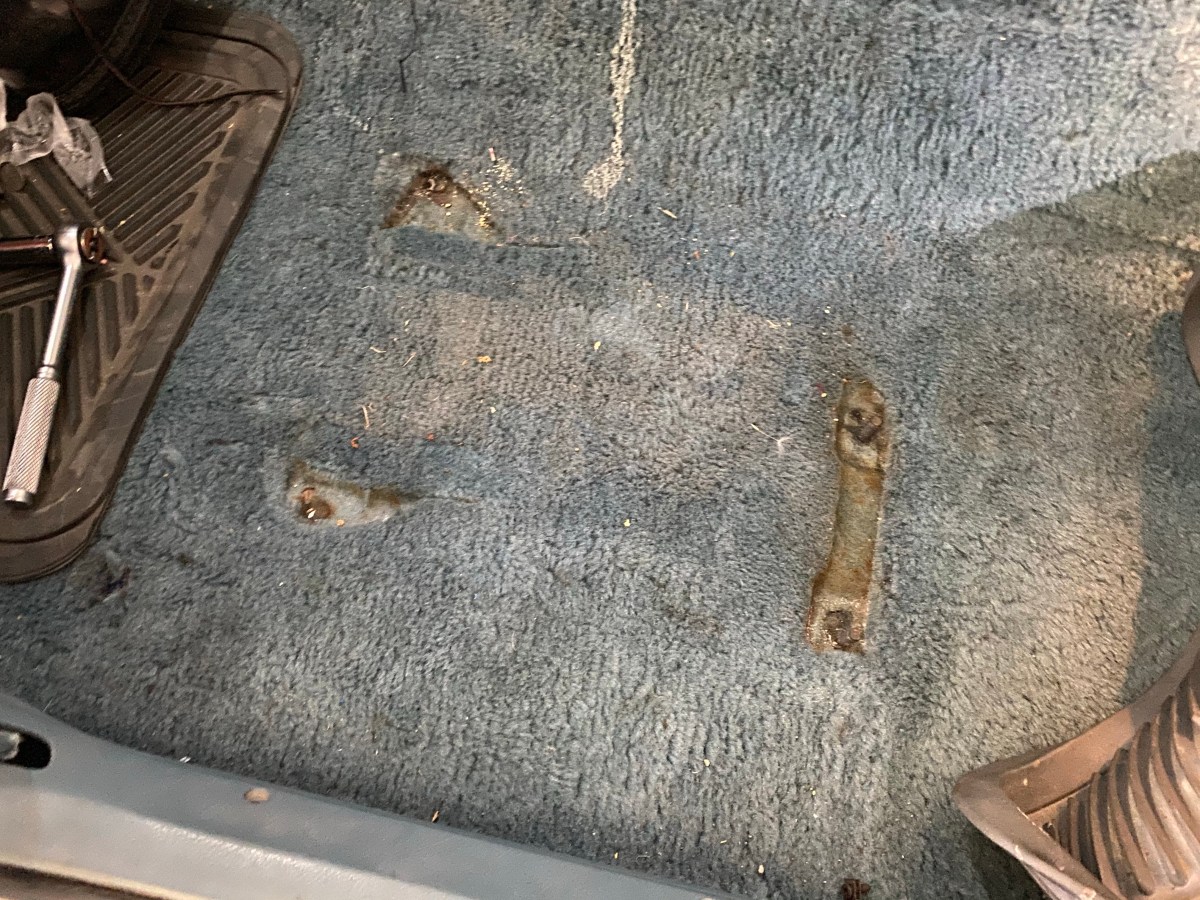
I pulled the seats out again and got to work on getting those items installed before the final install of the seats. I drilled the floor pan and bolted the harness-brackets down. To strengthen the harness-brackets, I sandwiched the body with an addition plate on the bottom side of the floor pan. All hardware is 3/8″ Grade 8 to give maximum sheer strength.

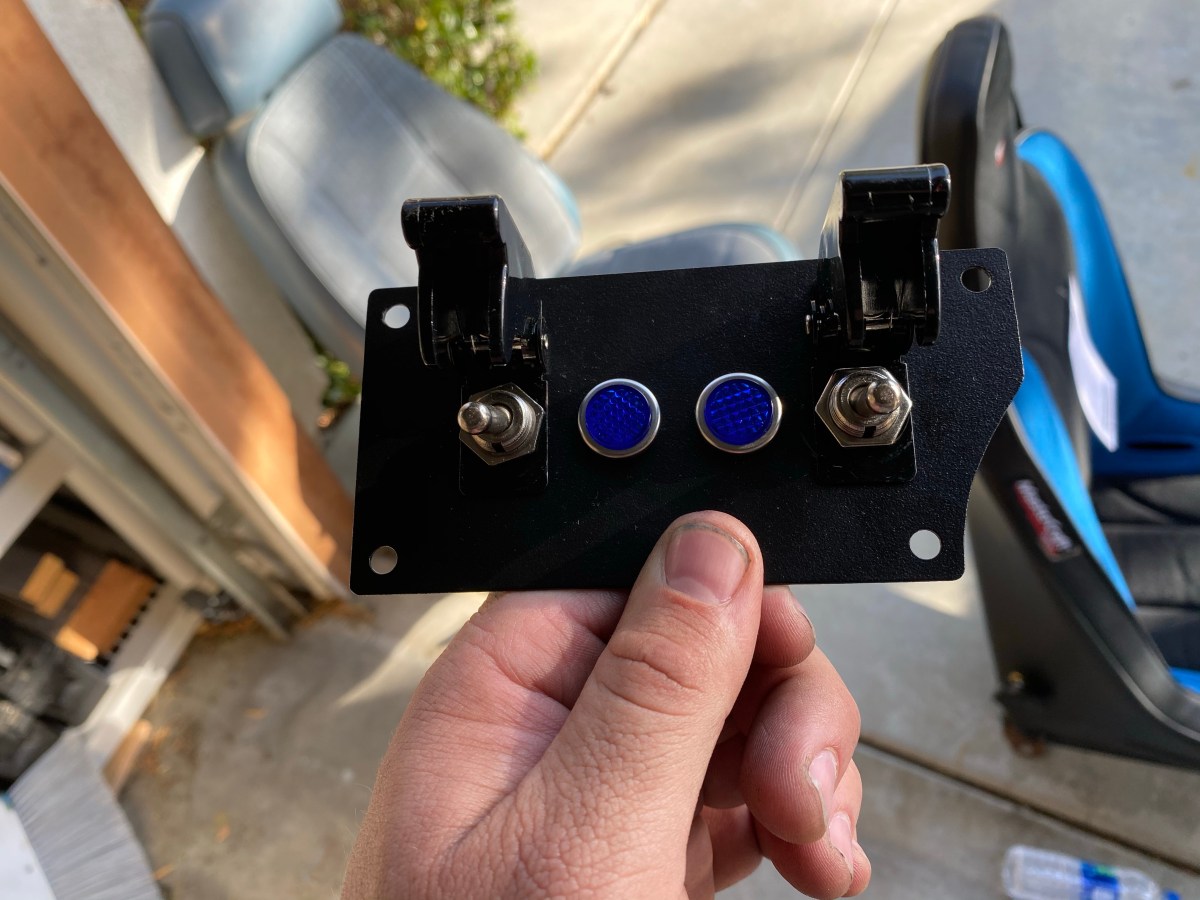
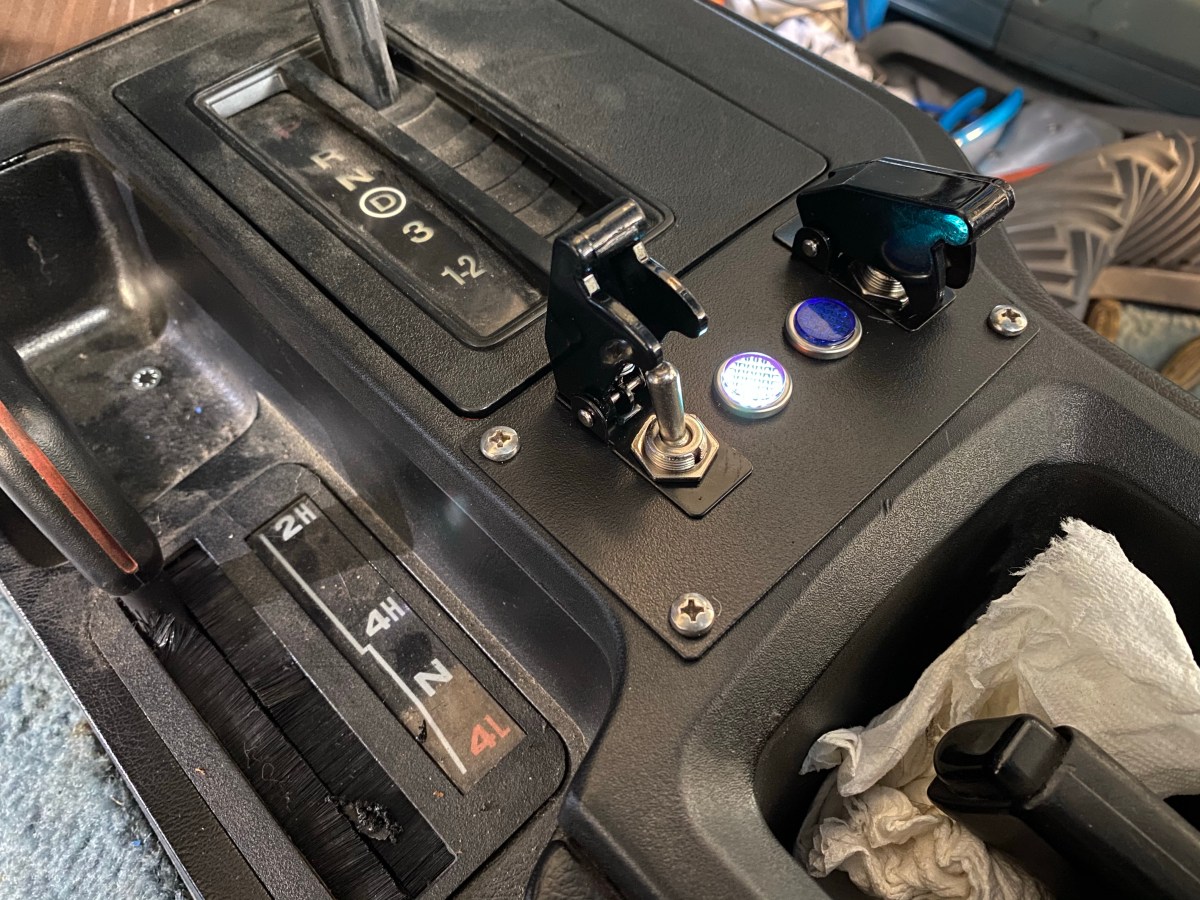
The wiring was ran through the center console to a switch panel I bought years ago that replaces the coin holder. I wired the switches with an indicator-light, which was wired in parallel to let me know if I ever have a blow fuse in either circuit. I used a 12AWG extension cord that I chopped both ends off of to supply power and ground to the heaters from the aux. fuse block I installed earlier. The three wires allowed me to use one wire for all the grounds and one wire for each hot circuit that I can fuse separately at the fuse panel.


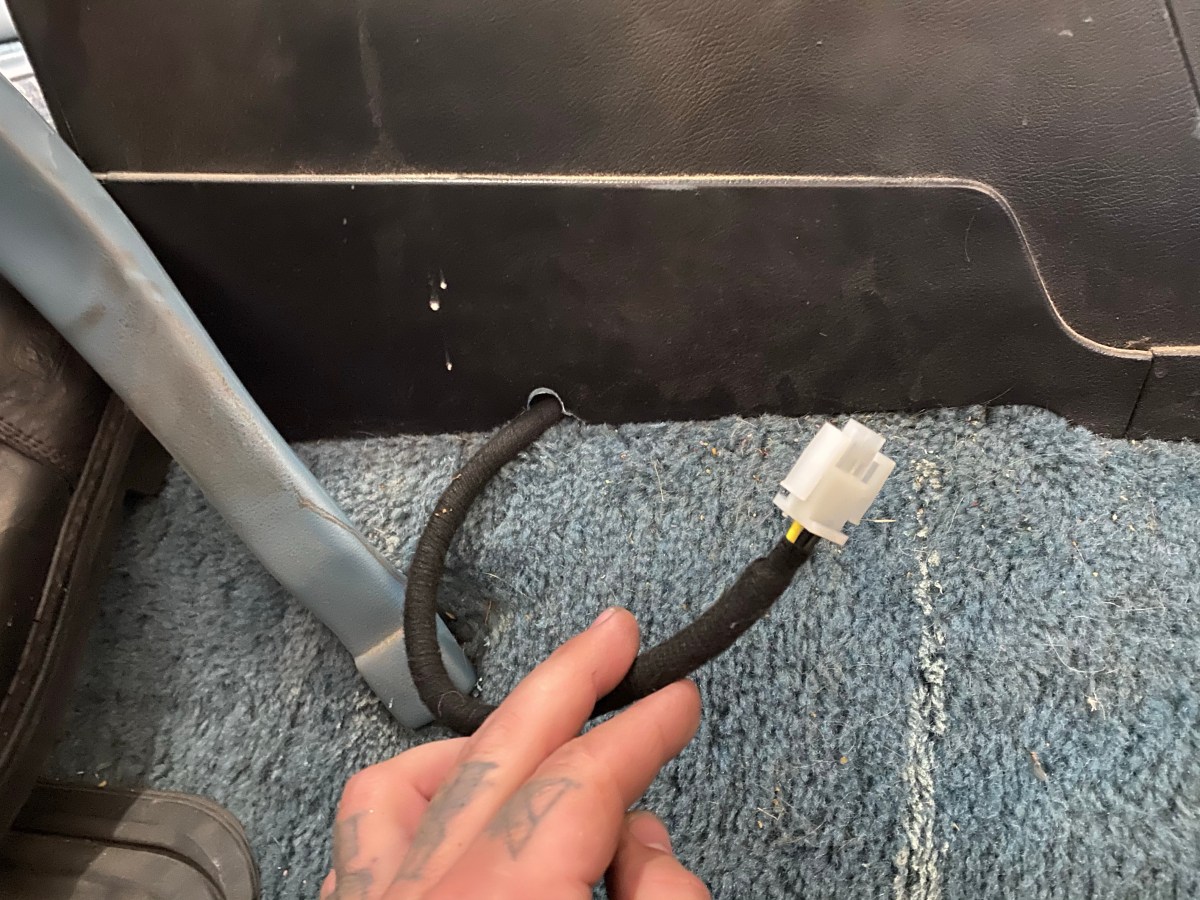
I cut a small notch out of the console on each side and left enough slack on the pigtail for the seat to slide forward without binding. I also encased the wires in split loom and wrapped it with Tesa Tape to give them a bit more protection.
Finally, I was able to install the seats for good. The seats have brackets welded on the bottoms from Mastercraft which bolt the seat to the adapter brackets.

With the seats now bolted to the adapters, I installed them back in their factory location and bolted them back down for good. Once fastened, I plugged in the heaters and made sure they were working properly. The power for the heaters are wired to the switched ignition power, which is on the aux. fuse panel, to ensure my aux. battery doesn’t drain due to forgetting the heaters are on.
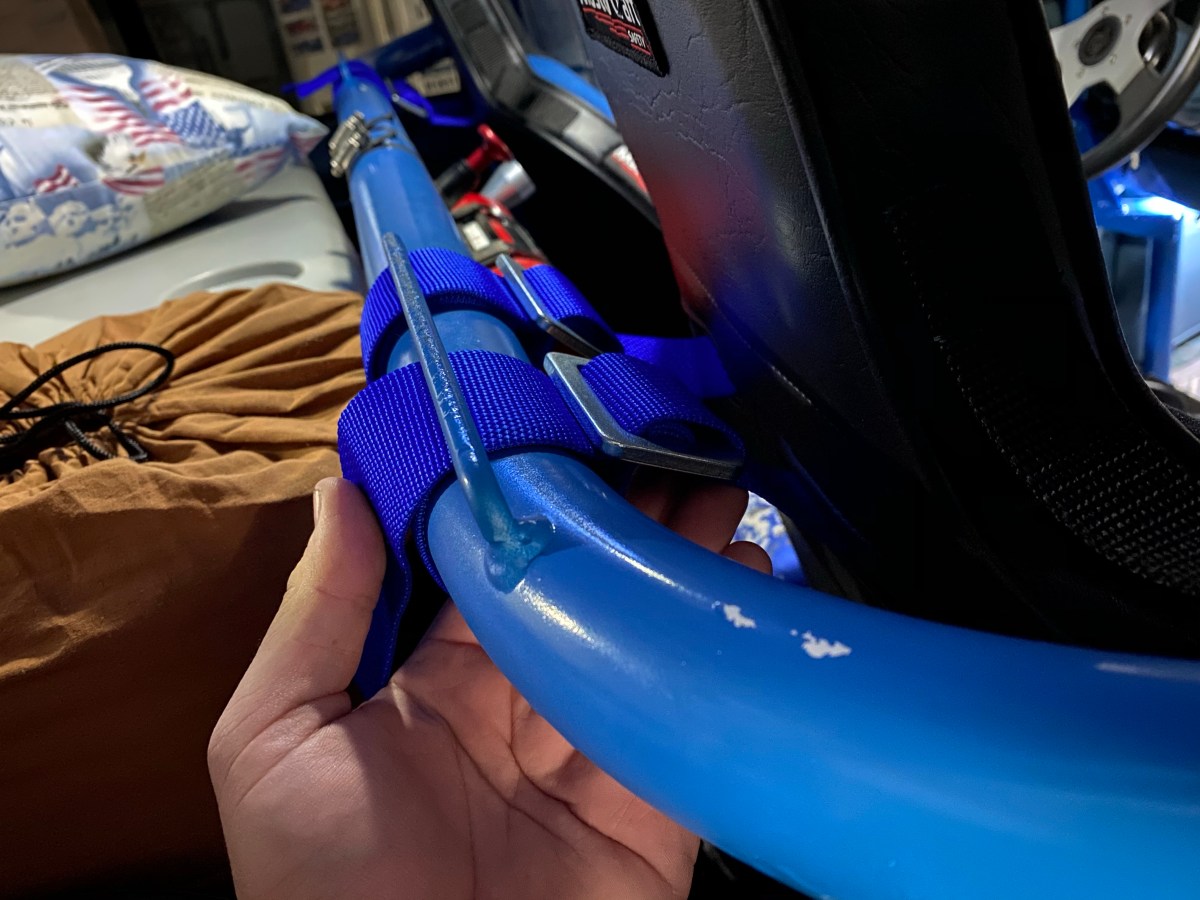
Last item to install was the harnesses. I chose 2″ Crow UTV, 4 Point, Wrap harnesses. In my experience, wrap harnesses are the better option for the shoulder harness because there is no potential for the double sheer bracket to fail in the event of an accident. That’s just my opinion though. I used aviation grade, AN6-11 bolts to attach the lap harness to the double sheer brackets mounted to the floor. The advantage of aviation grade hardware is you can get specific length shoulders on a short bolt. This allows me to bolt the harness through the double sheer bracket and only the shoulder is making contact with the harness mount and not the threads.