
Now that the engine is running great and the temperature gauge isn’t creeping out of the factory operating range, it was time to fix the overheating problem in the cab. Now that the heater kicks butt, I’m ready for the winter. After rebuilding the top end in 108° weather and having two ladies (Wife and Daughter) I want off roading with me, I had to get my Jeep comfortable for the whole family. How so? Crank the Air Conditioning.
On a normal day, my house is never higher than 75°. During the rebuild, I would walk in the house and see my wife and daughter playing in the living room and watching TV in a lovely 70° house and be so jealous. Working outside in the heat is one thing but off-roading in that weather in a mini microwave is not what I like. I never minded converting my compressor to an On Board Air system but I have other plans for an On Board Air system. I love my air conditioning. First step was to take a reference temperature.
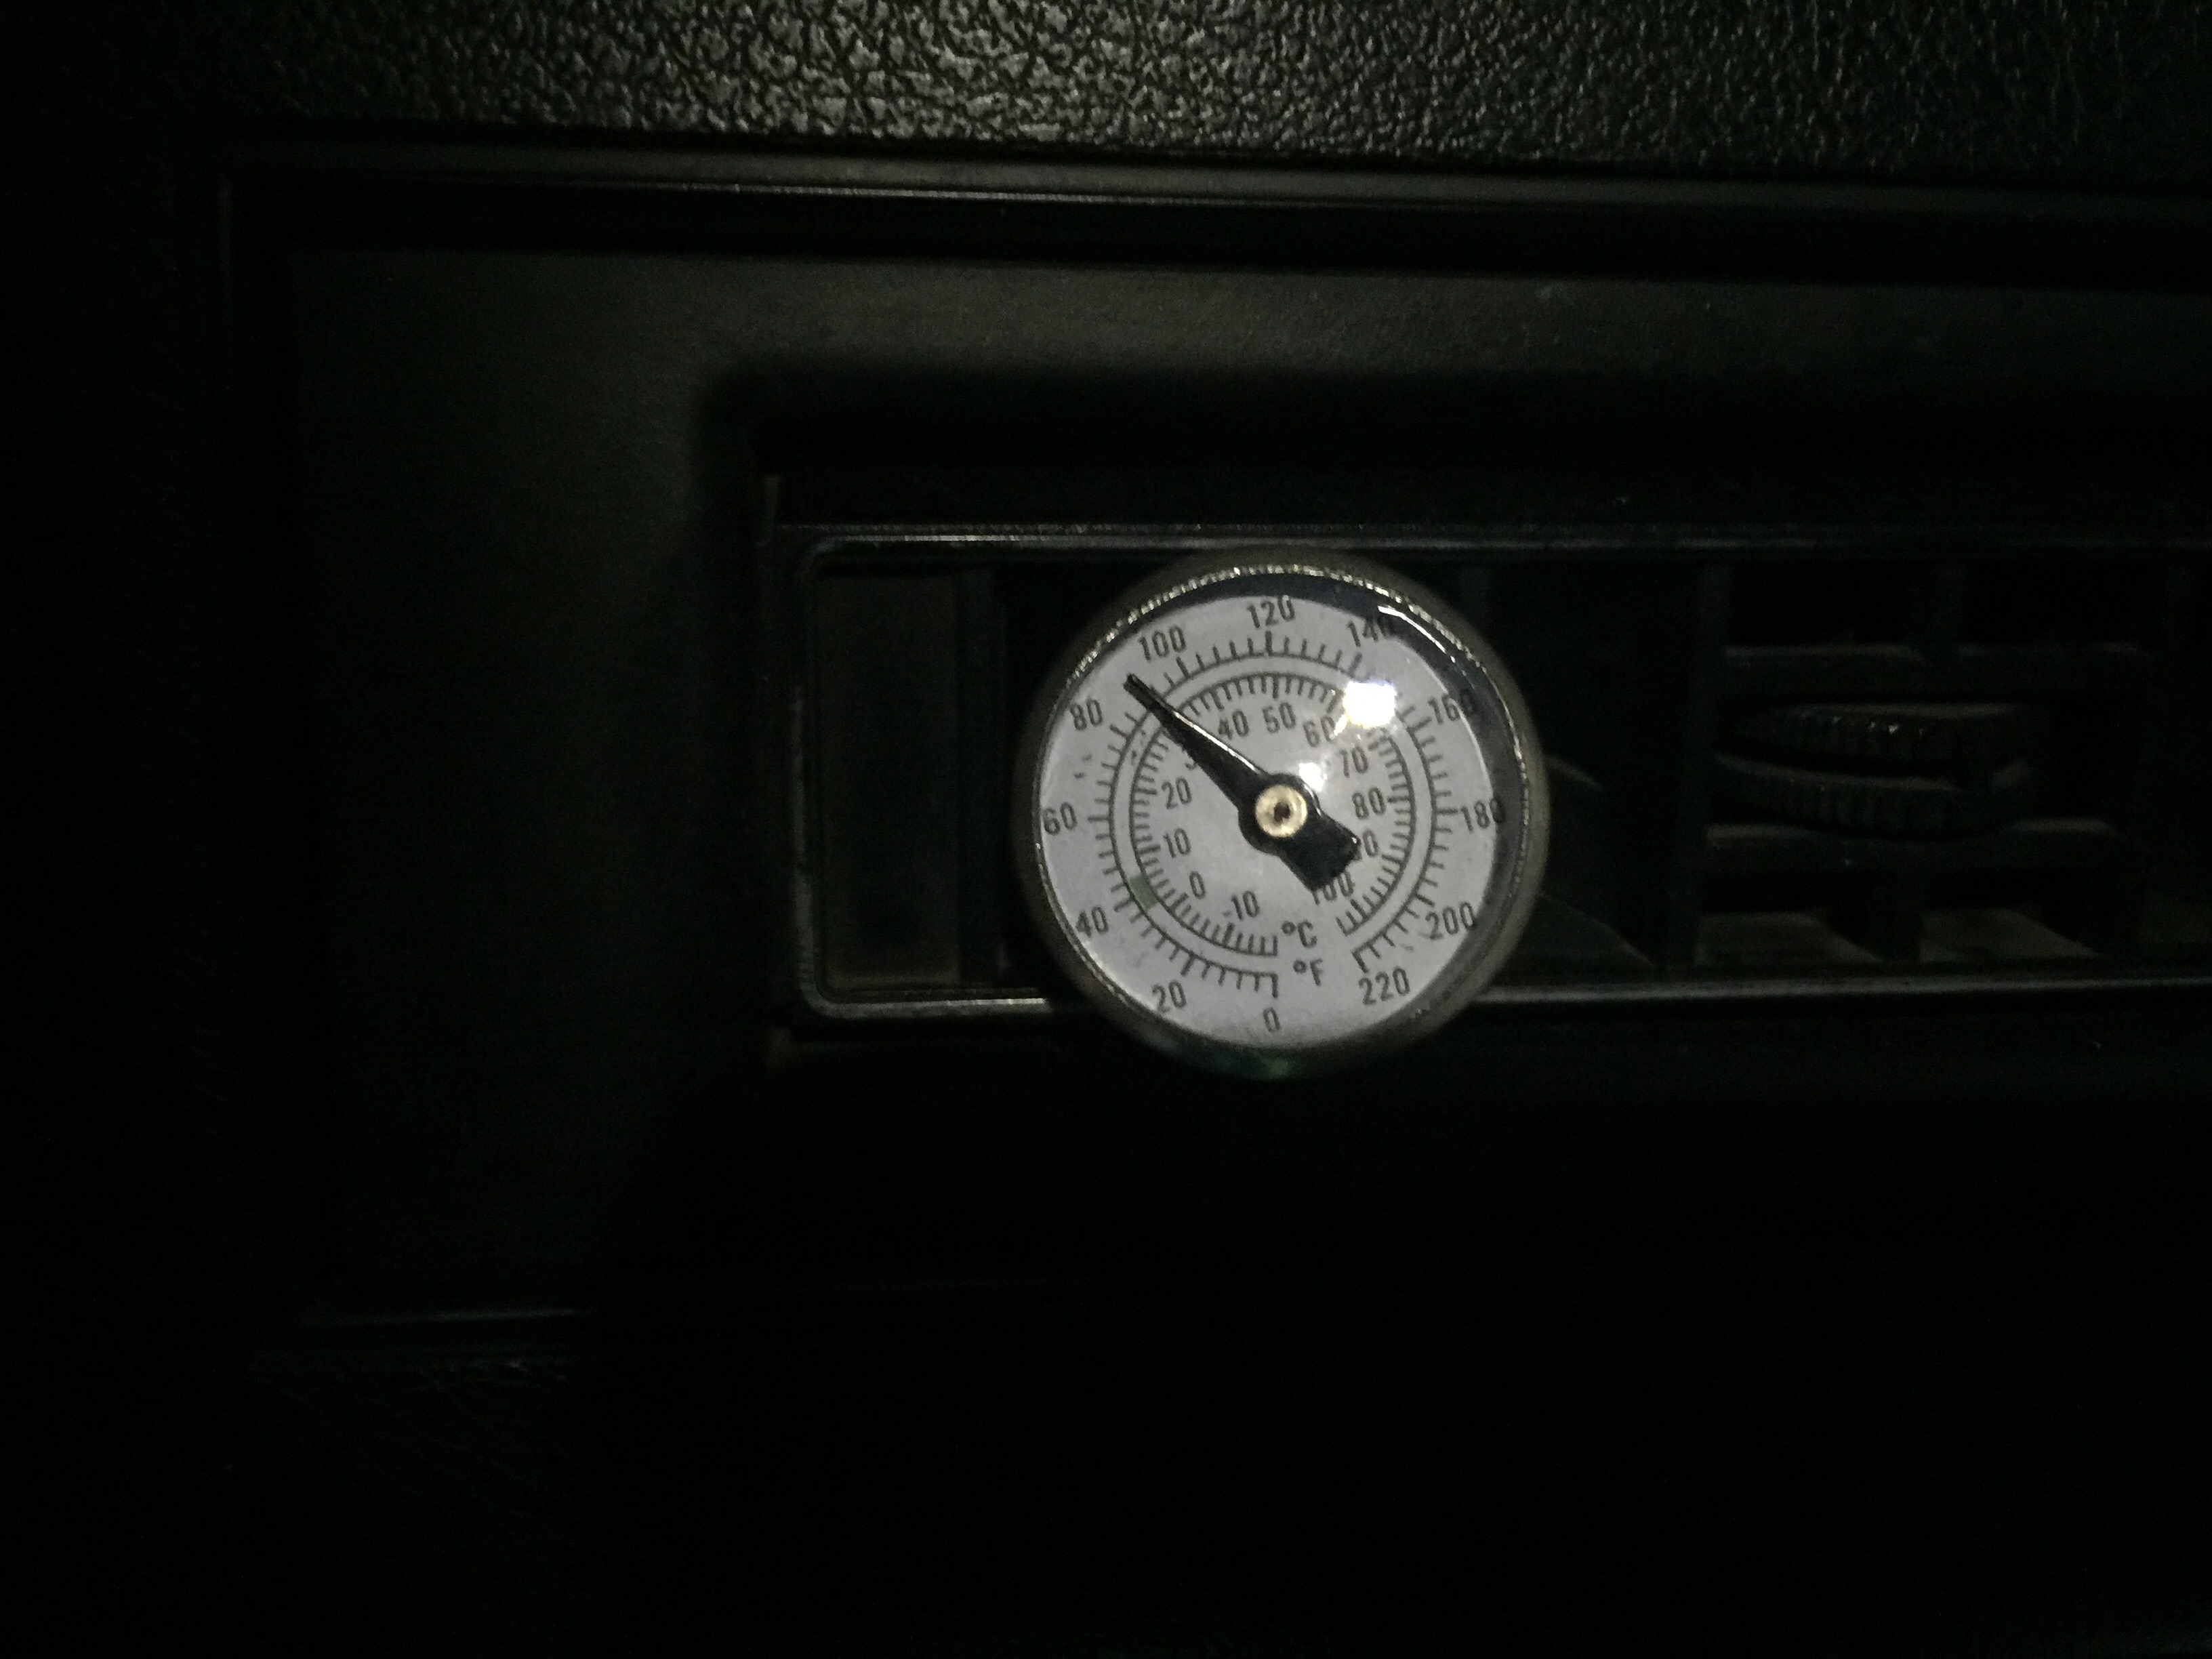
Obviously, 90° is not my idea of comfort on a 108° day. Before I continue, I have to say that I am not an air conditioning technician. I’m just a guy that read quite a bit into it and decided not to pay hundreds of dollars for someone else to fix whatever was wrong with my air conditioning. If you are not confident enough to work on your air conditioning system. Please, take it to a certified technician. If you are up to the challenge, before you start, take your vehicle to a proper R-134A evacuation site and have them discharge your system. Killing the O-Zone by discharging your system yourself into the open environment to not just uncool, its illegal. So with the disclaimers out of the way, it was time to get the air working properly. First, lets talk about the components in the air conditioning system in my Cherokee.
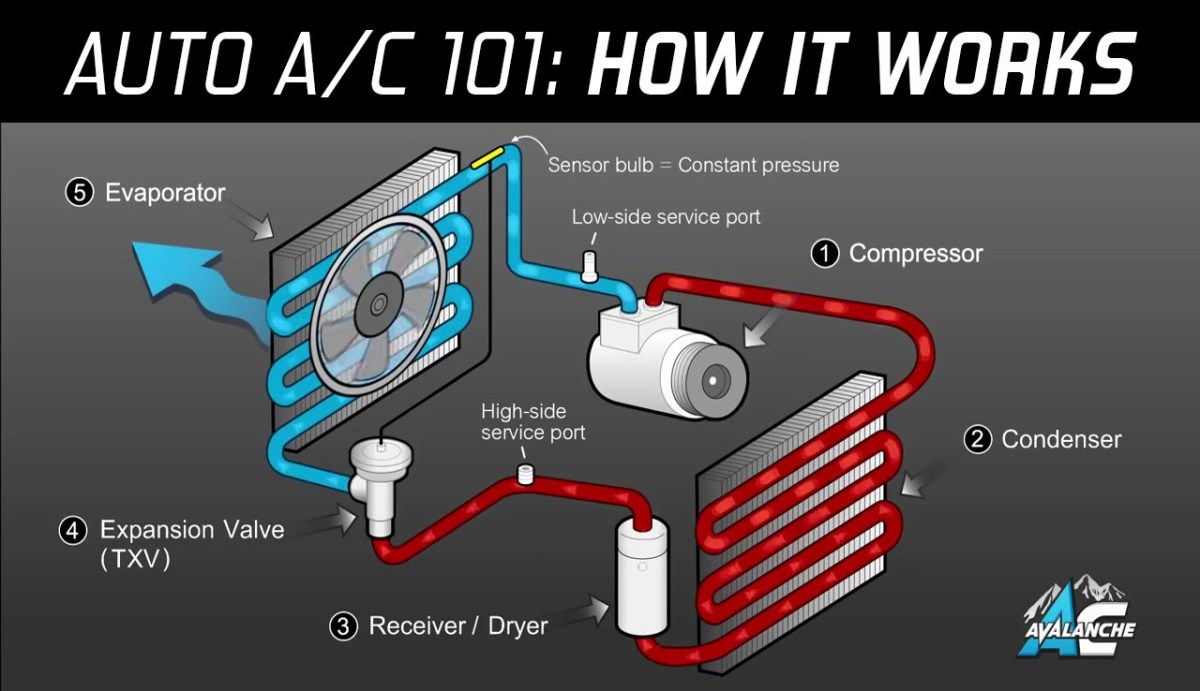
So the basics of an air condition system, as I understand it, breaks down into 5 basic components. The Compressor, Condenser, Receiver/Dryer, Expansion or Metering Valve, and the Evaporator. The compressor compresses the refrigerant into a high pressure gas. As the now high pressure gas refrigerant leaves the compressor, it passes through the condenser in the front of the vehicle to be cooled. Once it passes through the condenser, the hot, compressed gas is now a high pressure liquid. Leaving the condenser it travels to the Receiver/Dryer. The Receiver/Dryer removes moisture and other impurities from the system. Moisture in an AC system will combine with the refrigerant and form Hydrocloric Acid which is extremely corrosive to metal components. Once filtered through the Receiver/Dryer, it travels to the Expansion Valve or Metering Valve. The Expansion valve work basically like a throttle does to your engine. It opens and closes a port internally to various sizes depending on refrigerant demand. Without the Expansion Valve the Evaporator would probably turn into a huge block of ice. Past the Expansion Valve is the low pressure side. The cold, low pressure, liquid refrigerant passes through the evaporator which your blower motor blows air through and you get cold air conditioning. From the evaporator, the liquid refrigerant travels back to the compressor and the cycle repeats over and over.
Wow, that was a lot of information. So now that we know the basic components and have a basic understanding of how my air conditioning system works, lets dive into my repairs. Repairing my air conditioning system required basic hand tools and equipment.
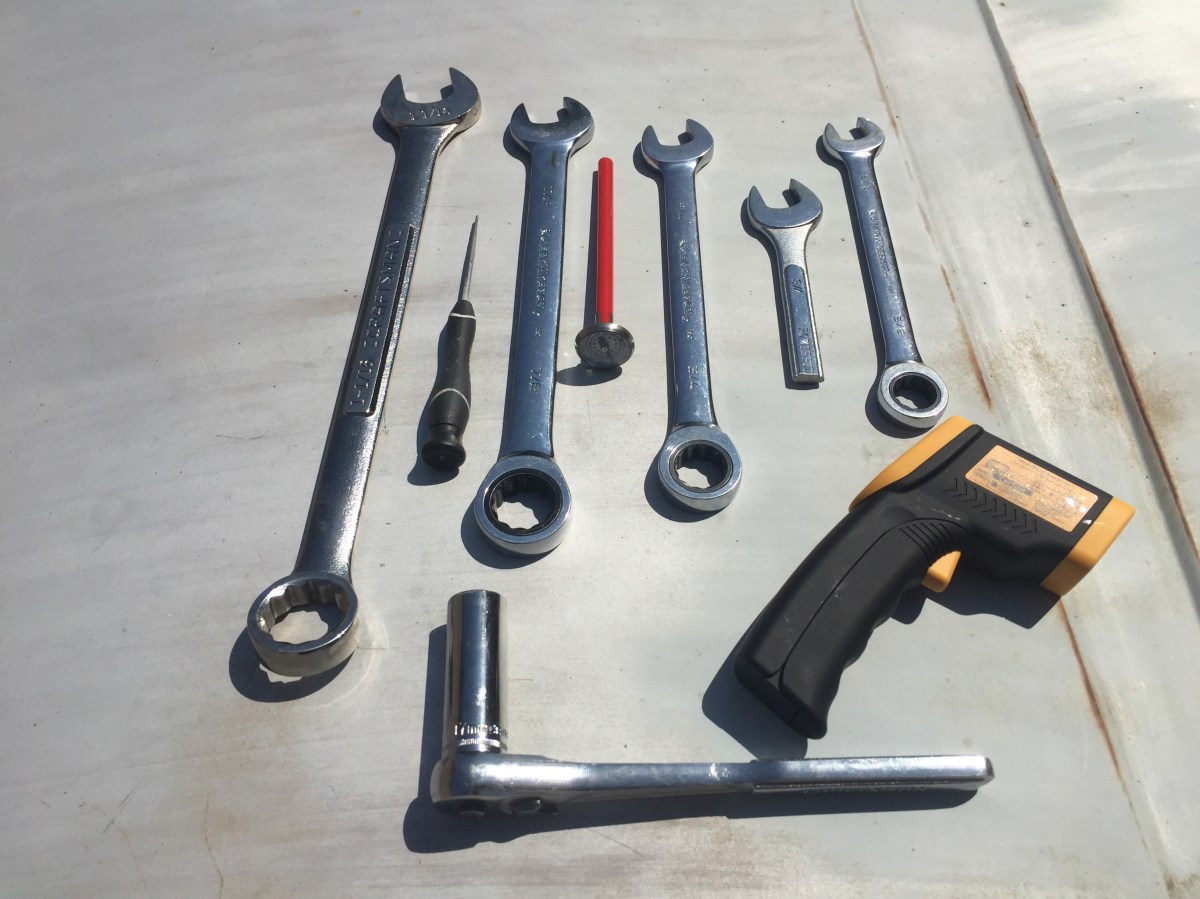
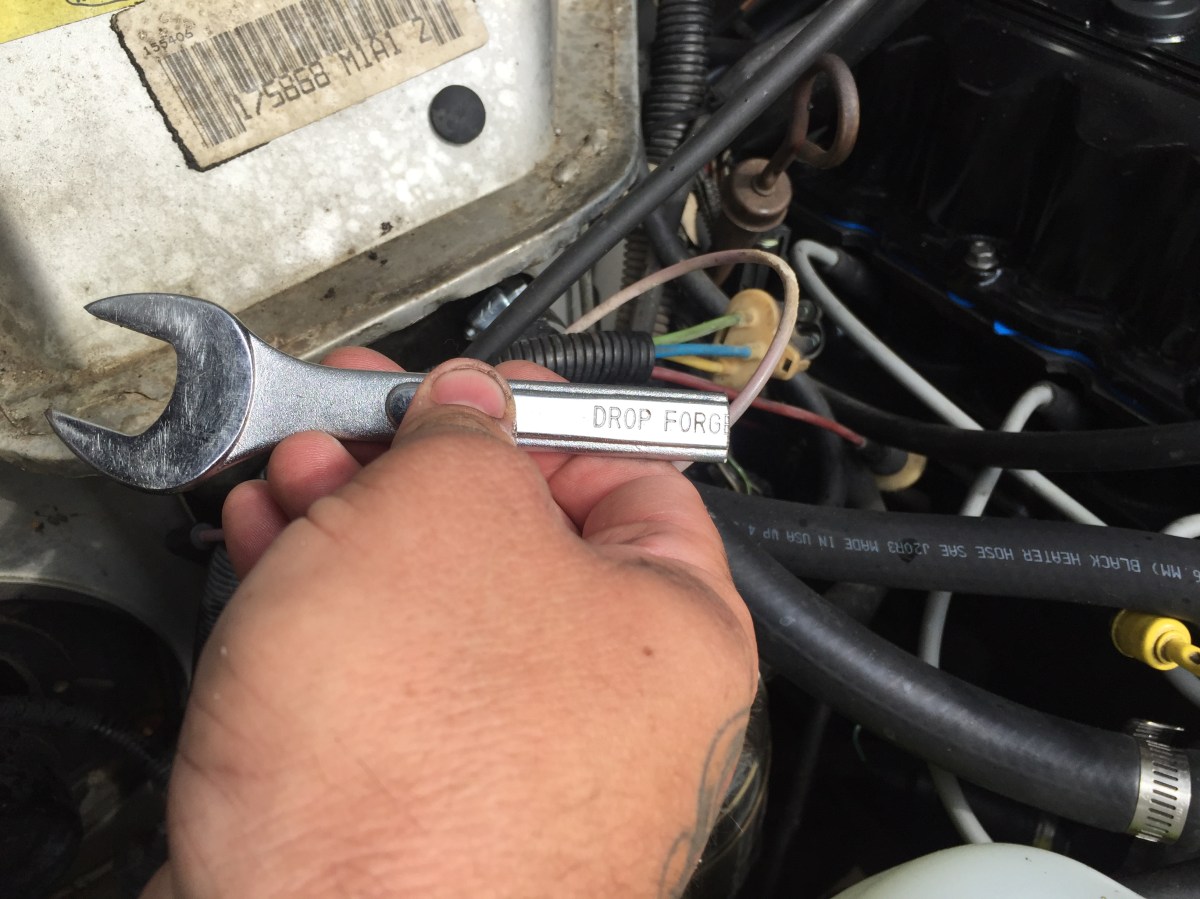
The tools I needed were 1: 1-1/16″ wrench, 1: 7/8″ wrench, 2: 3/4″ wrenches, one that’s been cut down. We’ll get into that modified wrench later. 1: 5/8″ wrench, a pick for O-Rings, a thermometer or infrared temperature gun, and a 3/8″ drive ratchet with a 17mm and 19mm socket. If you don’t have an 1 1/16″ wrench, you can substitute it with a adjustable wrench.
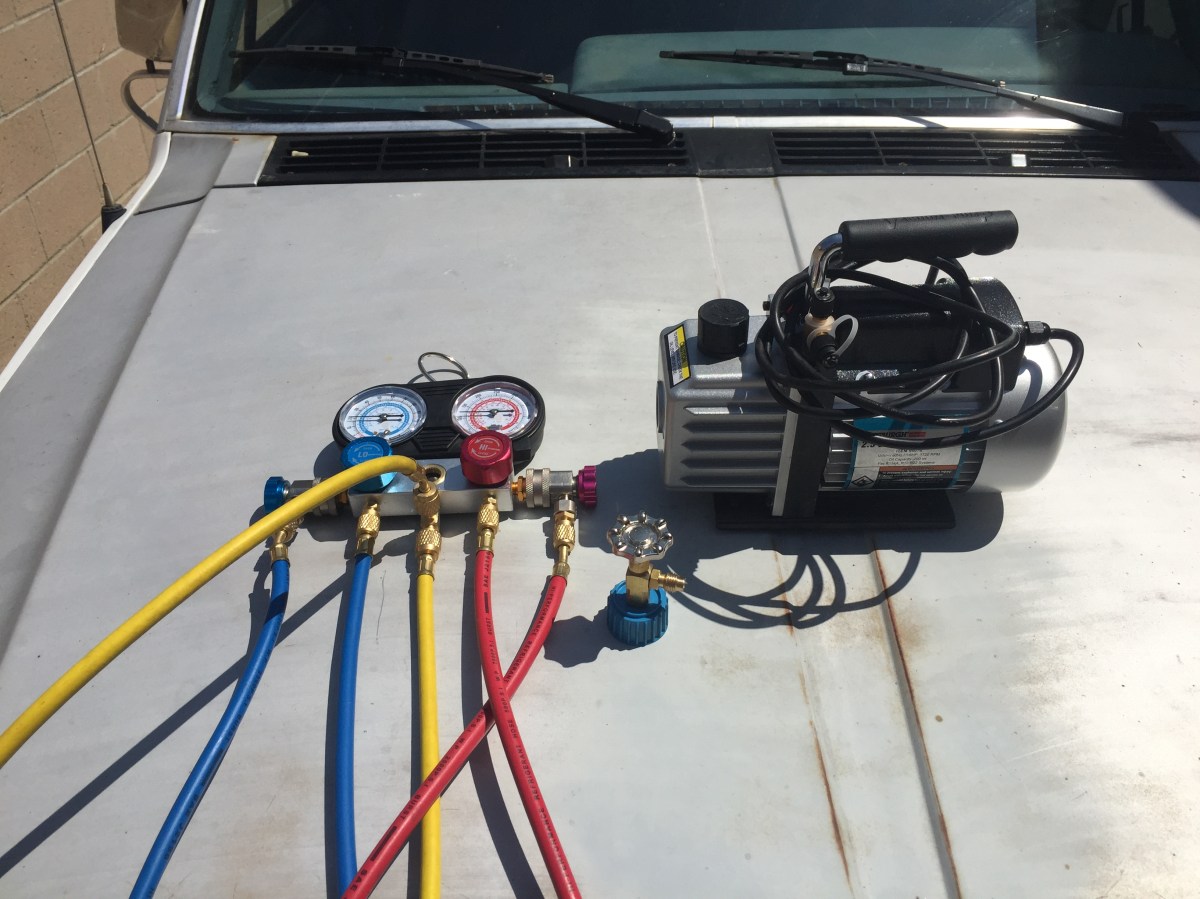
If you are going to recharge the system yourself, you will need a set of manifold gauges, a vacuum pump and a refrigerant can tap. If you live in California, you will also need the self sealing can adapter (the little blue adapter on the tap).
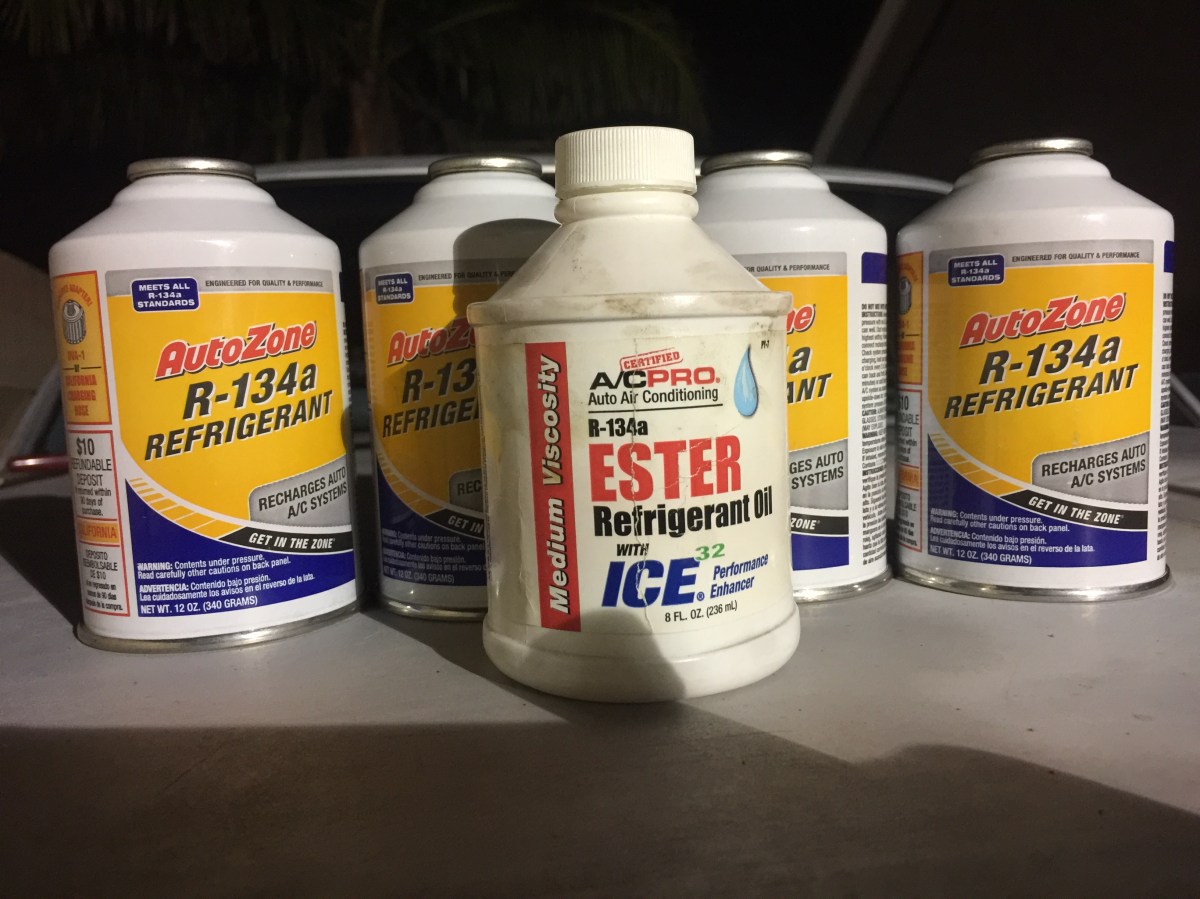
With all the above tools, you can repair and recharge your air conditioning system yourself. On my system, the previous owner had already done the R-134A conversion on the compressor. That saved me some time and money. Although they did the conversion, I wanted to make sure the shop that did it had replaced the R-12 oil with a compatible R-134A conversion oil. The oil I read to use on the conversion was Ester oil 100. Now here is the other side of this conversion. The factory service manual calls for 38 ounces of R-12 refrigerant. One guide I followed was Sanden’s R-12 to R134A Retrofit Guide. The Sanden guide says to use 5% less refrigerant when doing the conversion (38oz (R-12) X 0.95 = 36.1oz (R134A). I bought 4 – 12oz cans in case one of the cans wouldn’t purge.
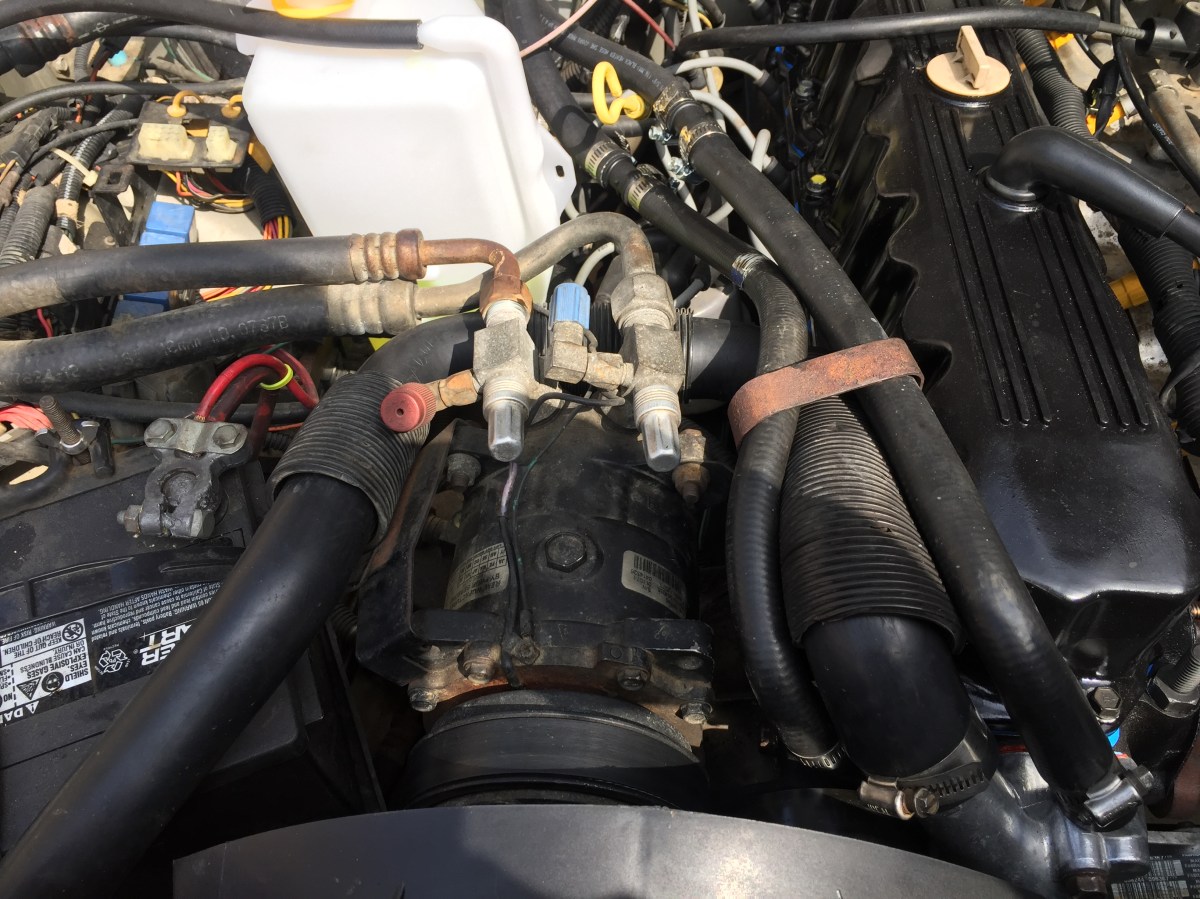
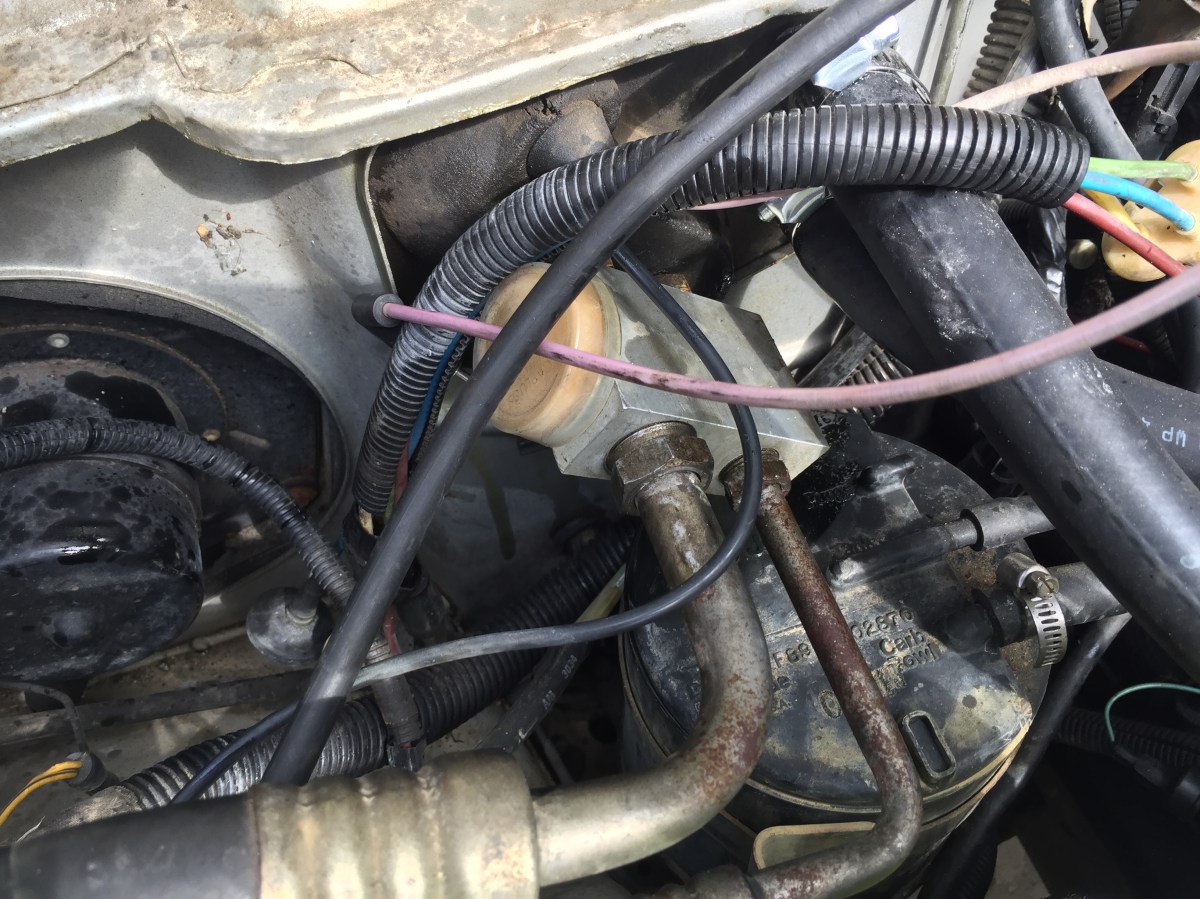
My AC system was already empty before I started. The first component I addressed was the compressor. I removed the high and low pressure hoses with a 1 1/16″ wrench on the low pressure side and 7/8″ wrench on the high pressure side. I removed the belt and compressor from the Jeep, and put the compressor on a drain pan. Unbolted the fill plug on the top of the compressor with a 17mm socket and ratchet, turned the compressor upside down and spun the compressor with a 19mm socket until all the oil I could get was out. Once I was convinced that I had got all the oil out, I added 6oz of the 8oz of Ester oil to the fill port in the compressor. I put the fill bolt back in and bolted it back in the Jeep.
Now before I put the high and low pressure hoses back on the compressor, I replaced the O-Rings on the fittings. I bought an AC O-Ring kit that had various sizes of O-Rings to replace and refresh all my old worn out ones. This part is very important because we don’t want to have leaks in our newly recharged AC system. Tighten the hose fittings down but don’t kill them. The fittings are aluminum and you will strip the threads if you over tighten.
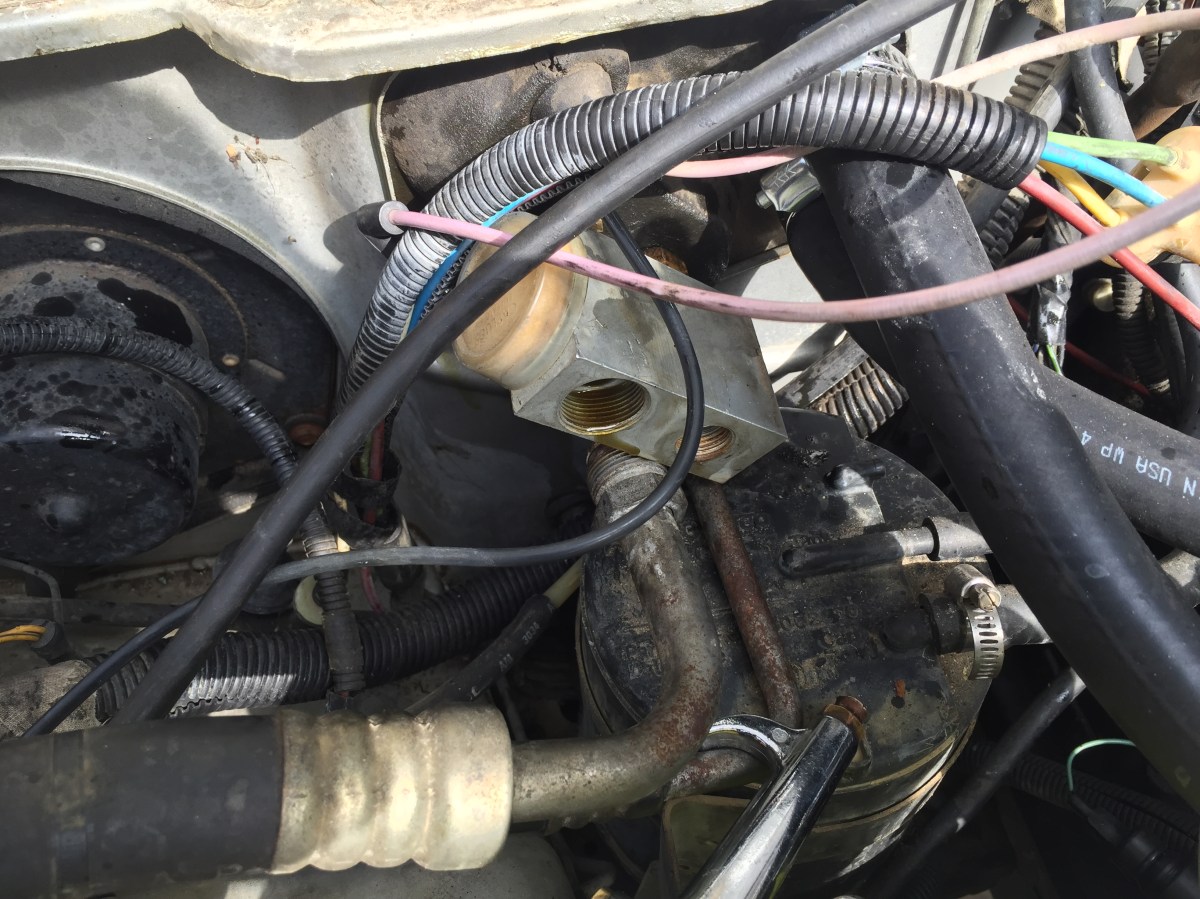
Moving down the low pressure side, we get to the expansion valve. Now this is where that modified 3/4″ wrench comes into play. First, I removed the high pressure and low pressure hoses on the engine side with a 7/8″ wrench on the low pressure side and a 5/8″ wrench on the high pressure side. I used the 1 1/16″ wrench on the expansion valve to brace the valve while I torqued them off.
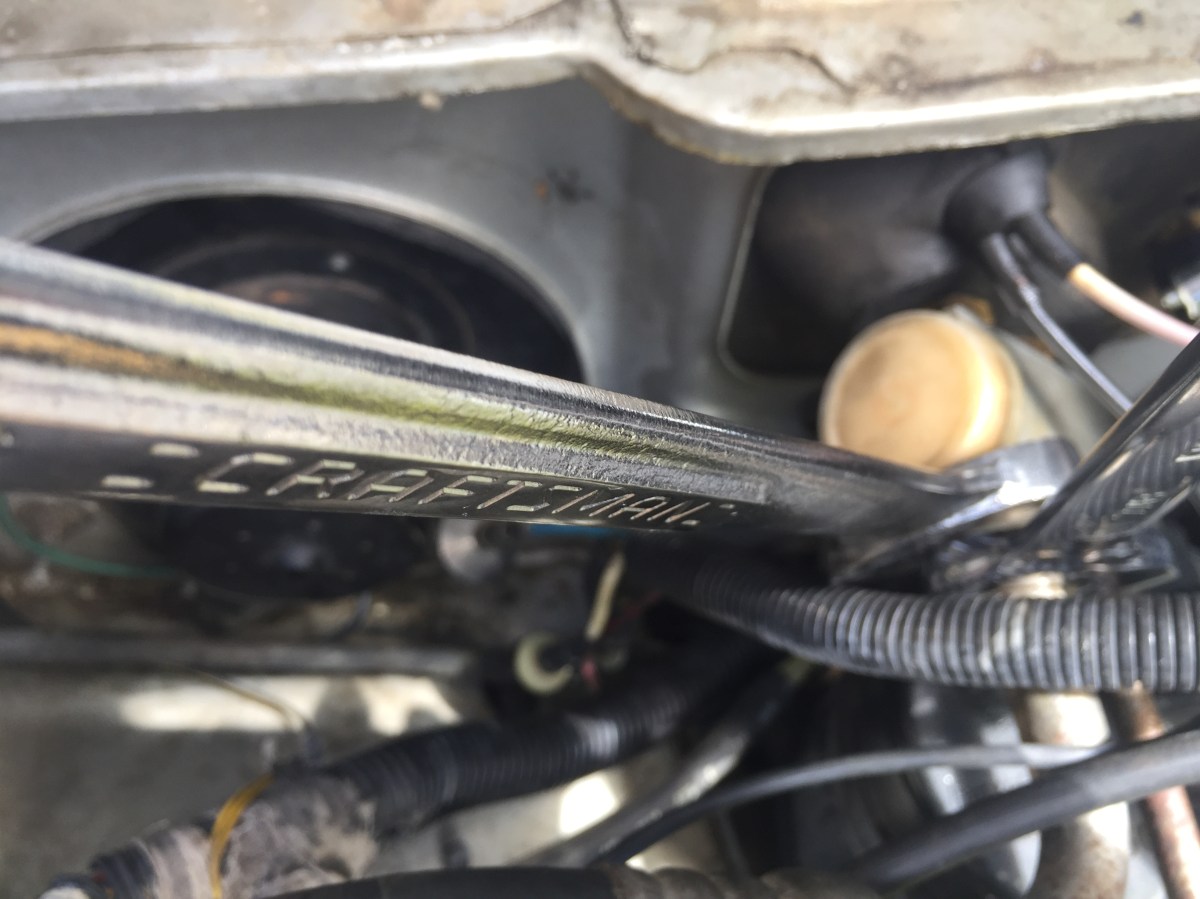
I didn’t want to bend or break anything on the evaporator. Once the engine side hoses are off, its time to break out that special 3/4″ wrench and break loose the evaporator side fittings from the expansion valve.
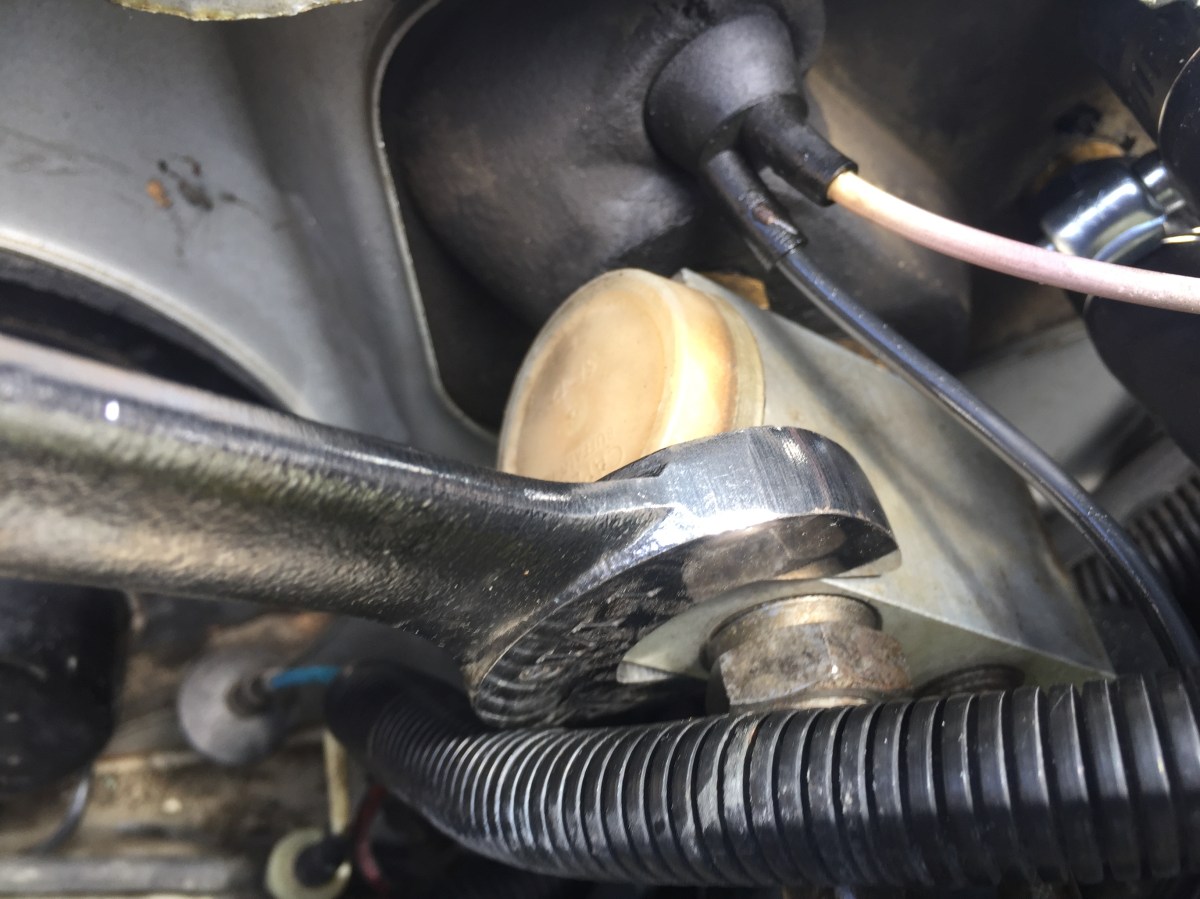
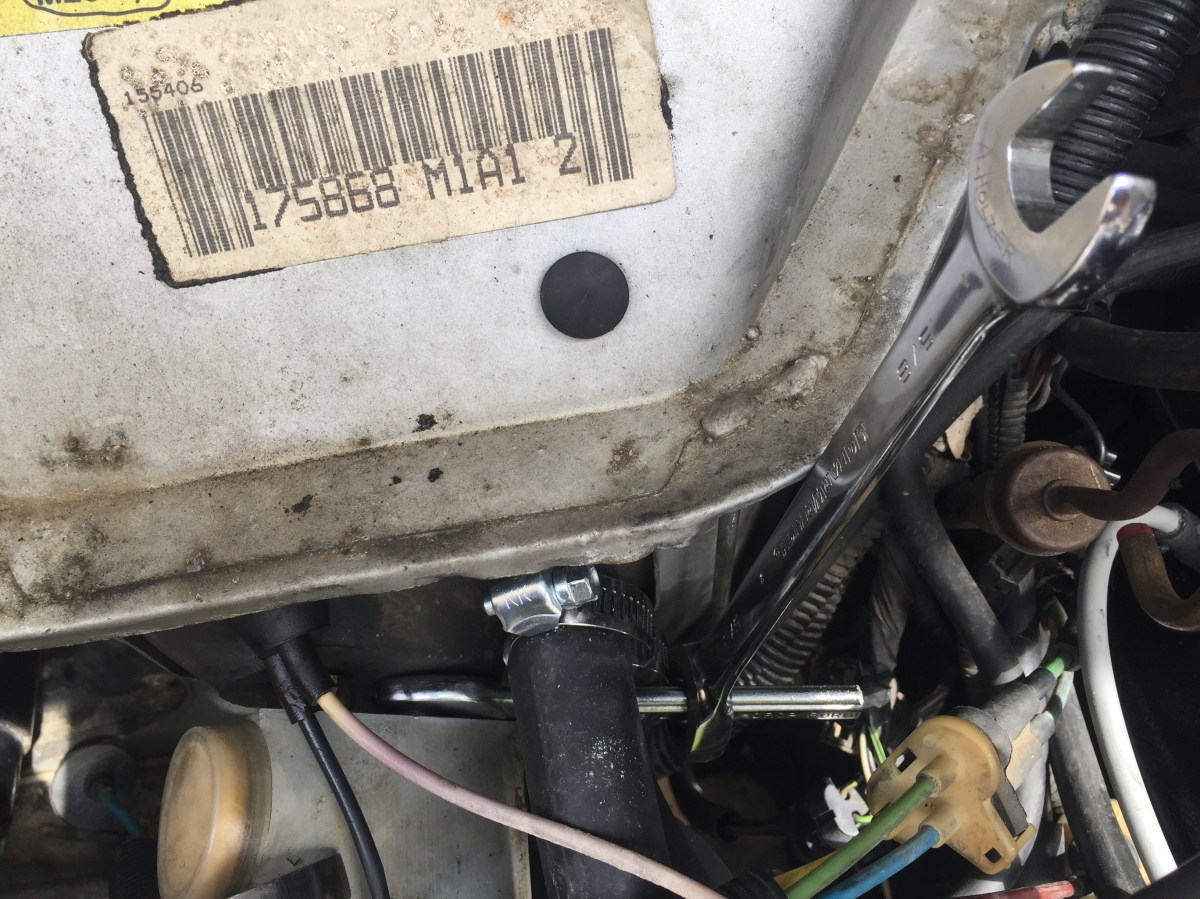
Using the 1 1/16″ wrench again to brace the expansion valve, I used a standard 3/4″ wrench to break the upper, evaporator side fitting. The lower, evaporator fitting requires you to get in a tight spot of the engine. I went under the heater hoses and used a back up wrench with my modified 3/4″ wrench to assist in breaking the lower fitting loose.
Once I got all the fittings off, I was able to remove the expansion valve. While I had the Expansion valve out, I took my air compressor and blew out as much oil from the evaporator as possible. Keep some rags near by because the oil will blow everywhere. I cleaned the treads of the expansion valve and used my pick to remove the old O-Rings that were stuck inside the valve. I was going to replace the expansion valve but chose not to. You can replace it if you’d like. I just replaced the O-Rings that go into the expansion valve and re-torqued them back together in the reverse order I removed them. Again, it’s aluminum. Don’t strip them when reinstalling.
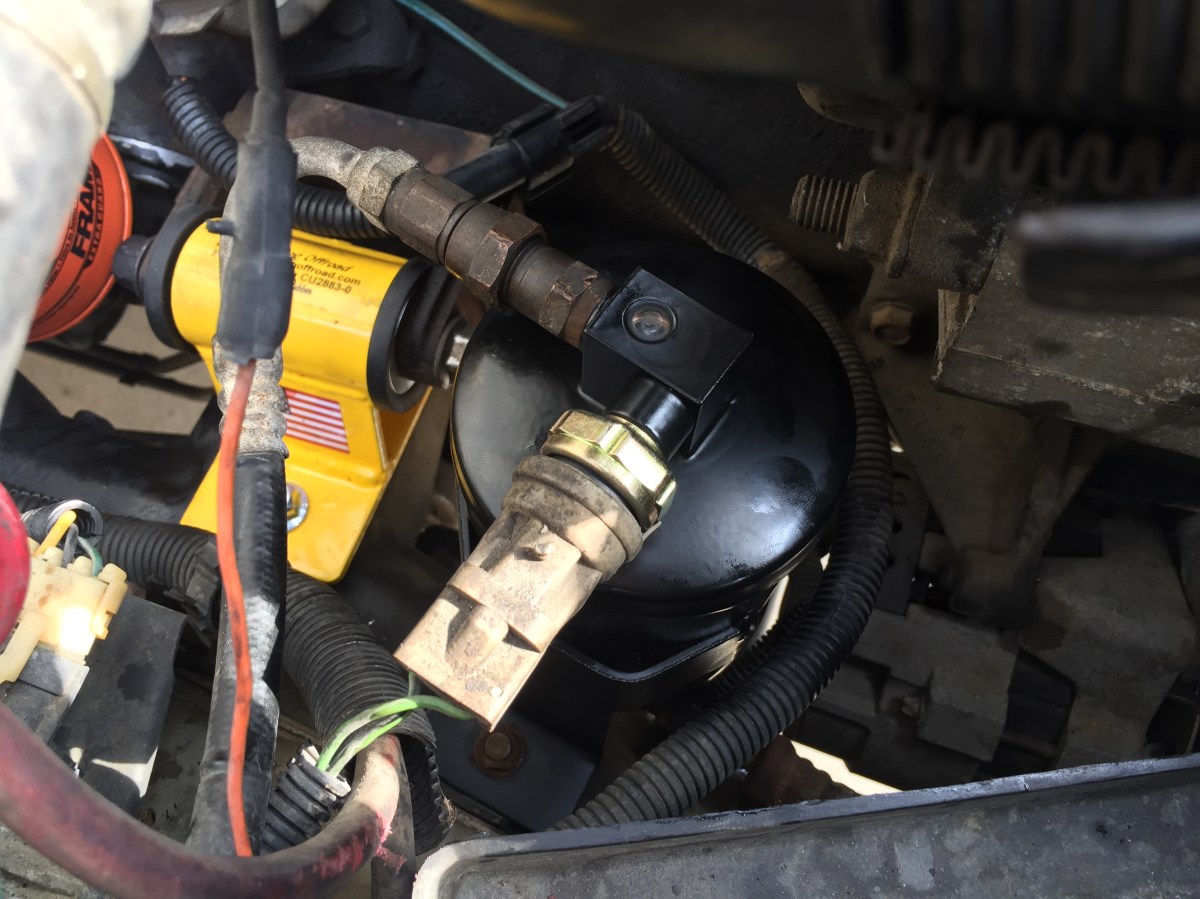
The next component to work on was the Receiver/Dryer. Now from everything I read, if you’re going to open the system, it’s highly recommend that you replace the Receiver/Dryer. The Receiver/Dryer has an internal filter to remove particles in the system and a material called desiccant to absorb moisture before it enters the expansion valve. Over years of use, the desiccant will breakdown and fail to absorb the moisture in the system. If the Receiver/Dryer fails to do its job, the system will form Hydrocloric Acid and begin to destroy the air conditioning system. The new Receiver/Dry is pressurized to keep contaminates and moisture out, so don’t remove the seals on the fittings until you are ready to install it. I got my new O-Rings ready and install the new Receiver/Dryer. I torqued them down and was ready to move on to the condenser.
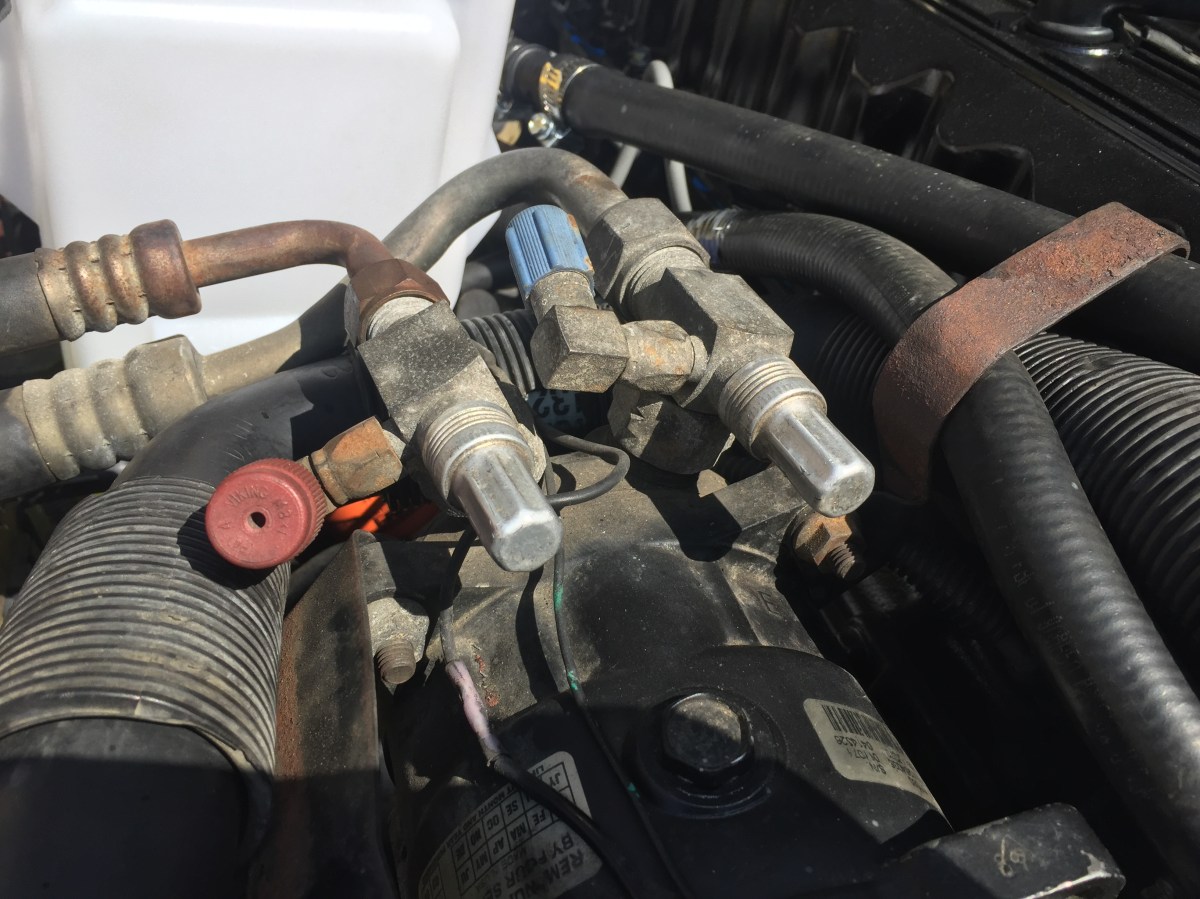
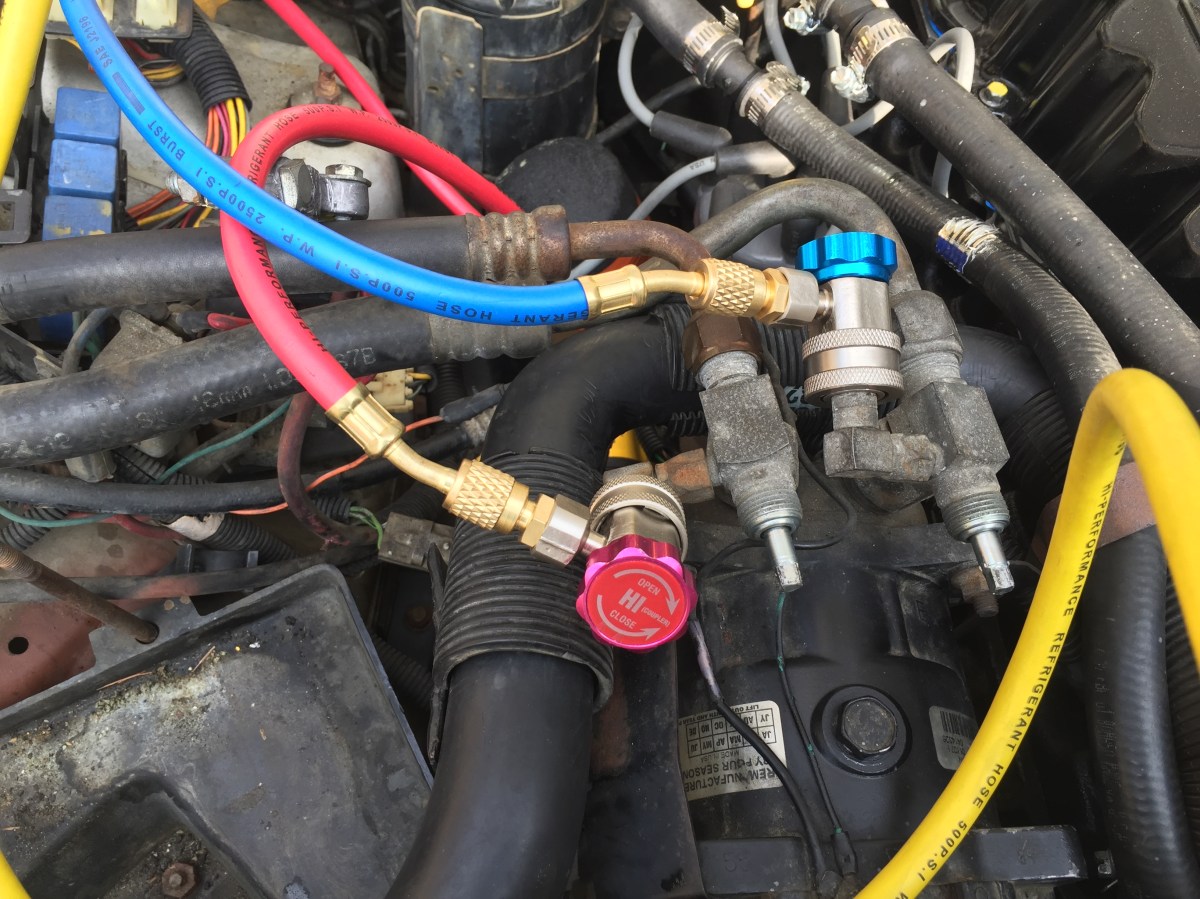
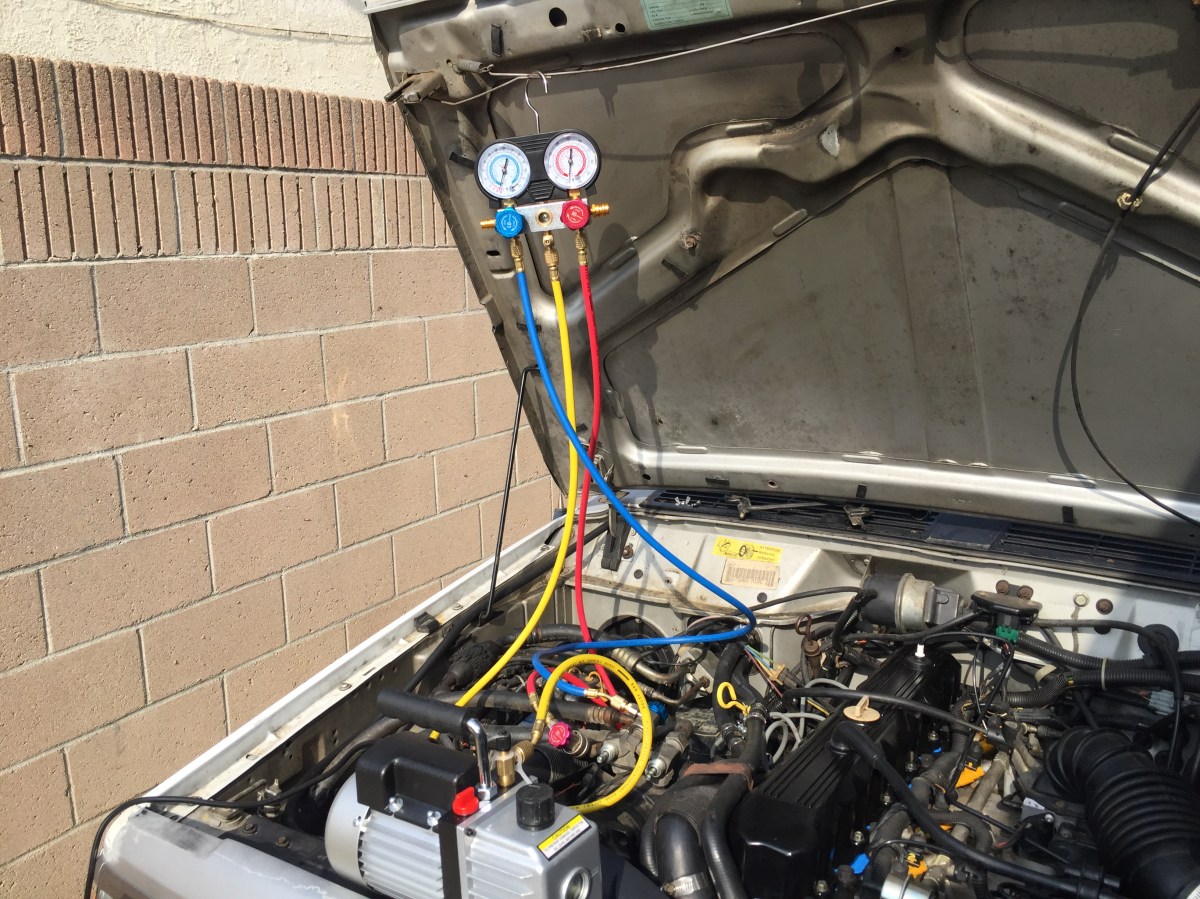
At the condenser, I removed the two fittings that connect the system to the condenser and replaced the two O-Rings on those lines. After that, it can be assumed that the system is completely sealed but I had to test that. To test the integrity of the system, it was time to hook up the gauges. I removed the dust covers from the pressure fittings as well as the service valves and hooked up the gauges to the pressure fittings.
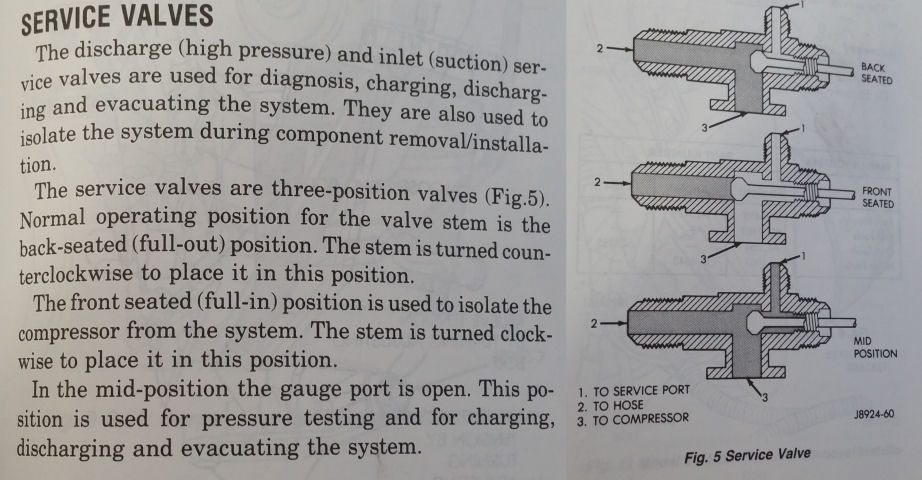
The service valves have to be adjusted properly in order to enter the system for testing and filling. The service valves at this point should be backed out completely. Below is a reference guide from the factory service manual on how to adjust the service valves for filling and testing.
Once the service valves are adjusted to the fill setting, it was time to pull a vacuum on the system to evacuate the system from any moisture. I let the vacuum pump run for an hour to ensure there was little to no moisture left before adding refrigerant.
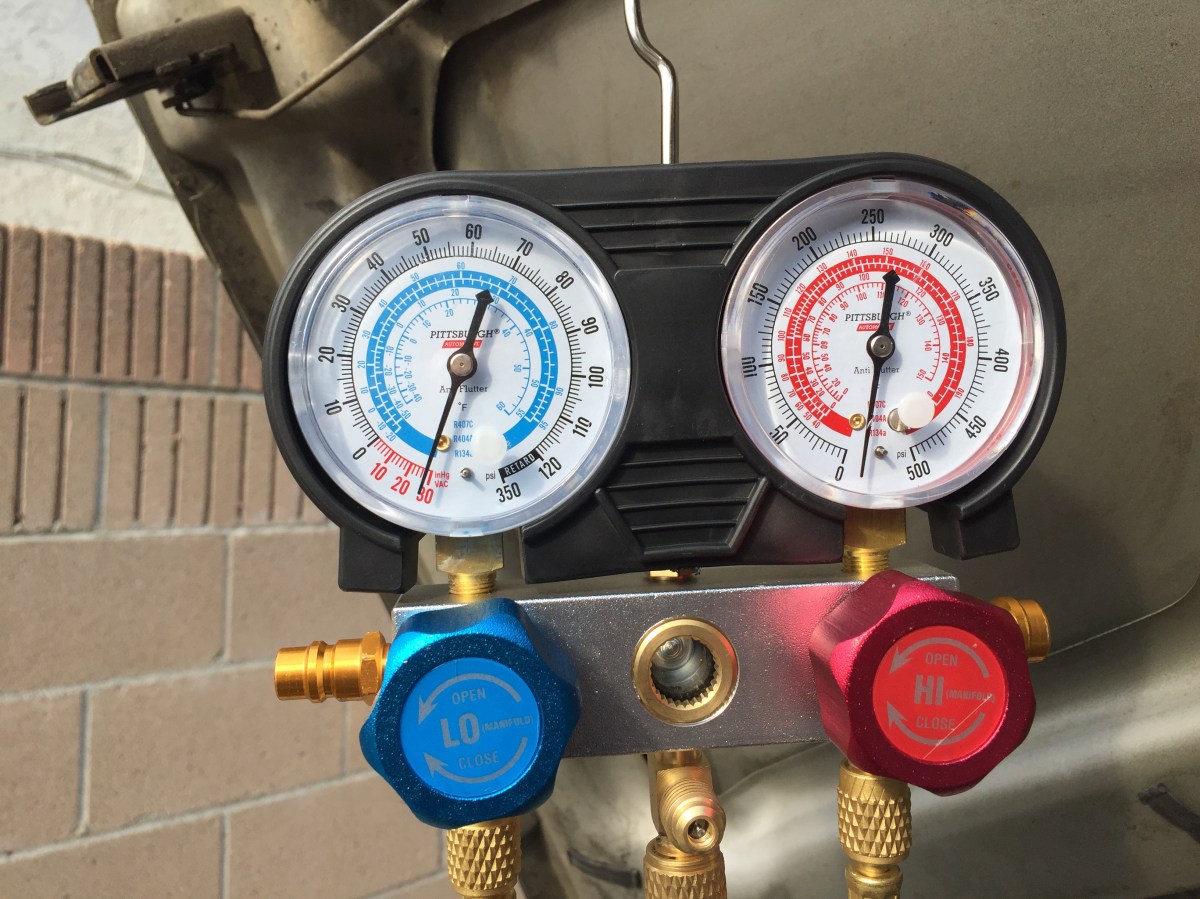
After the evacuation, I closed the manifold valves and turned the vacuum pump off to see if the system would hold a continuous vacuum. I documented the gauges and let it sit for two hours without the pump on.
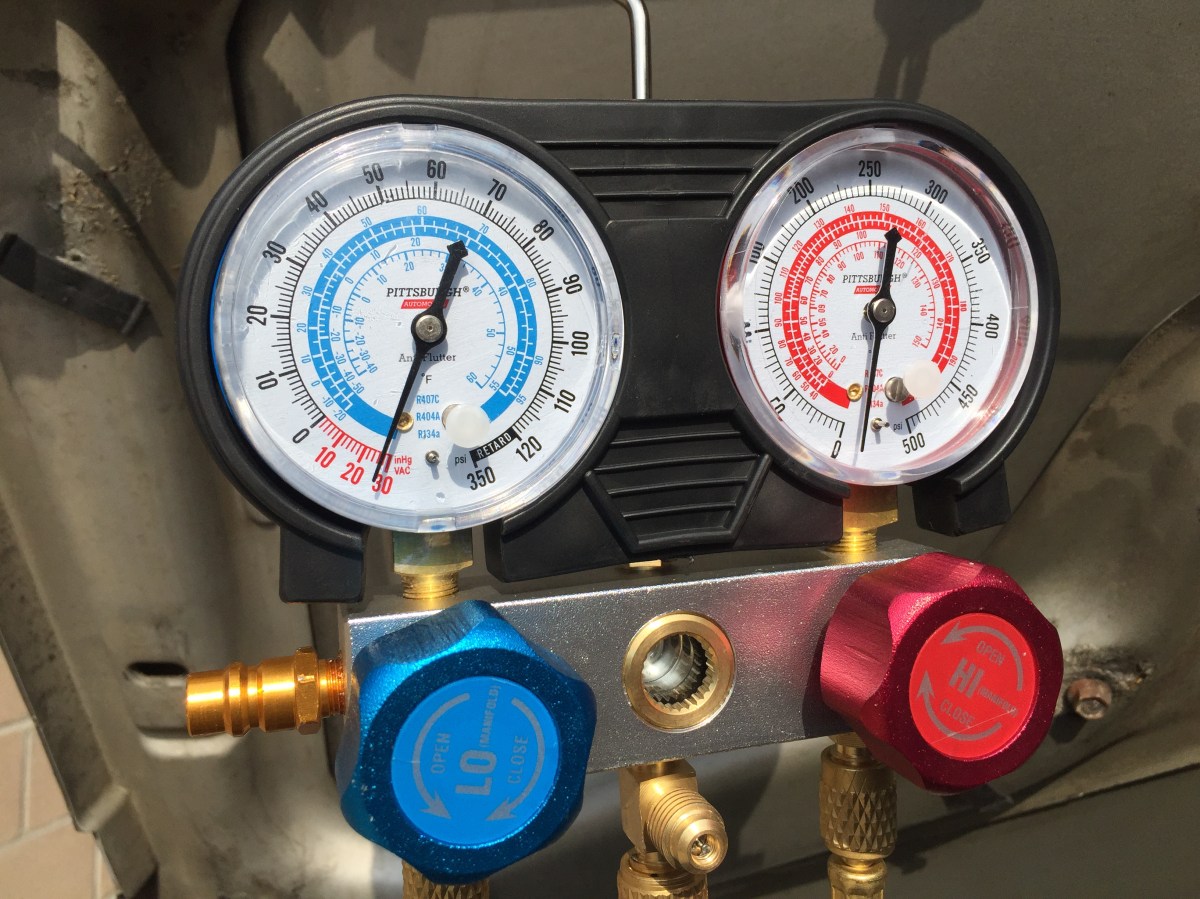
After two hours the gauges didn’t move at all. Below are the gauge readings after two hours on vacuum test.
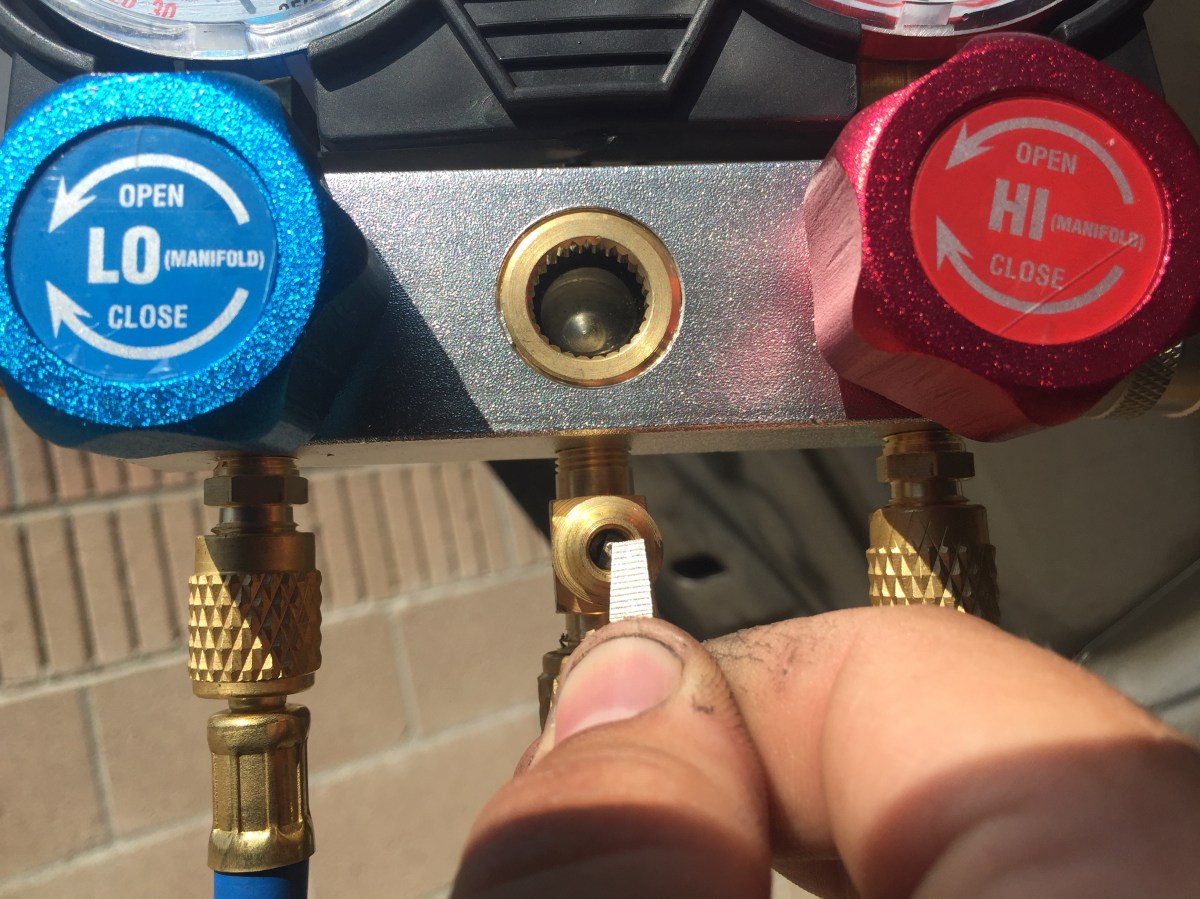
Passing the vacuum test, I was confident the system was sealed and ready to accept refrigerant. Safety Advisory: When filling the system with refrigerant, DO NOT open the High Pressure manifold gauge valve. ONLY FILL FROM THE LOW PRESSURE SIDE. Filling from the high pressure side can be dangerous and damage your air conditioning system. With that said, I kept both valves on the manifold closed until I was ready to fill and had purge the yellow fill line from all air. I hooked up the refrigerant tap and yellow fill line hose to a refrigerant can and turned the tap into the can completely. I backed the tap handle back out to let refrigerant flow into the fill line. With a small screwdriver, I bled the fill line by depressing the schrader valve until I saw a small active release of refrigerant.
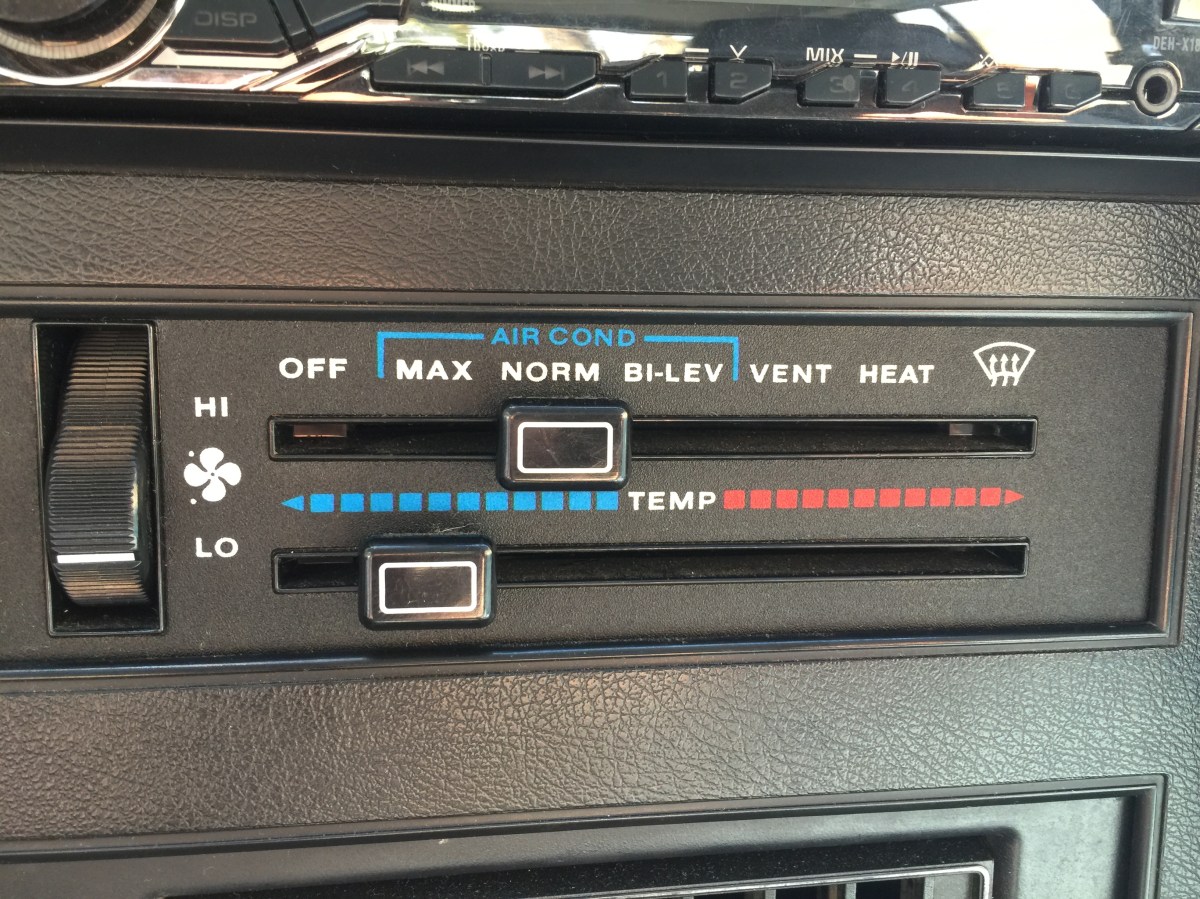
Now that the fill line was purged, I started the Jeep and turned the AC on to “NORM” and “LO” Fan speed.
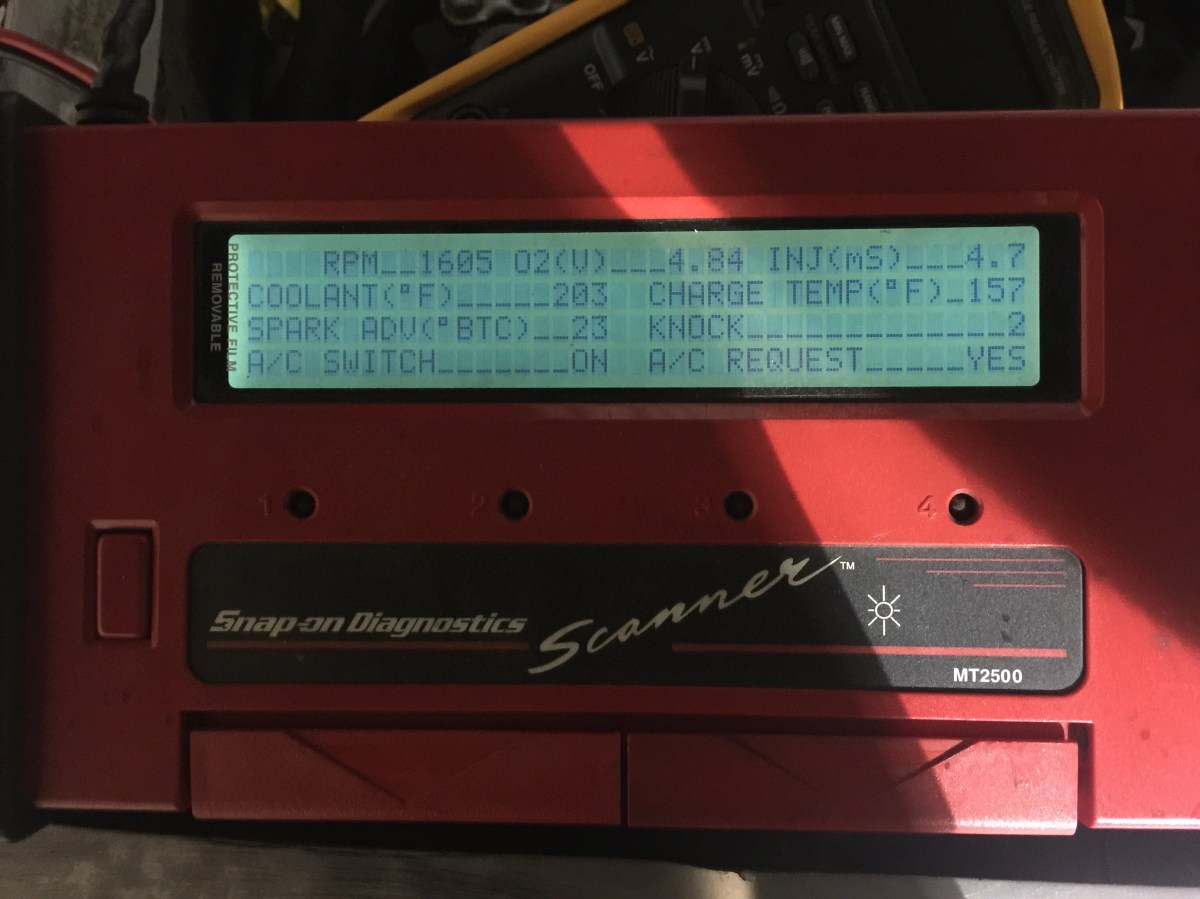
Time to fill the system, I cracked the low pressure manifold valve and started letting the refrigerant drain into the system. I kept my scanner hooked up to watch my engine coolant temperature and to monitor when the AC clutch is requested to activate from the ECM.
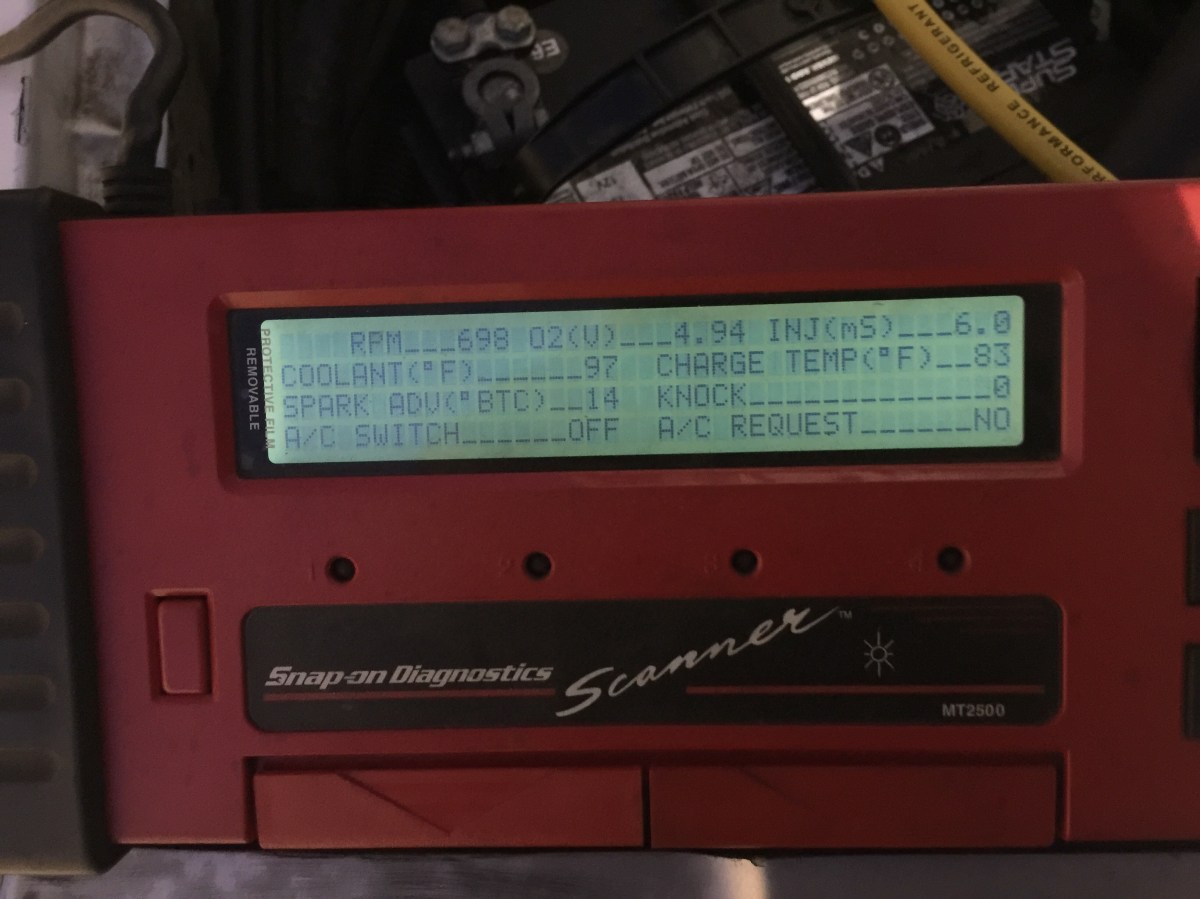
Once 12 ounces were accepted into the system, the compressor clutch activated. Woohoo! I added two additional 12 ounce cans and a half ounce from the fourth can. I used a postage scale to add the final half ounce. I kept an eye on my scanner to ensure the engine rpm’s were maintained while I added the refrigerant. While adding refrigerant it was recommended to keep engine rpm’s between 1500 and 2000 rpm’s.
After all refrigerant was accepted into the system, I checked the temperature of the air coming from the vents in the Jeep.

The temperature maintained itself between 38° to 48°. According to many AC techs I have talked to. As long as the vent temperatures are below 60° that is acceptable as air conditioning. Now just another side note. Adding more refrigerant to an AC system than required will not make the air colder. It will cause problems if you overcharge the system. Check your factory service manual if you are unsure of the proper amount of refrigerant to add.
