If you’re a Cherokee owner, you are a special kind of Jeep owner. We range from high school pizza deliverers that got theirs Jeep from grandpa to the $100K+ a year construction workers that’s a home fabricator. We’re willing to stick the junk yard, V8 Grand Cherokee coils, bastard pack lift kits on with craigslist purchased, 25% remaining tread mud tires, just to save a few bucks. Most don’t like to pay for the extras if we can help it. On certain modifications, I’m one of those people. I’m no master welder or fabricator, but I do have the knowledge and skills to get me by.
As a Christmas present, my lovely wife fed my Jeep obsession with some DIY front and rear bumpers from Dirtbound Off-Road. The kits comes with everything I needed to have some sweet looking armor for the front and rear of my Cherokee.
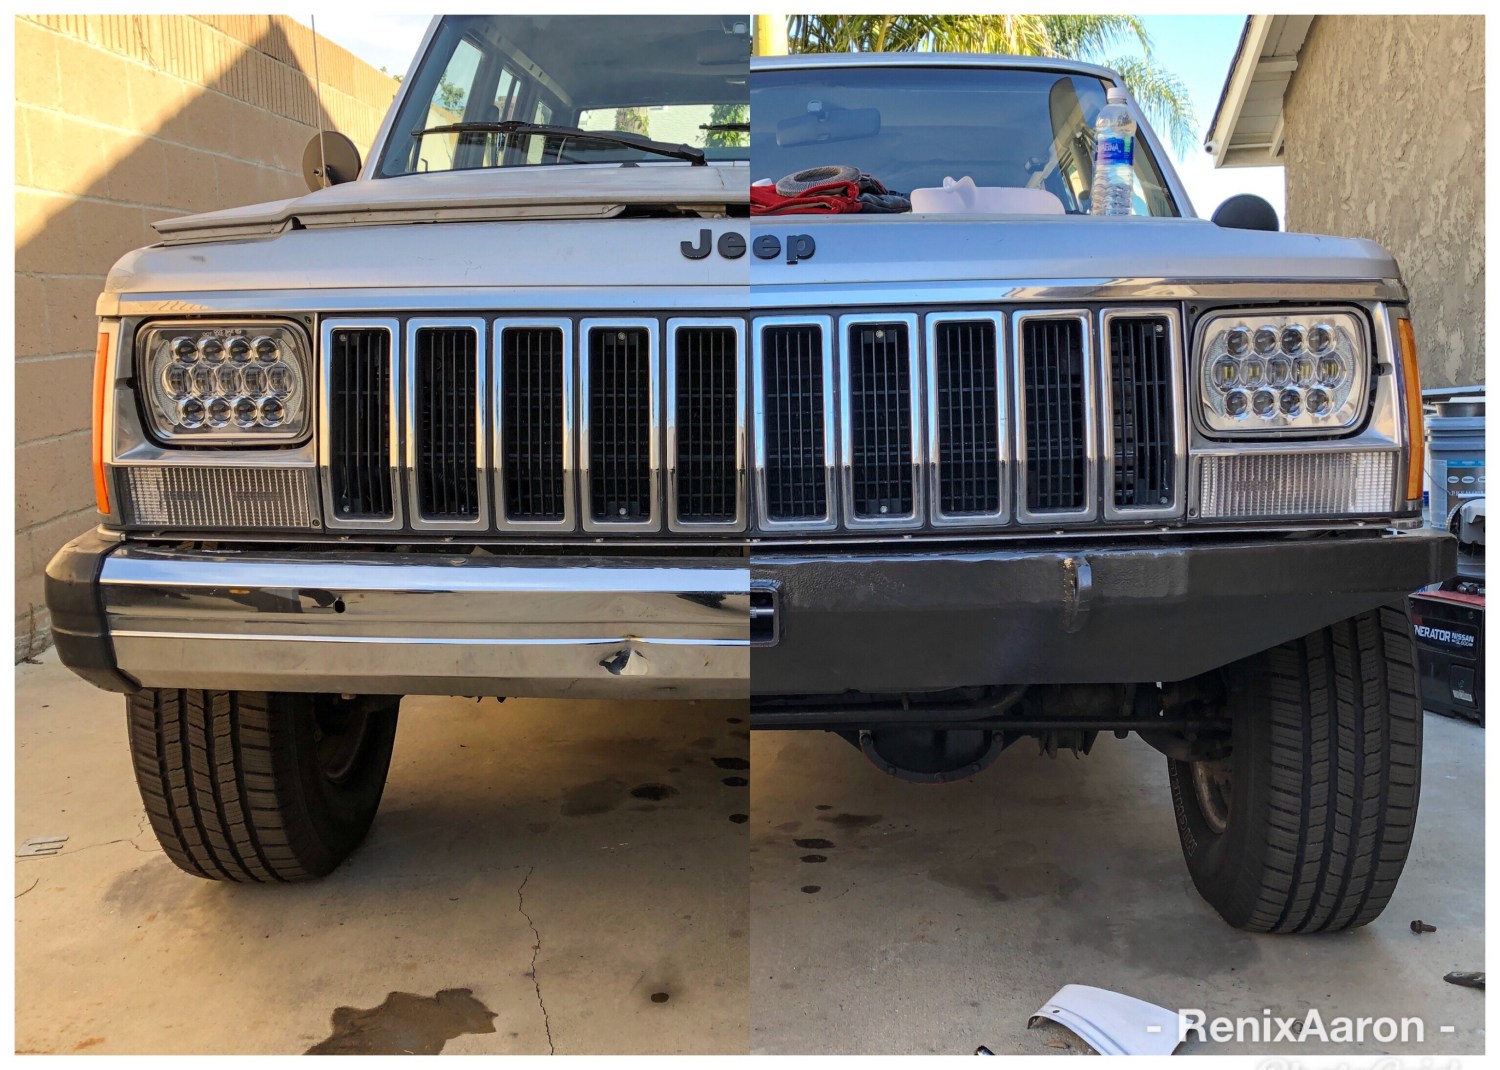
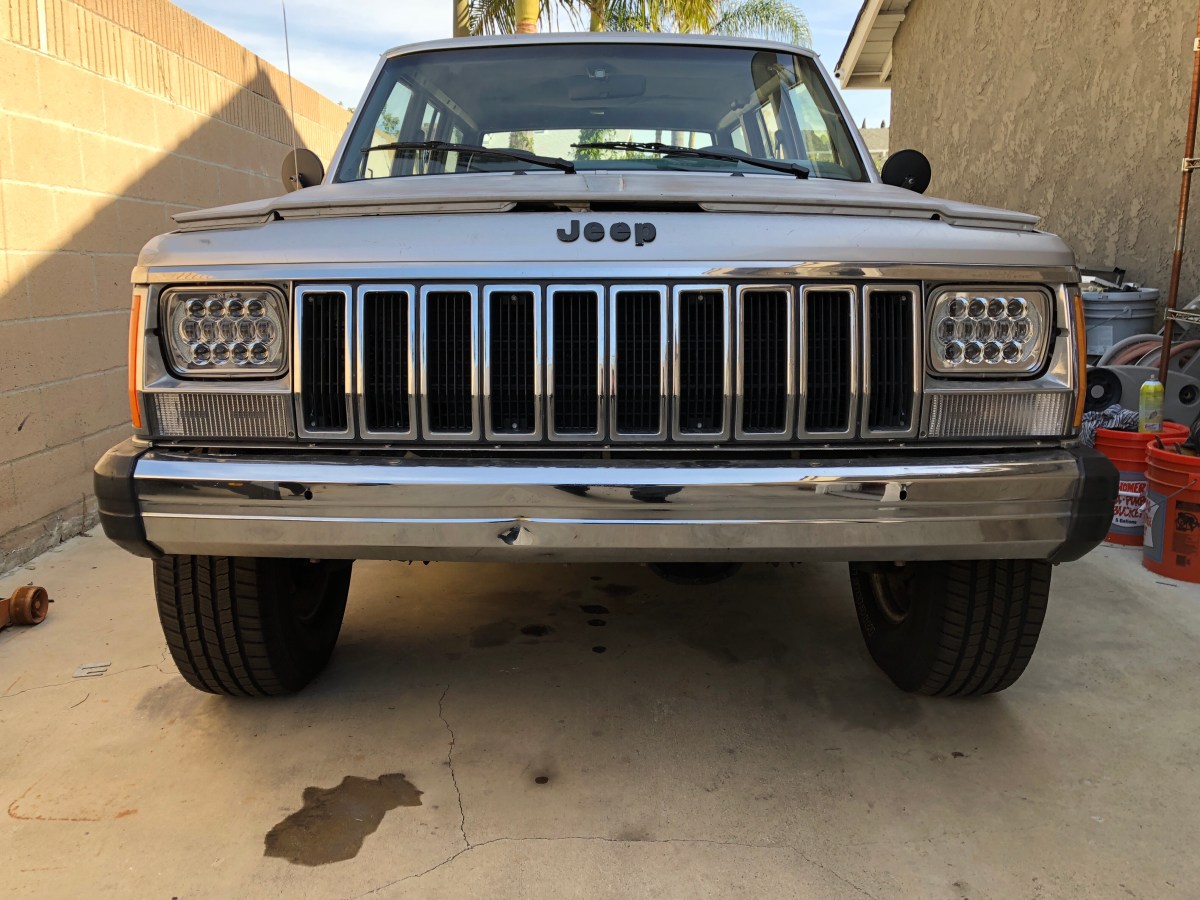
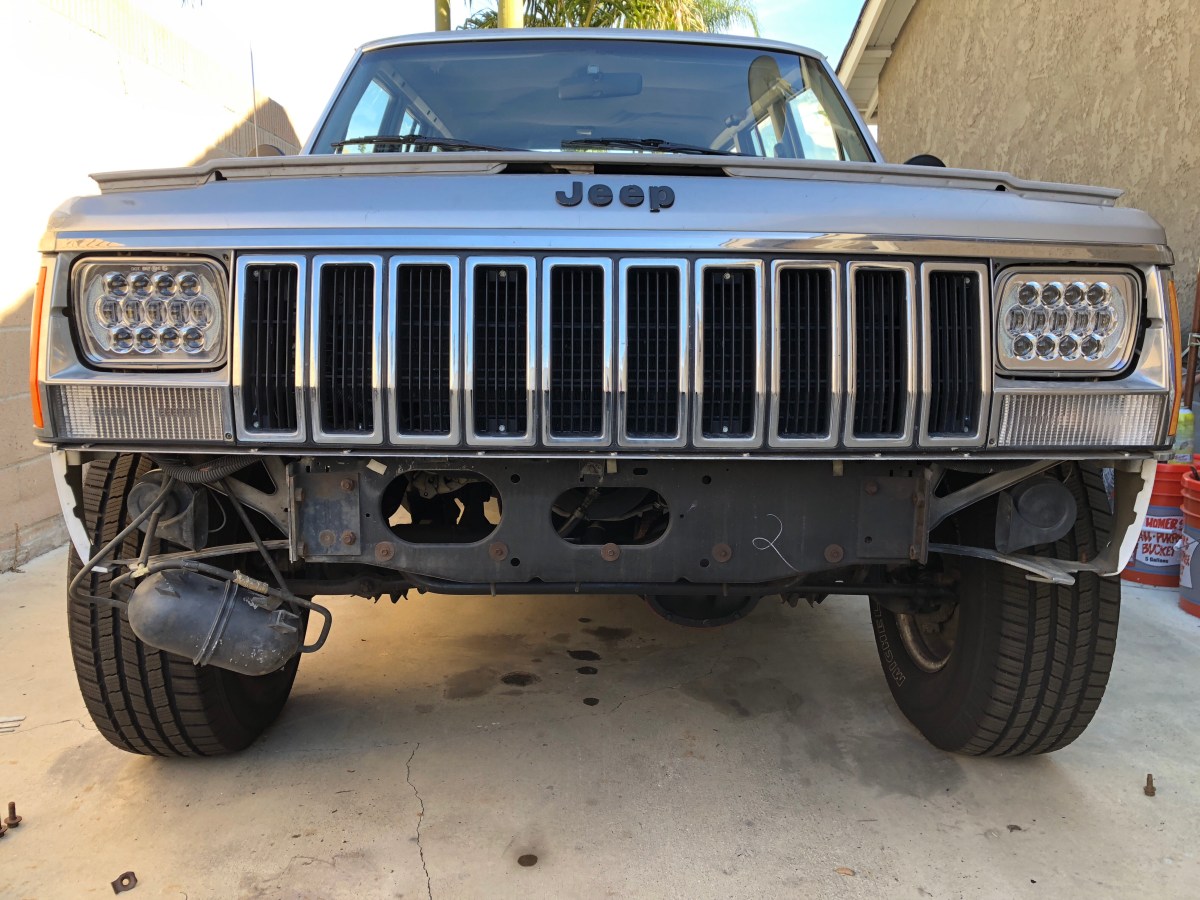
The only thing they don’t come with are some instructions on assembling them. The rear bumper has instruction on their website but the front, you’re on your own. Lucky for you all, I’ll list the degrees I bent all my panels to. The first step was to remove to OEM bumper. On mine, there were just four bolts holding it on behind the bumper. The vacuum ball tabs were broken, so the previous owner just zip-tied it to the bumper bracket. I removed the four bolts and cut the zip-ties and it fell right off.
With the bumper out of the way, I installed the frame reinforcement brackets. The drive side was a snap. I removed the three bolts holding the power steering box and aligned the reinforcement plate up with the steering box holes on the unibody. Once aligned, I used the factory bolts to sandwich the plate with the unibody. Before tightening them, I aligned the front holes with the factory bumper mounting holes. 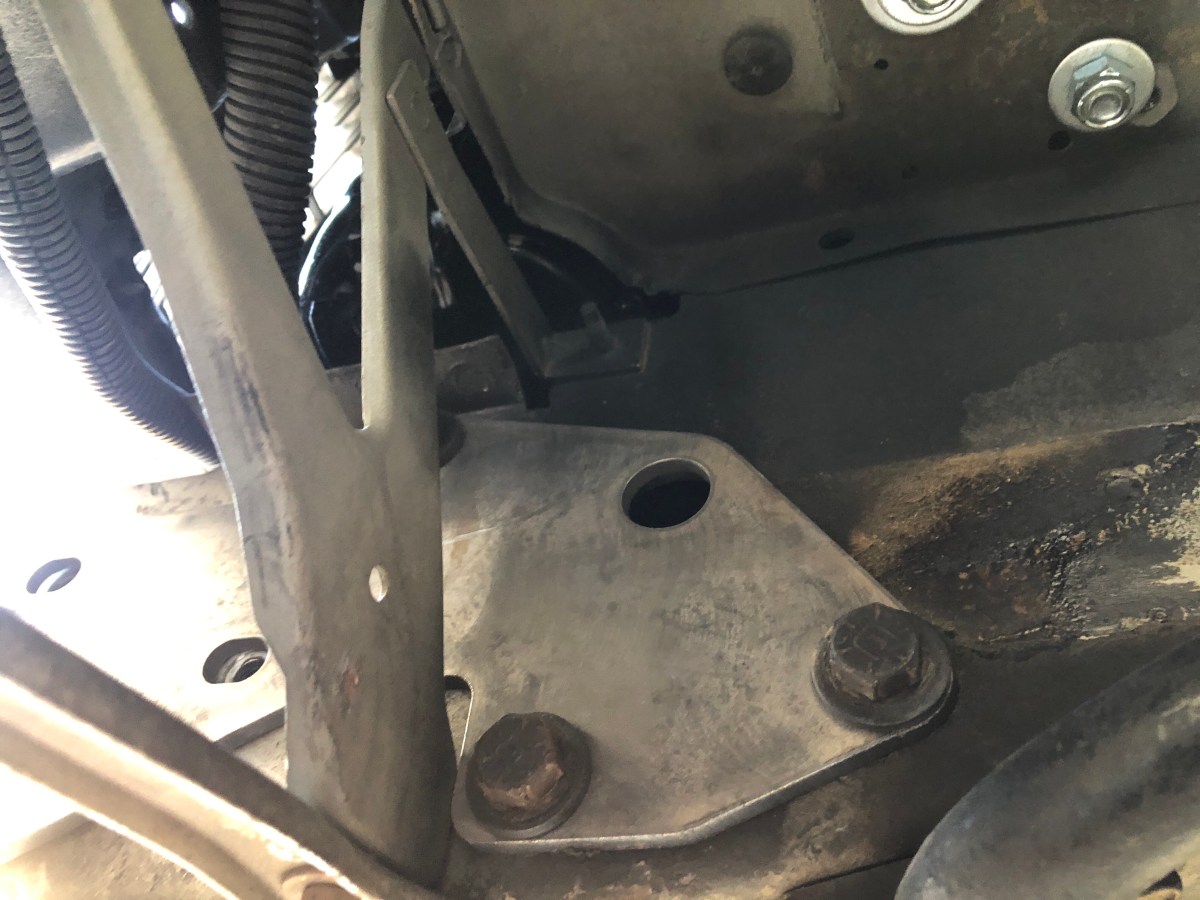
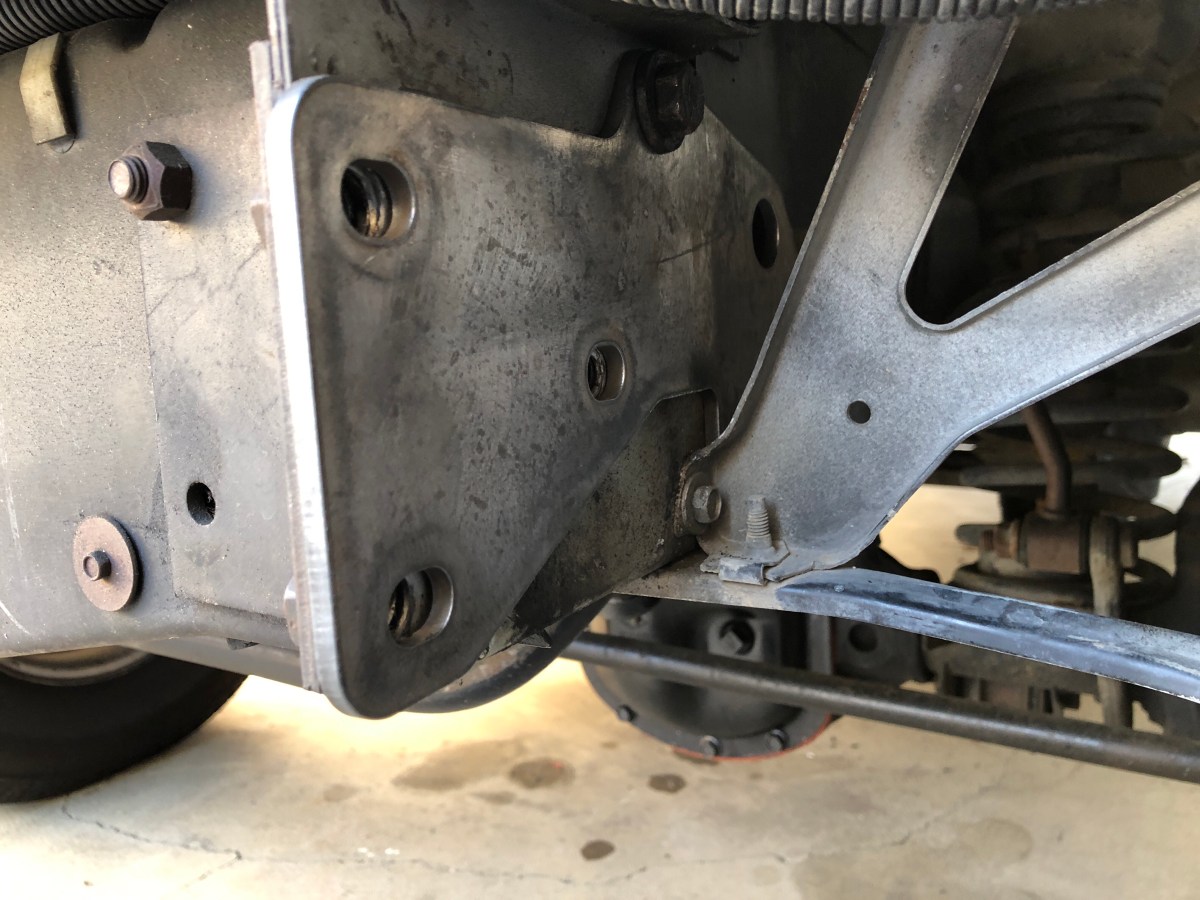
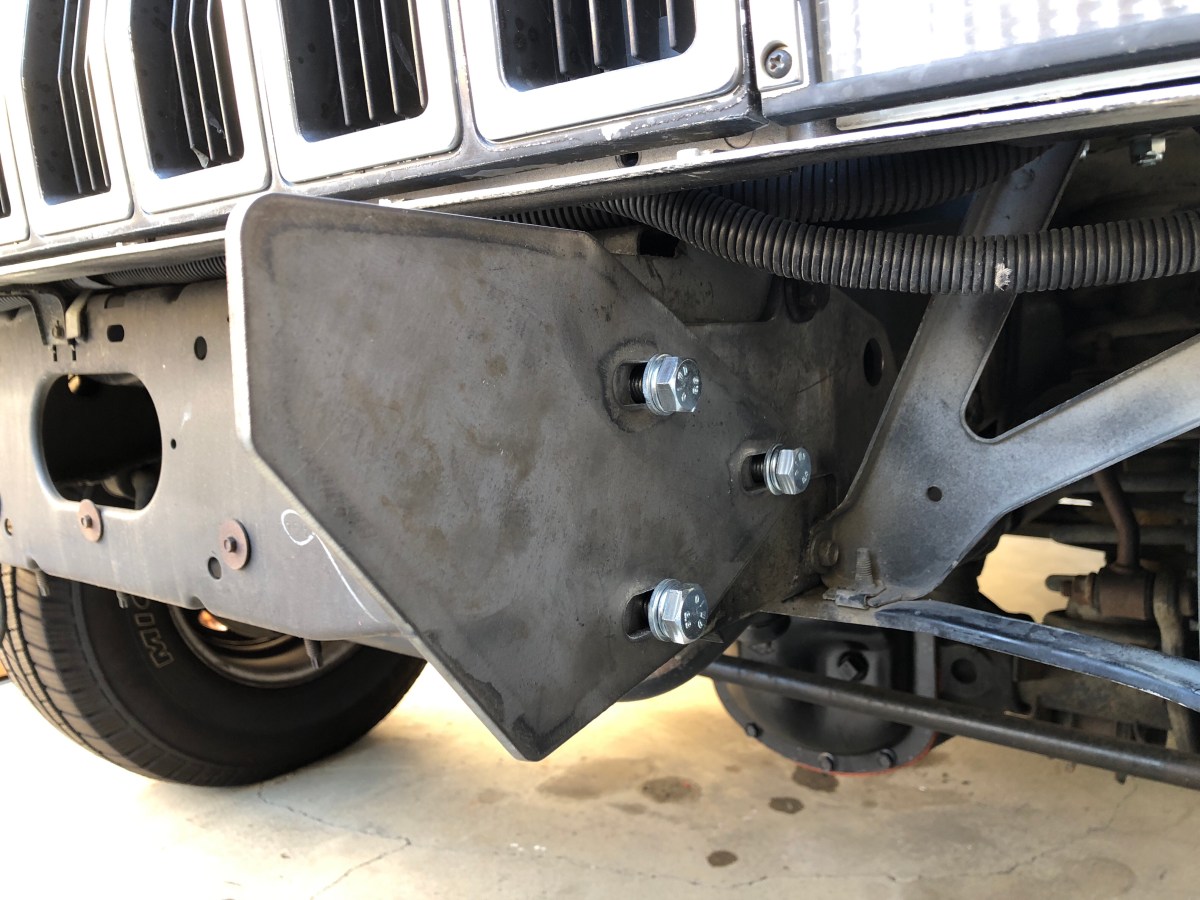
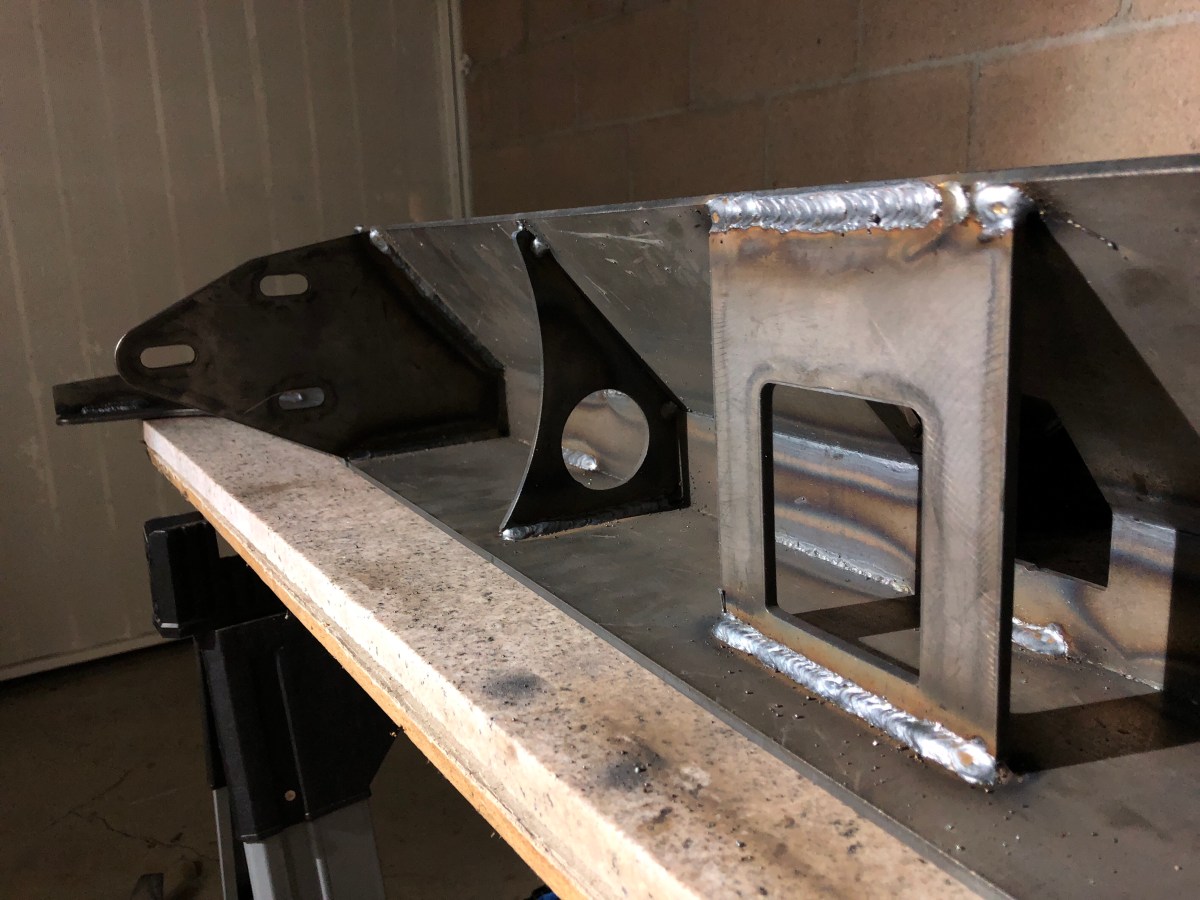
In preparation for the bumper I installed the bumper brackets that will be welded onto the the bumper. Installing them on the Jeep prior to welding them gave me the approximate location they need to be welded in order for the bumper to be centered on the Jeep when final installation is ready.

I also set them as far forward as possible to guarantee they would be evenly mounted and not offset at all.
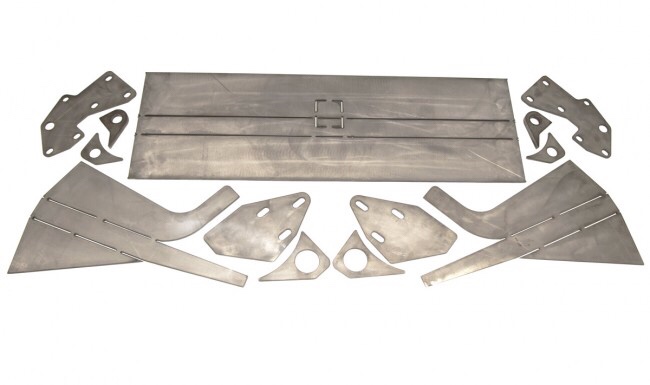
Now onto the bending of the bumper. On the main front panel, the bends will be:
Top Plate: 90°
Bottom Plate: 40°
For the side panels, the bends will be:
Top Plate: 90°
Bottom Plate: 38°
The 2° difference between the main panel and side panels, bottom plates are necessary. When you put the side panels together with the main panel, if all bottom plates are at 40°, the slight curvature in the bumper will cause the side panels bottoms to sit lower than the main panel bottom. This 2° offset on the side panels will cure this issue. To assist in bending the the top and bottom plates on each panel, I used a cutoff wheel and slightly cut into the tabs the CNC left to keep the plates together.
After I bent each plate, I tack welded where the CNC tabs were to ensure the slim tabs didn’t fully break.
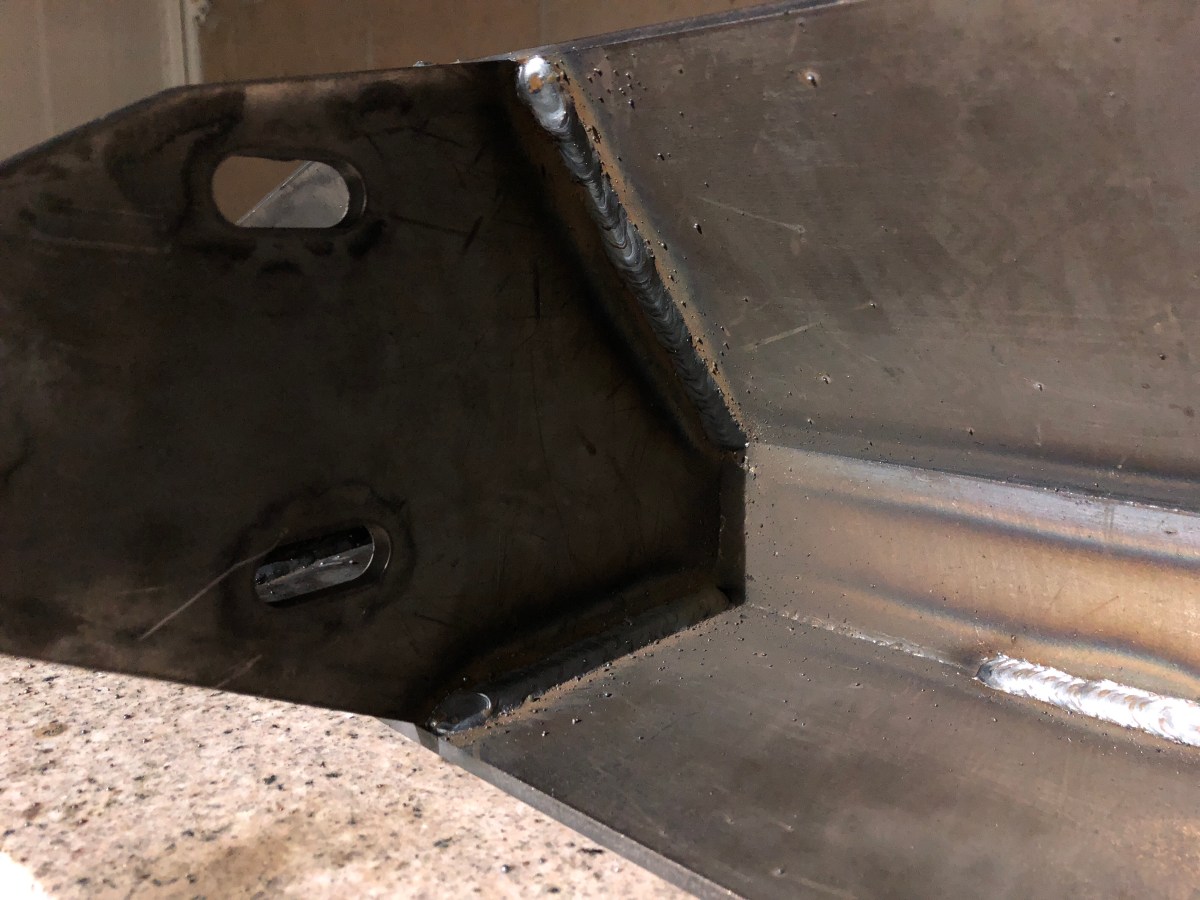
After bending everything and before welding the sides to the main panel, I test fit the main panel to the bumper mounting brackets to ensure the angles were proper.
All my angles matched perfectly to the mounting brackets so I lined up the side panels and tack welded them to the main panel. Once they were tack welded together, I place the bumper back on the Jeep and centered it. At this point, I crawled under the Jeep and tacked the mounting brackets to the bumper.
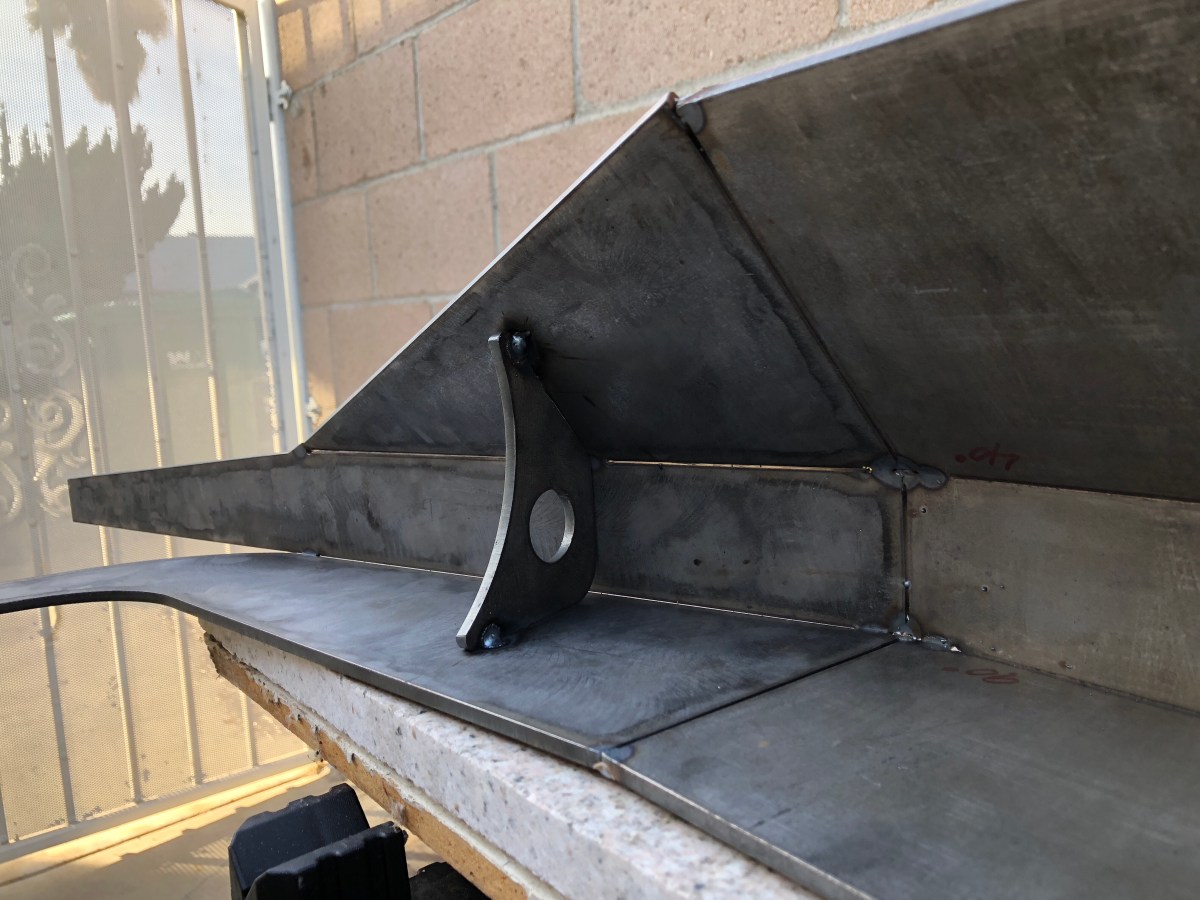
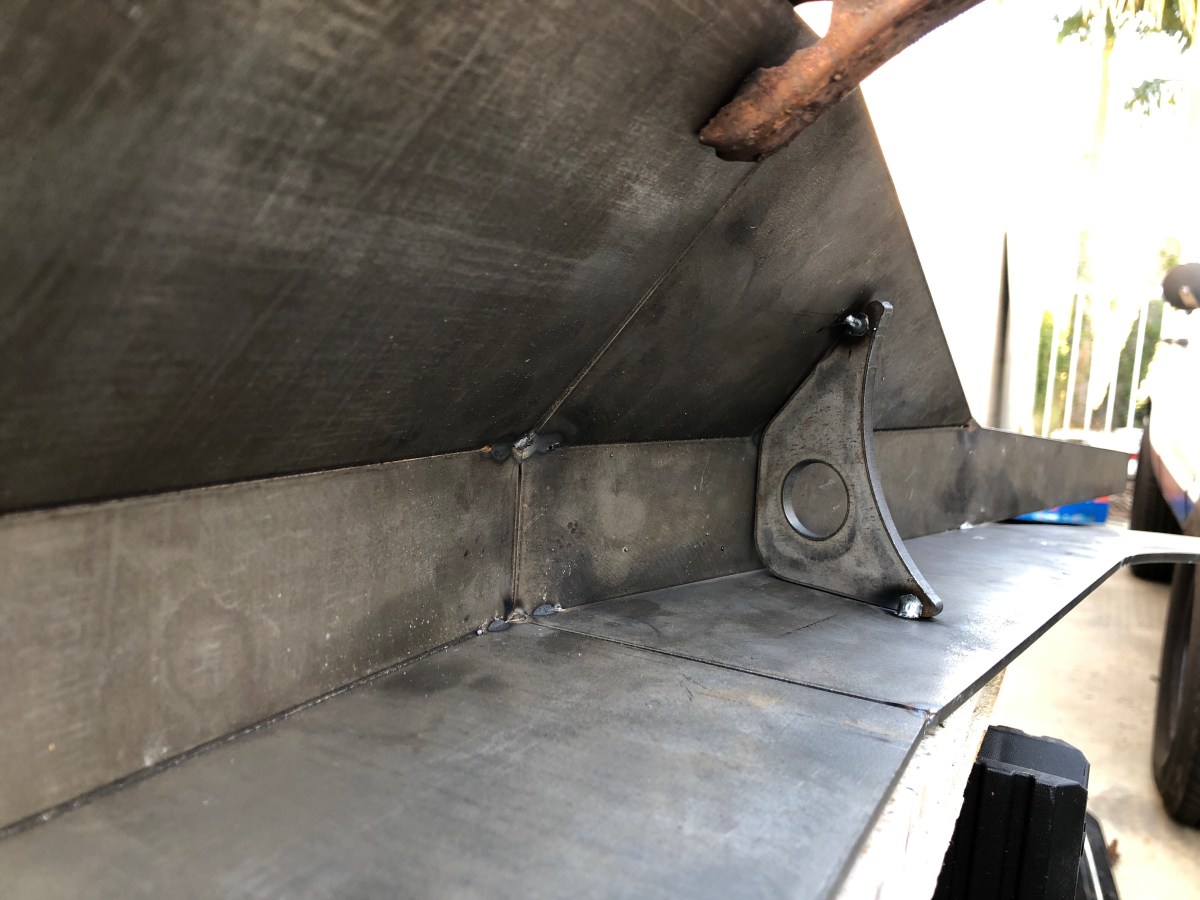
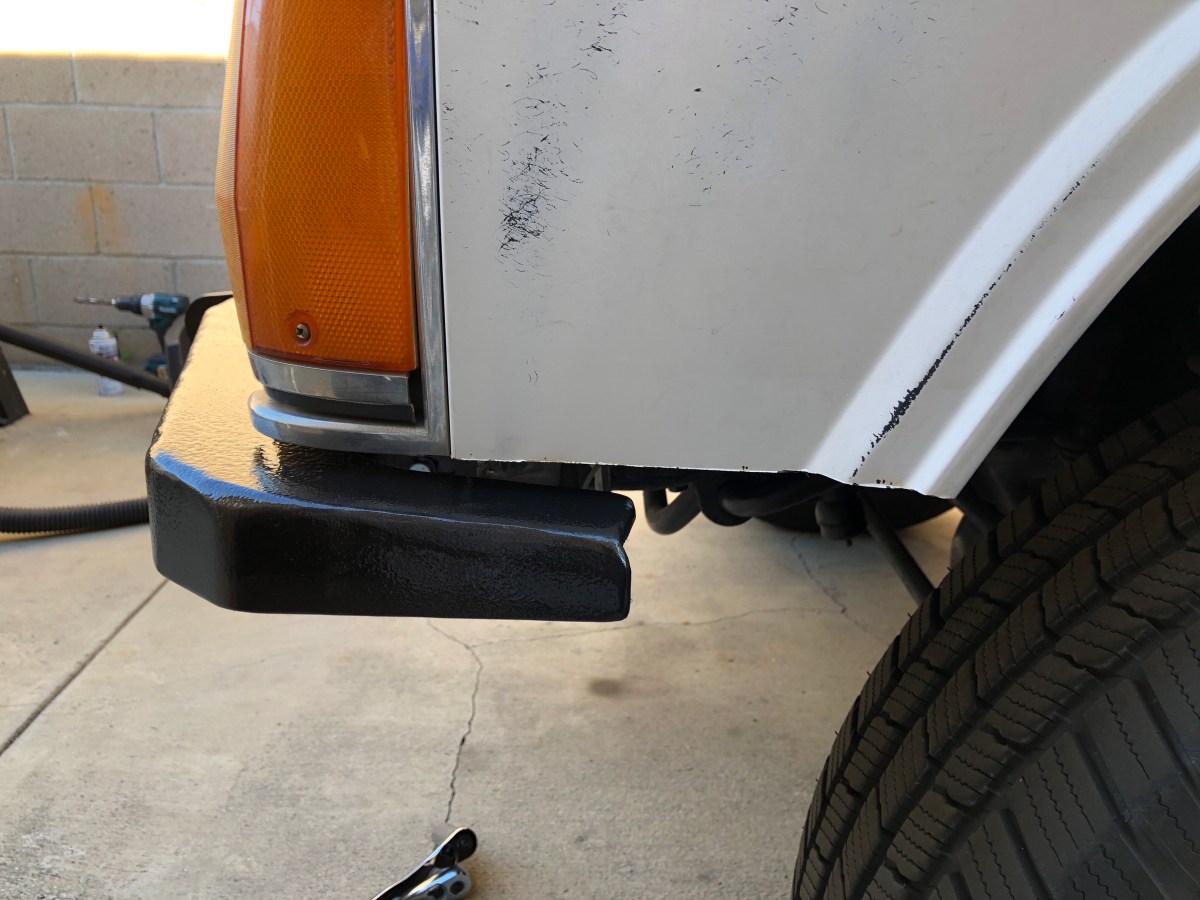
I unbolted the bumper and went back to the bench. I had the little side winds to bend. Bending it by hand was out of the question. I pulled out the torches and heated the wings until they we’re pliable enough to bend into shape. Before the metal cooled and deformed, I tack welded the wing to the top plates.
Before the wings were bent and tacked, I measured and set the gussets to an equal distance from the center of the bumper and tacked them down.
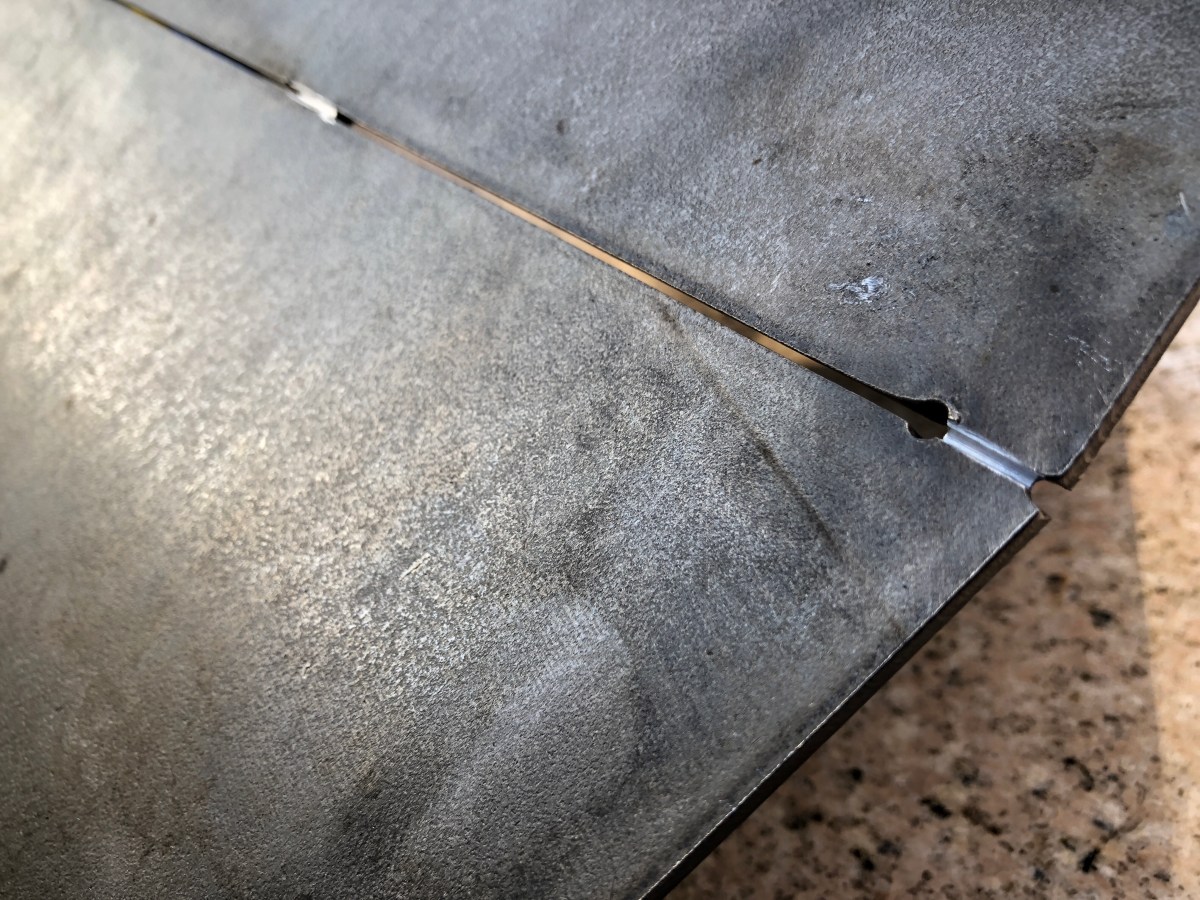
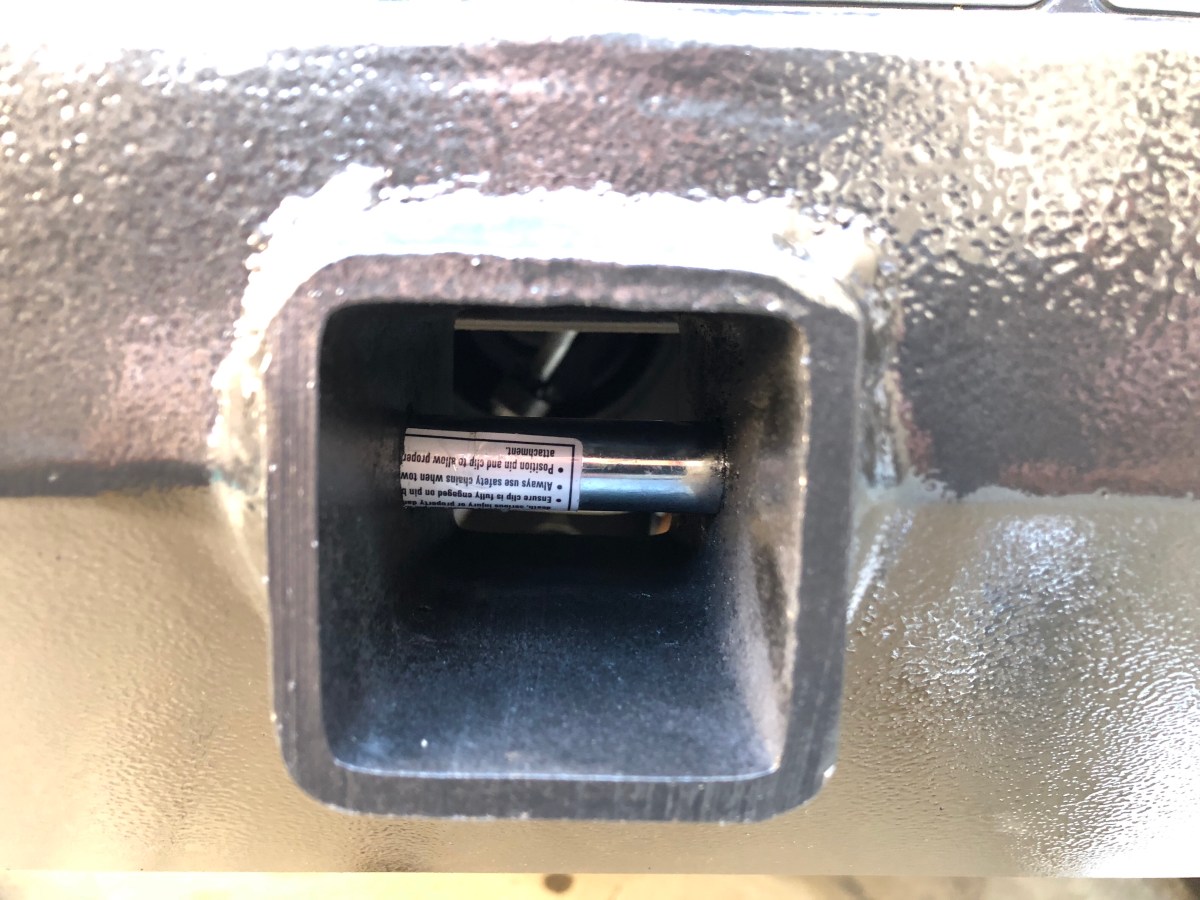
Last piece to install was the receiver and reinforcement bracket. I cut the receiver block plate out of the bumper and installed the receiver. Once the receiver was in, I installed the reinforcement bracket and centered the receiver and tack welded everything down.
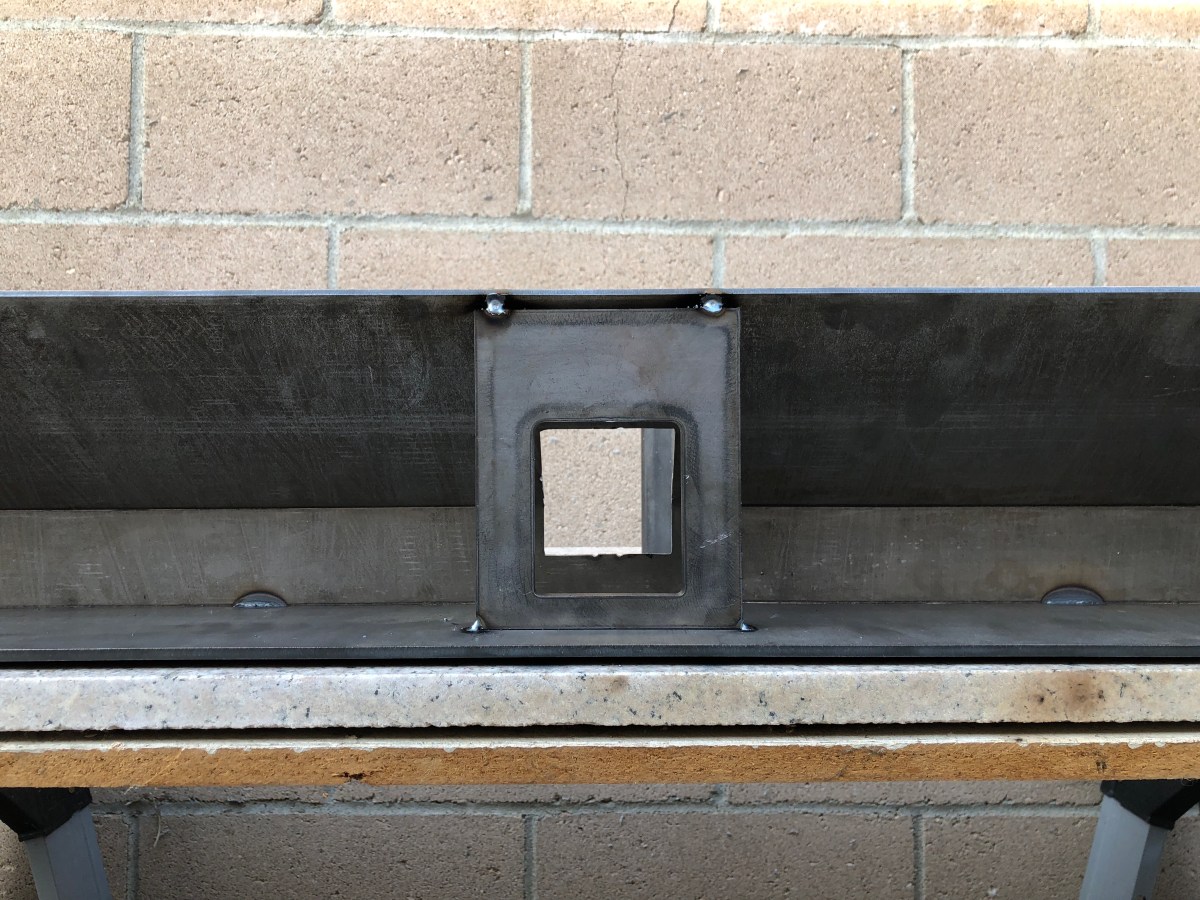
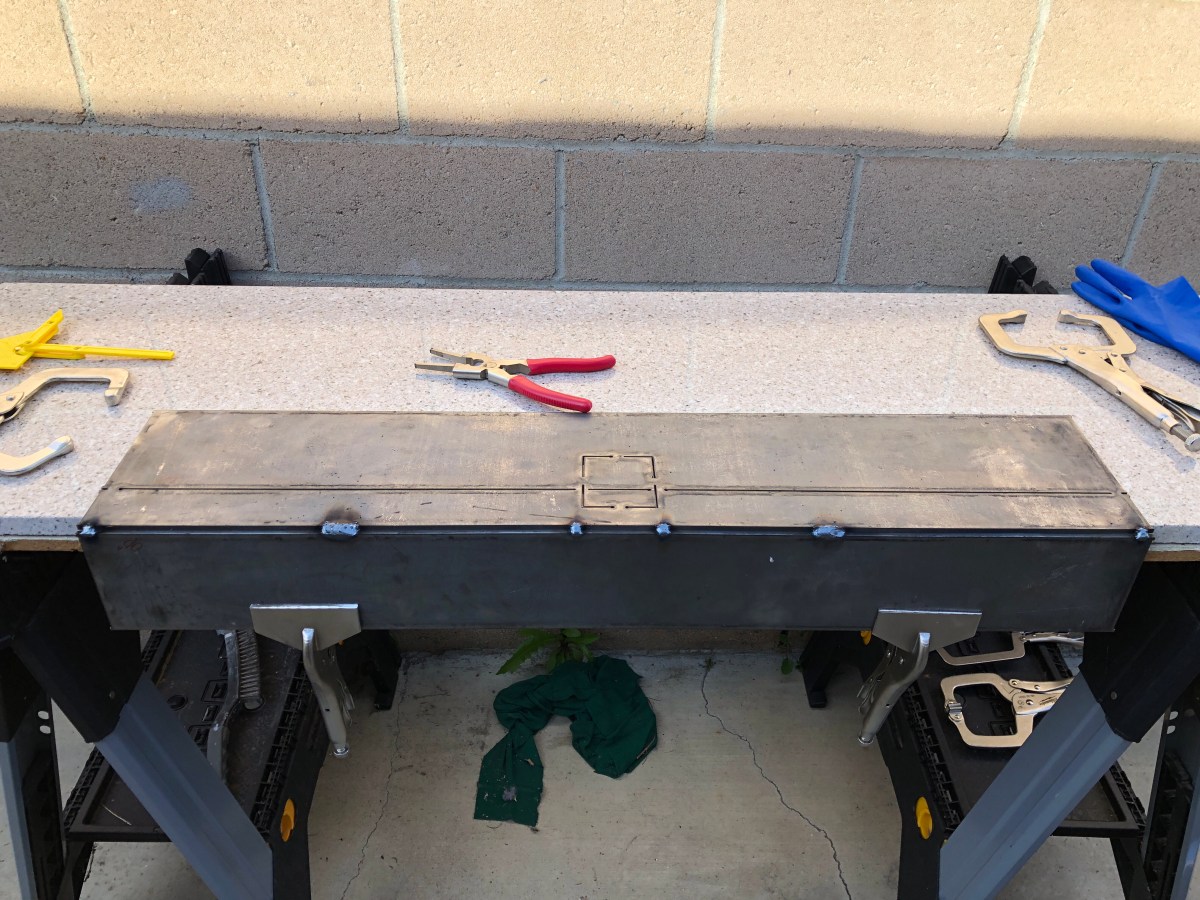
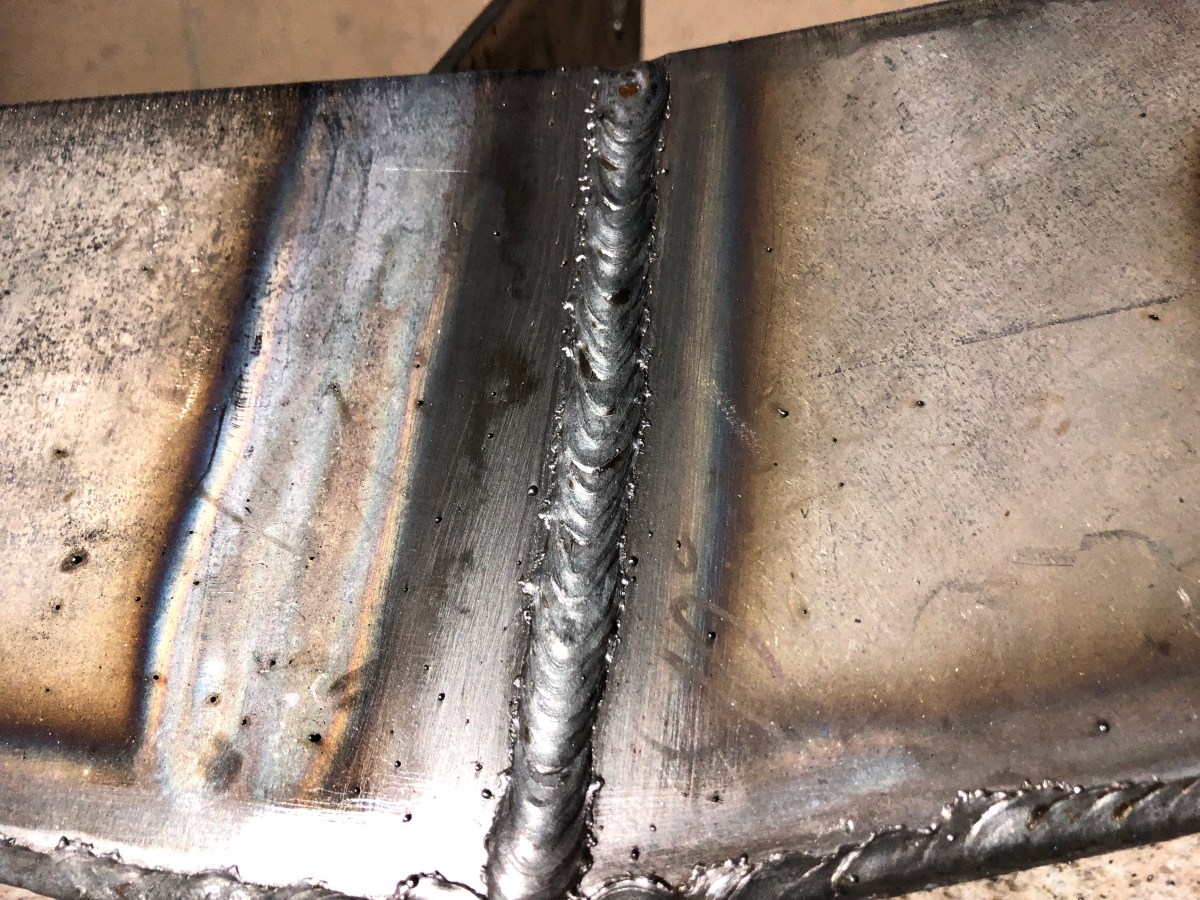
I removed the receiver and now the fun part arrived. It took awhile but I welded the entire bumper up. I started with the gussets and receiver reinforcement bracket to ensure none of the panels warped while I welded all the seams.
After the gussets were welded, I welded all the seams. I started from the outside and worked my way inwards to not concentrate too much heat in one spot. Once I got closer to the center I gave the metal a 20 minute break between welds until the whole thing was welded.
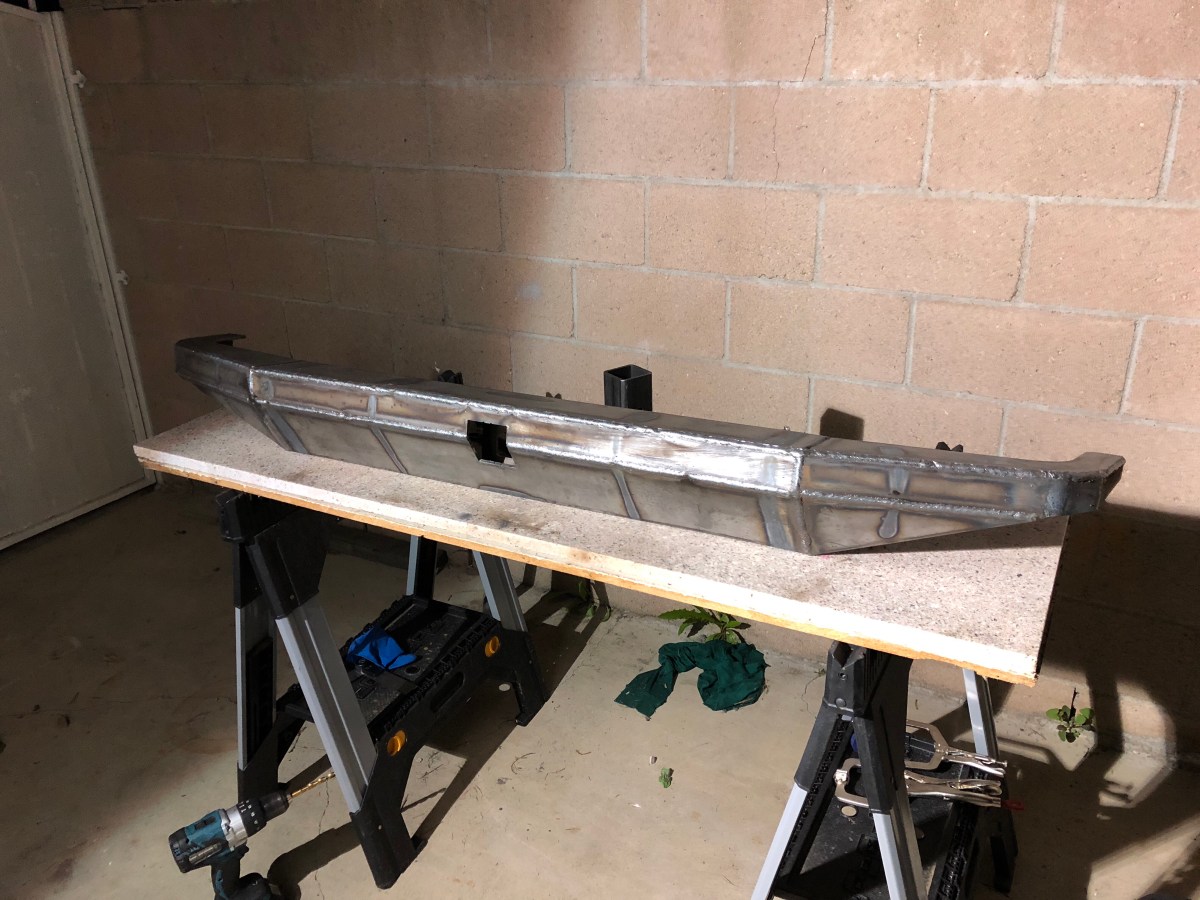
I let the bumper cool over night before I welded the recovery hooks and receiver onto the bumper.
Finally finished welding. I like to think my welds look decent. Maybe not NHRA standards but decent by any other home fabricator standards.
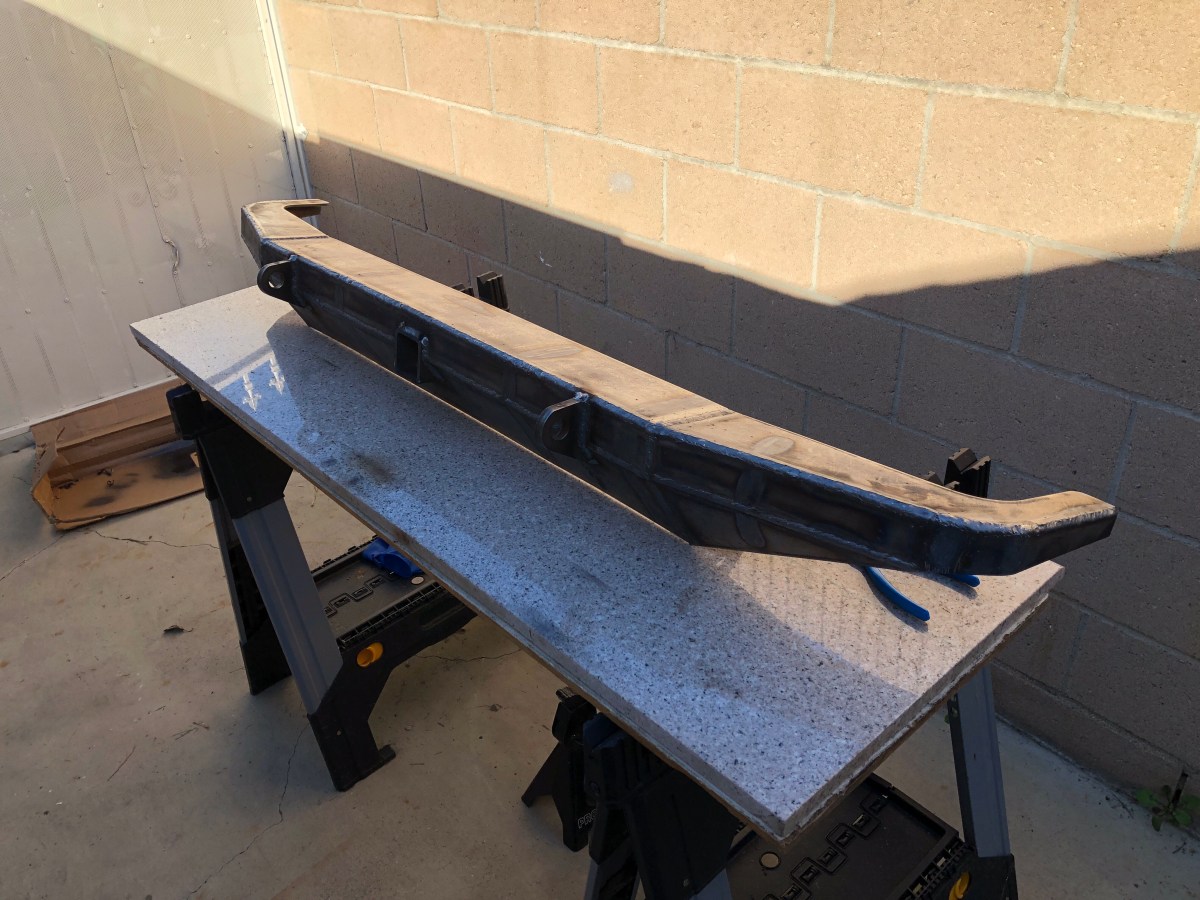
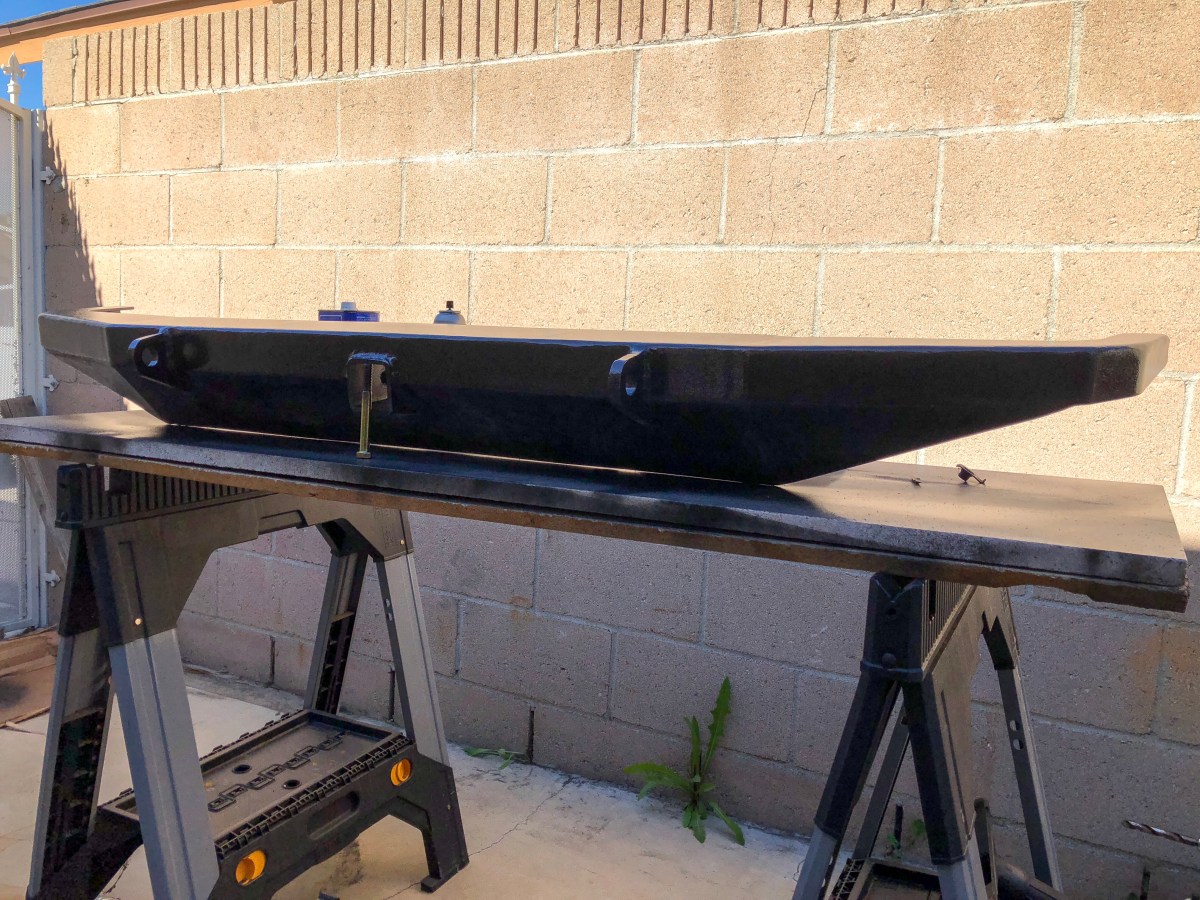
Since they don’t look like a machine welded them I decided to grind them all smooth. After 2 hours of grinding I realized I need more hood time. Haha. I rounded everything and leveled all my welds until the bumper was nice and smooth.
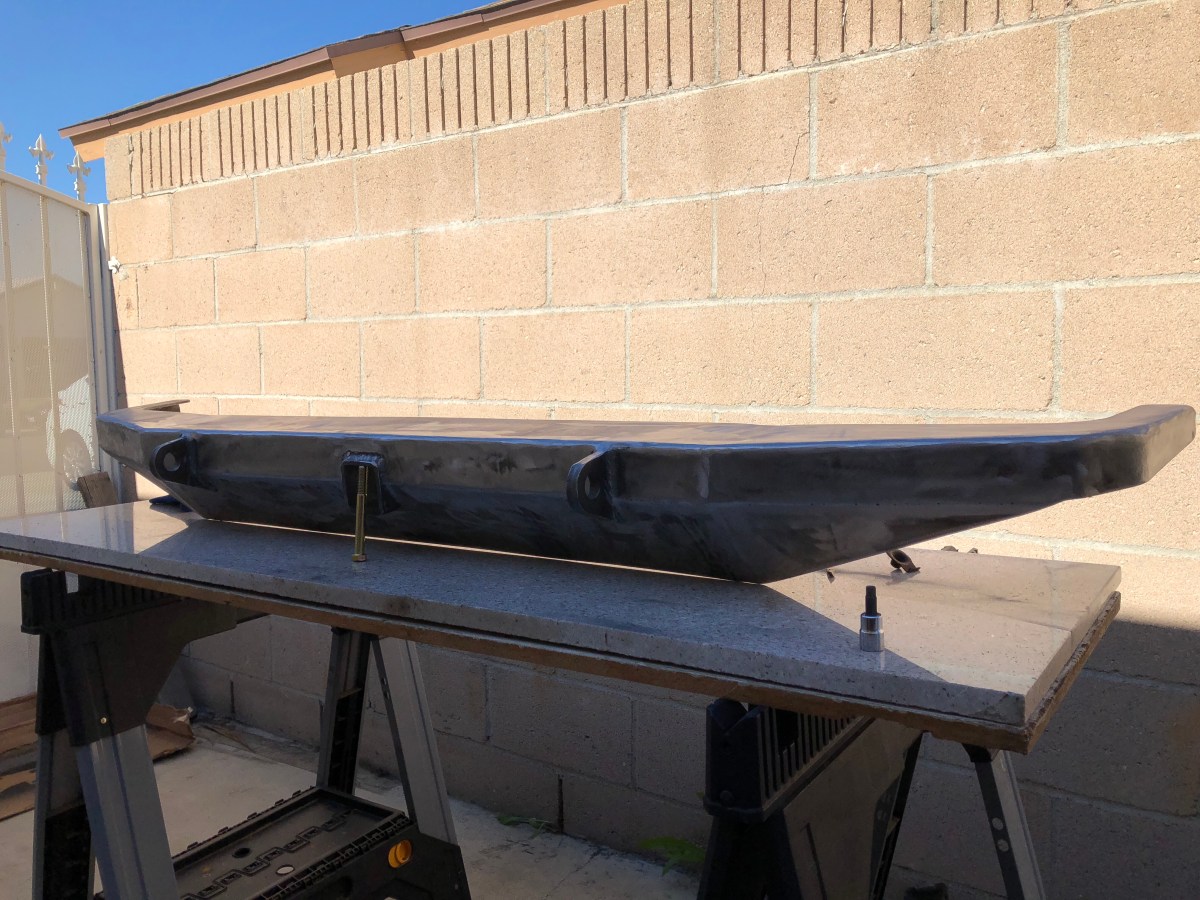
I cleaned it down with some acetone and gave it a few coats of Rust-Oleum “Hammered” to protect the metal and make it pretty.
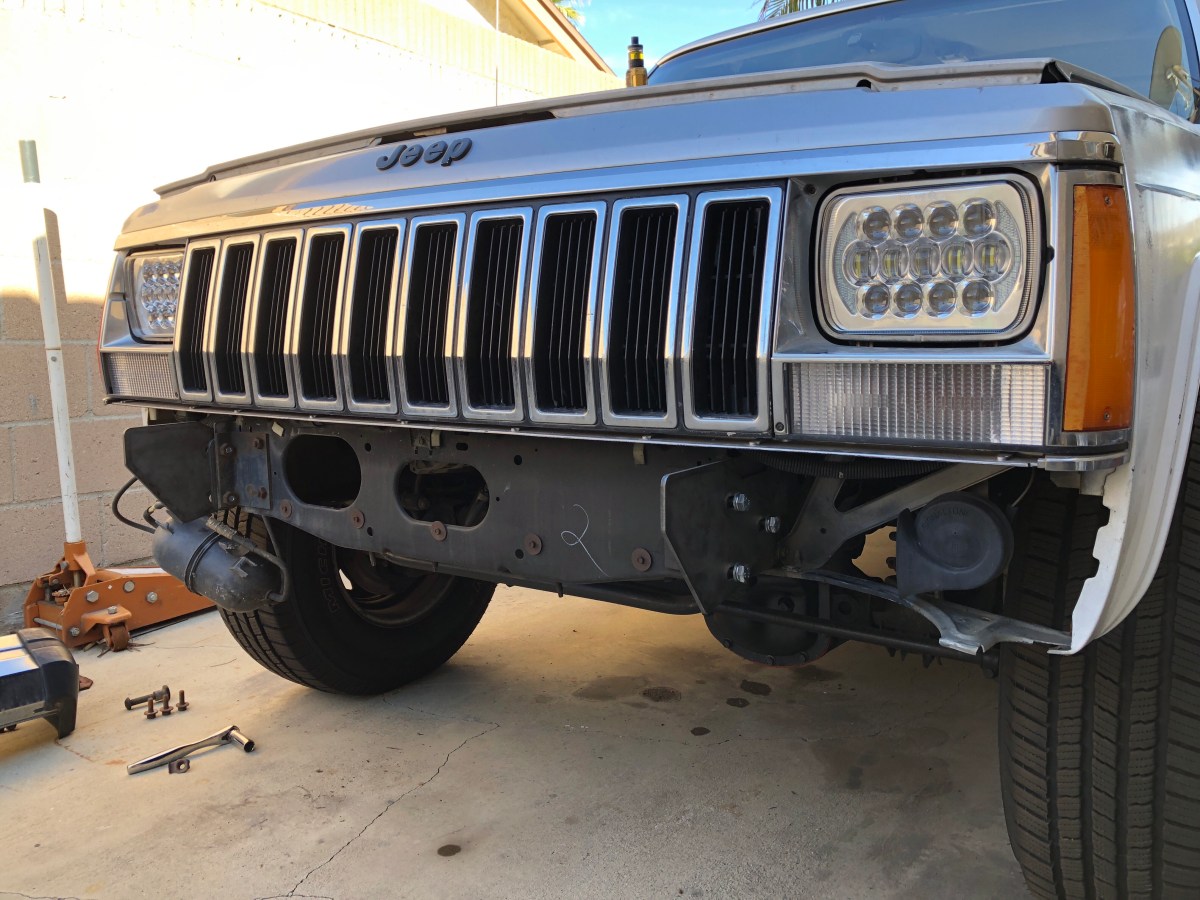
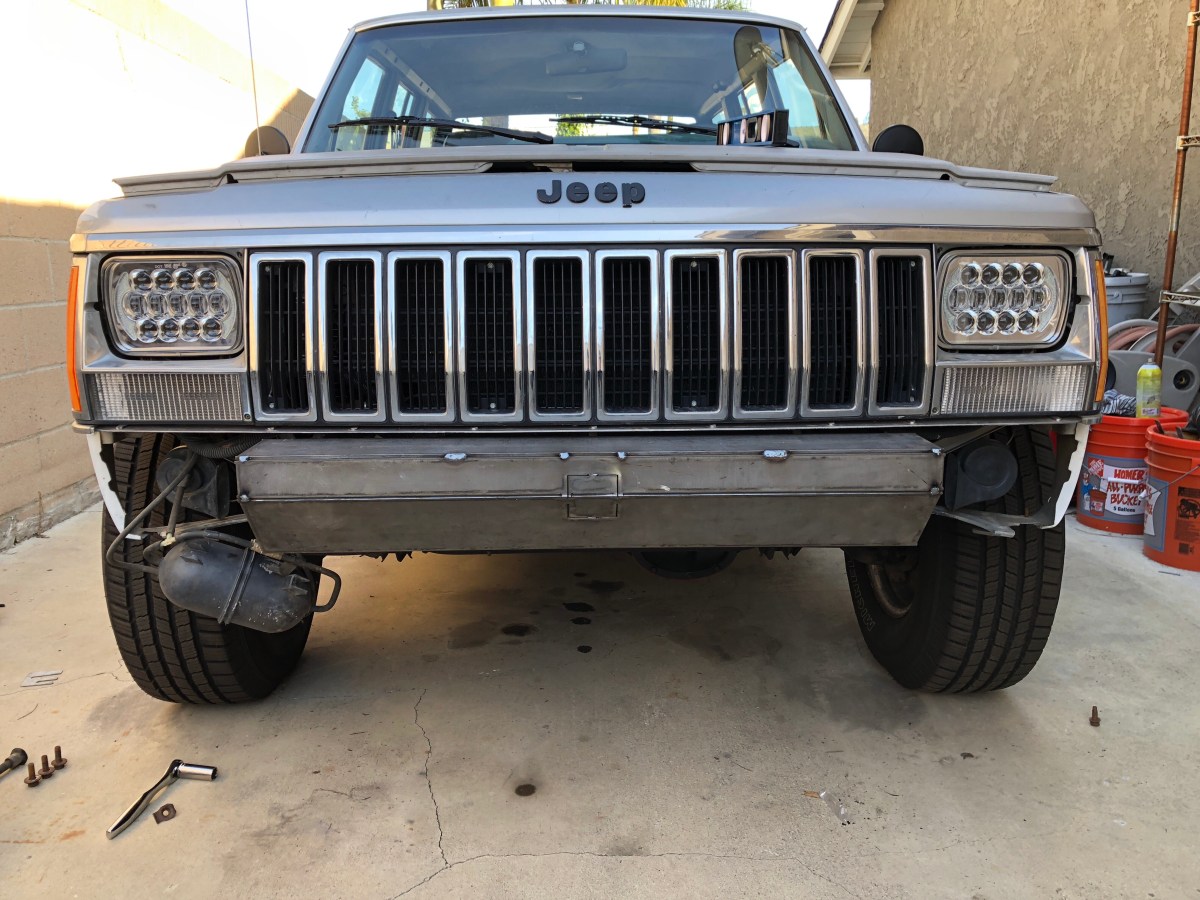
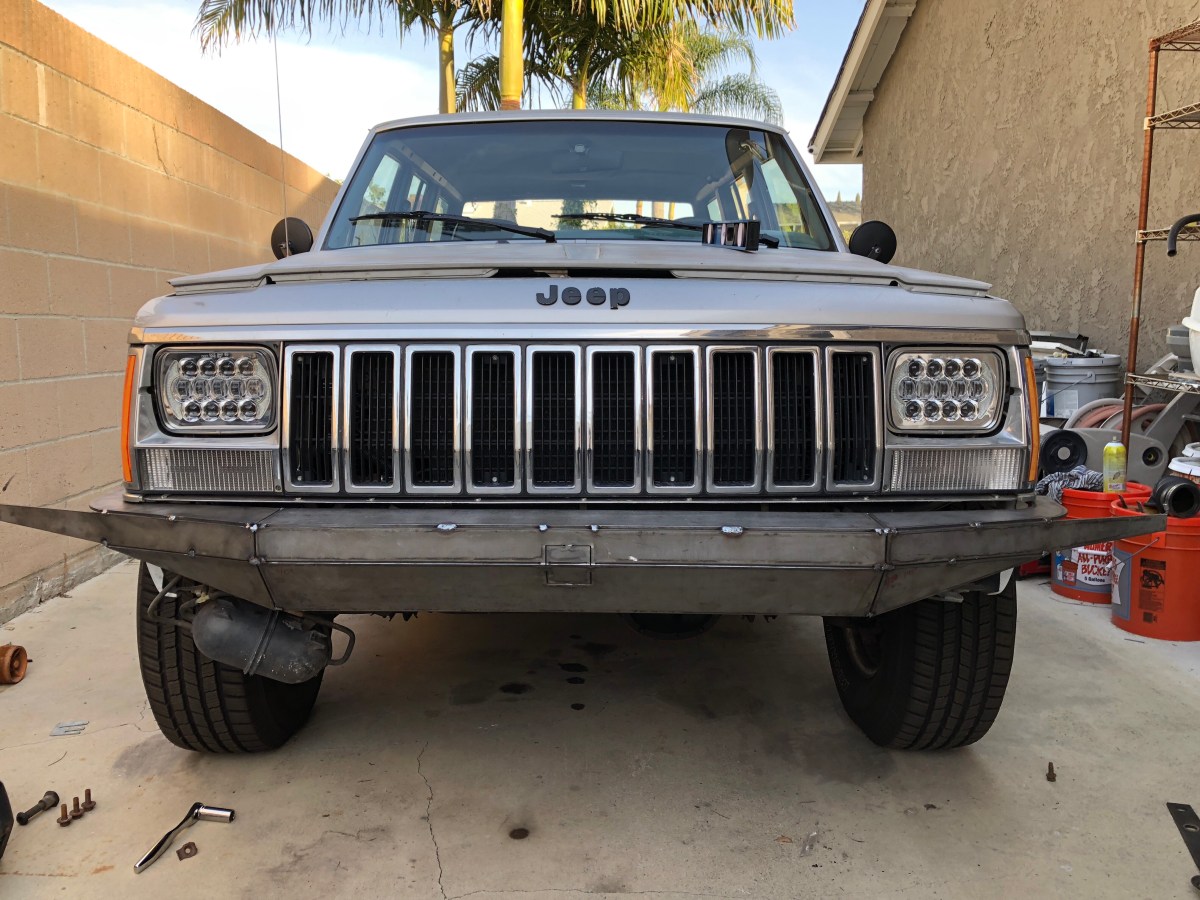
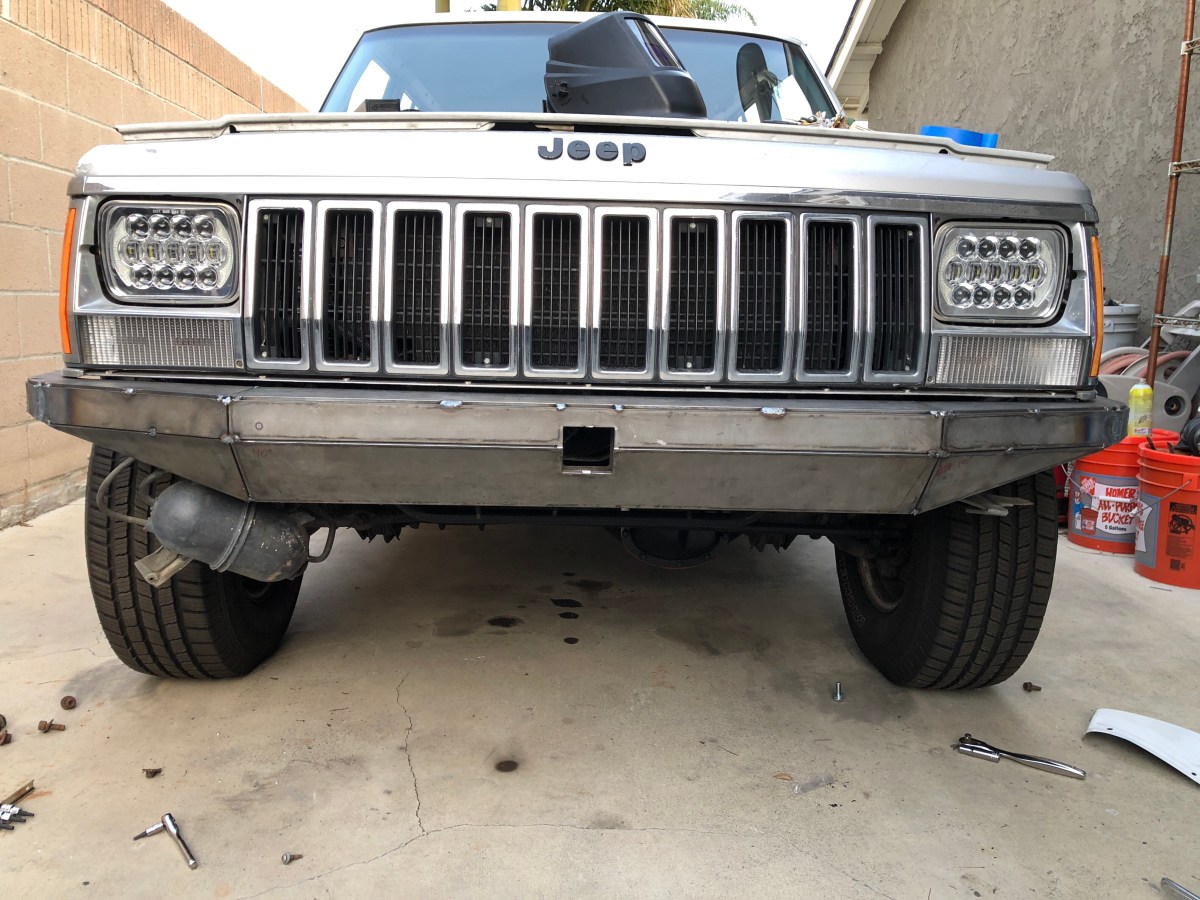
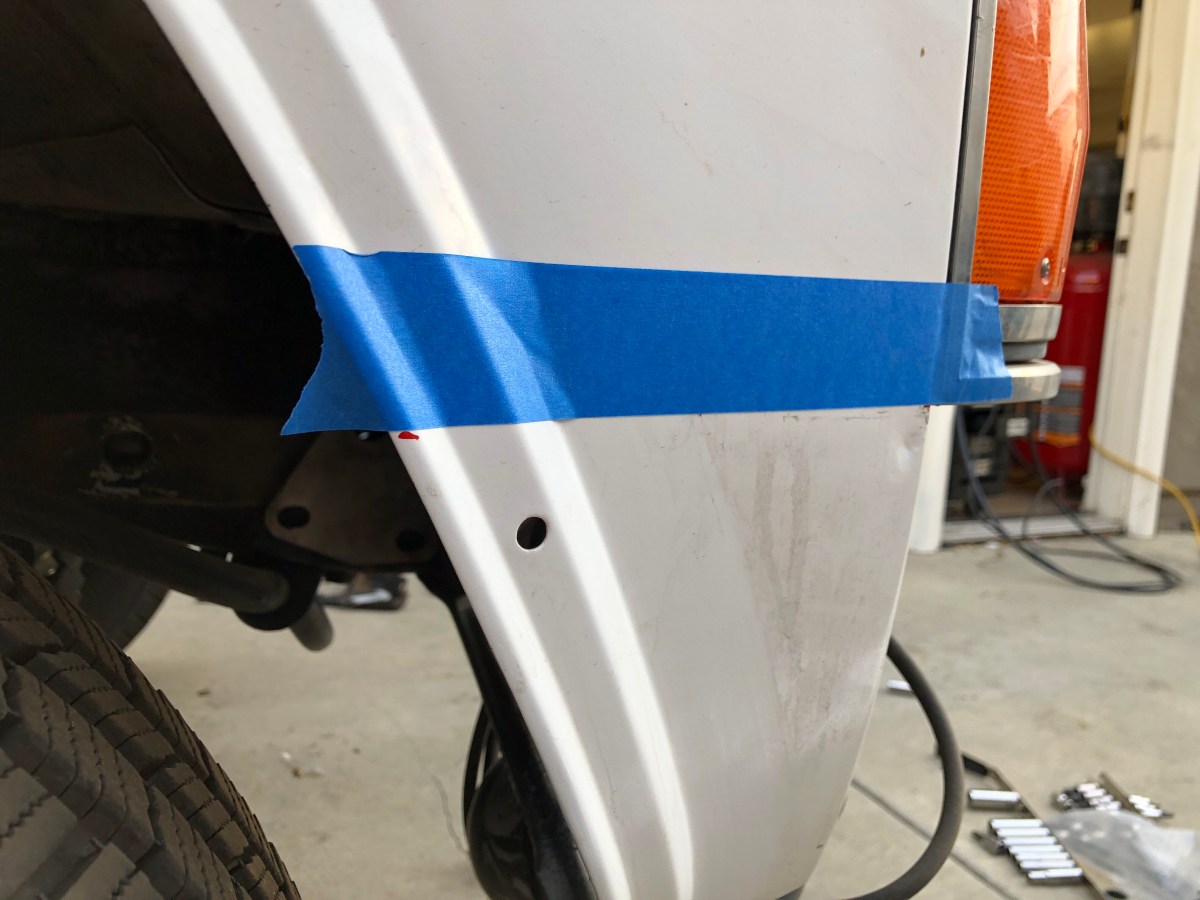
Before installing it on its final resting place, I cut the fenders flush with the headlight bezel. This was necessary to fit the bumper properly.
Once it was cut, I installed the bumper. I pushed the bumper back as far as space allowed for maximum tuck on the front end. I slid the receiver pin in and gave it the shake test. 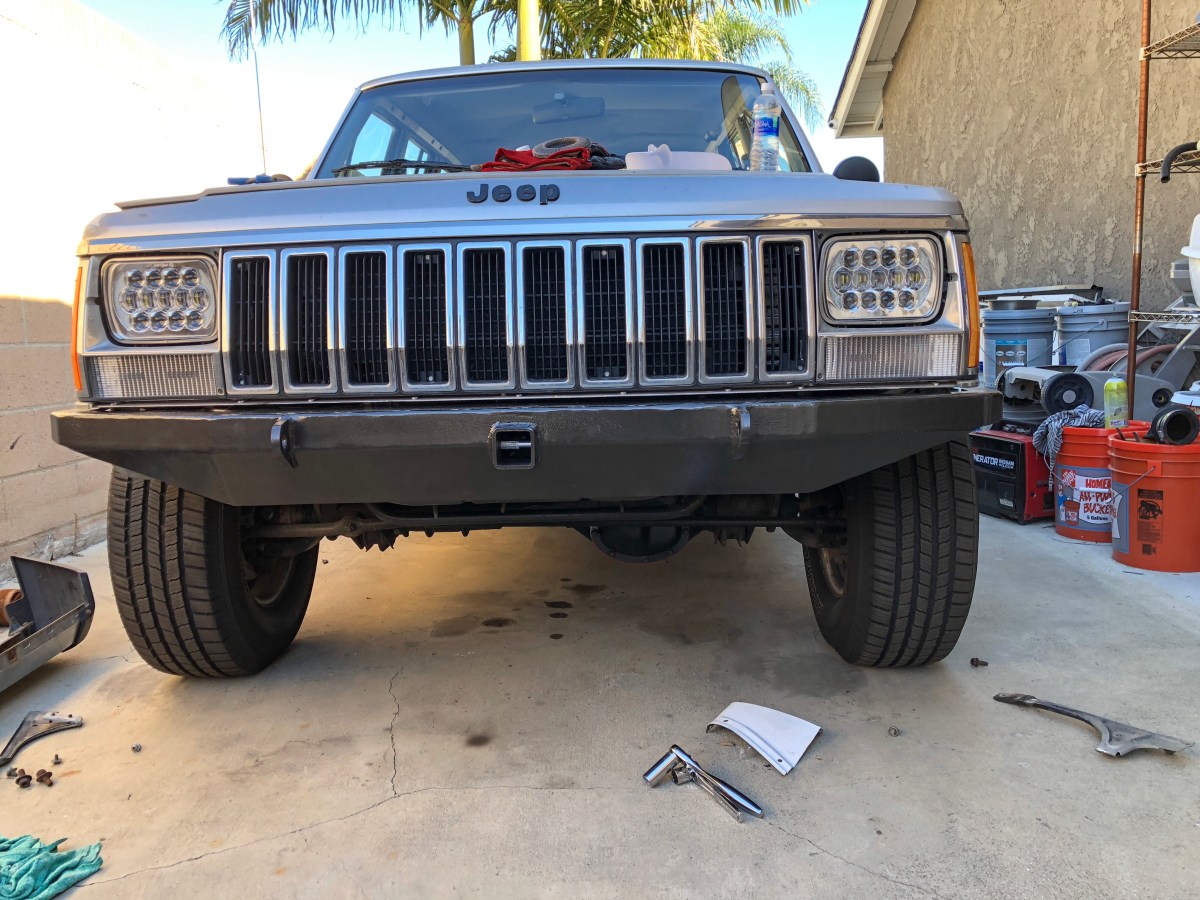
Overall the bumper turned out great. It did suck that Dirtbound Off-Road doesn’t give you instructions but with an angle finder and some common sense, you can get it done. This bumper is their Mohave, Non-Winch series bumper. I chose the non-winch bumper because I personally don’t like my bumper sticking out twelve to fifteen inches from the front of my vehicle. I personally think it looks goofy. I also plan to keep my winch in the Jeep, out of the elements and away from thieve’s eyes while it’s parked somewhere. I plan to run the wiring to the front and rear in the event I need to it on either end. But that’s a later article.
