
So the following weekend of the purchase, I started troubleshooting the overheating problem with the cooling system. The cap on the pressure bottle appeared to be new and in proper working condition. The thermostat house and water pump looked brand new as well. The hoses seemed to be older and needing to be replace but the bottom hose did still have the support spring inside of it. The clutch fan was a little loose and could be replaced but still appeared to be in working order. The temperature switch in the radiator was working properly and turned the electric fan on around 200°F. So with all obvious problems checked and verified as “in working condition”, it was time to pull the head and check the head gasket for failure.

There was some signs that the head gasket was replaced previously. From what I could see with the naked eye and close inspection, the block didn’t appear to have any cracks or fractures. After clean as much head gasket remnants with a razor blade, I sanded the block lightly with 300, 1000, and 2500 grit sand paper. I checked the mating surface with a level and feeler gauges. A .0015 feeler would not clear the level in all directions, so I call that a pretty flat surface.
The cylinder head was sent to Amcal Machine Shop in Colton, California. After they magnafluxed the original Renix cylinder head, they found four cracks in the head. One between cylinders 3 and 4. Another between cylinder 6’s intake and exhaust valves and cylinder 6 to the rear water jacket port. The last crack was the two rear water jacket ports. Needless to say the cylinder head was officially junk.
They were able to snag me a good used 4.0L H.O. cylinder head from a 1993 engine. They magnafluxed, hot tanked, machined, did a valve job and tested the head, it was ready to pick up a few days later.
While the head was torn off the engine and there was room to check other components in the engine bay. I check out my motor mounts and low and behold, they were beyond shot.
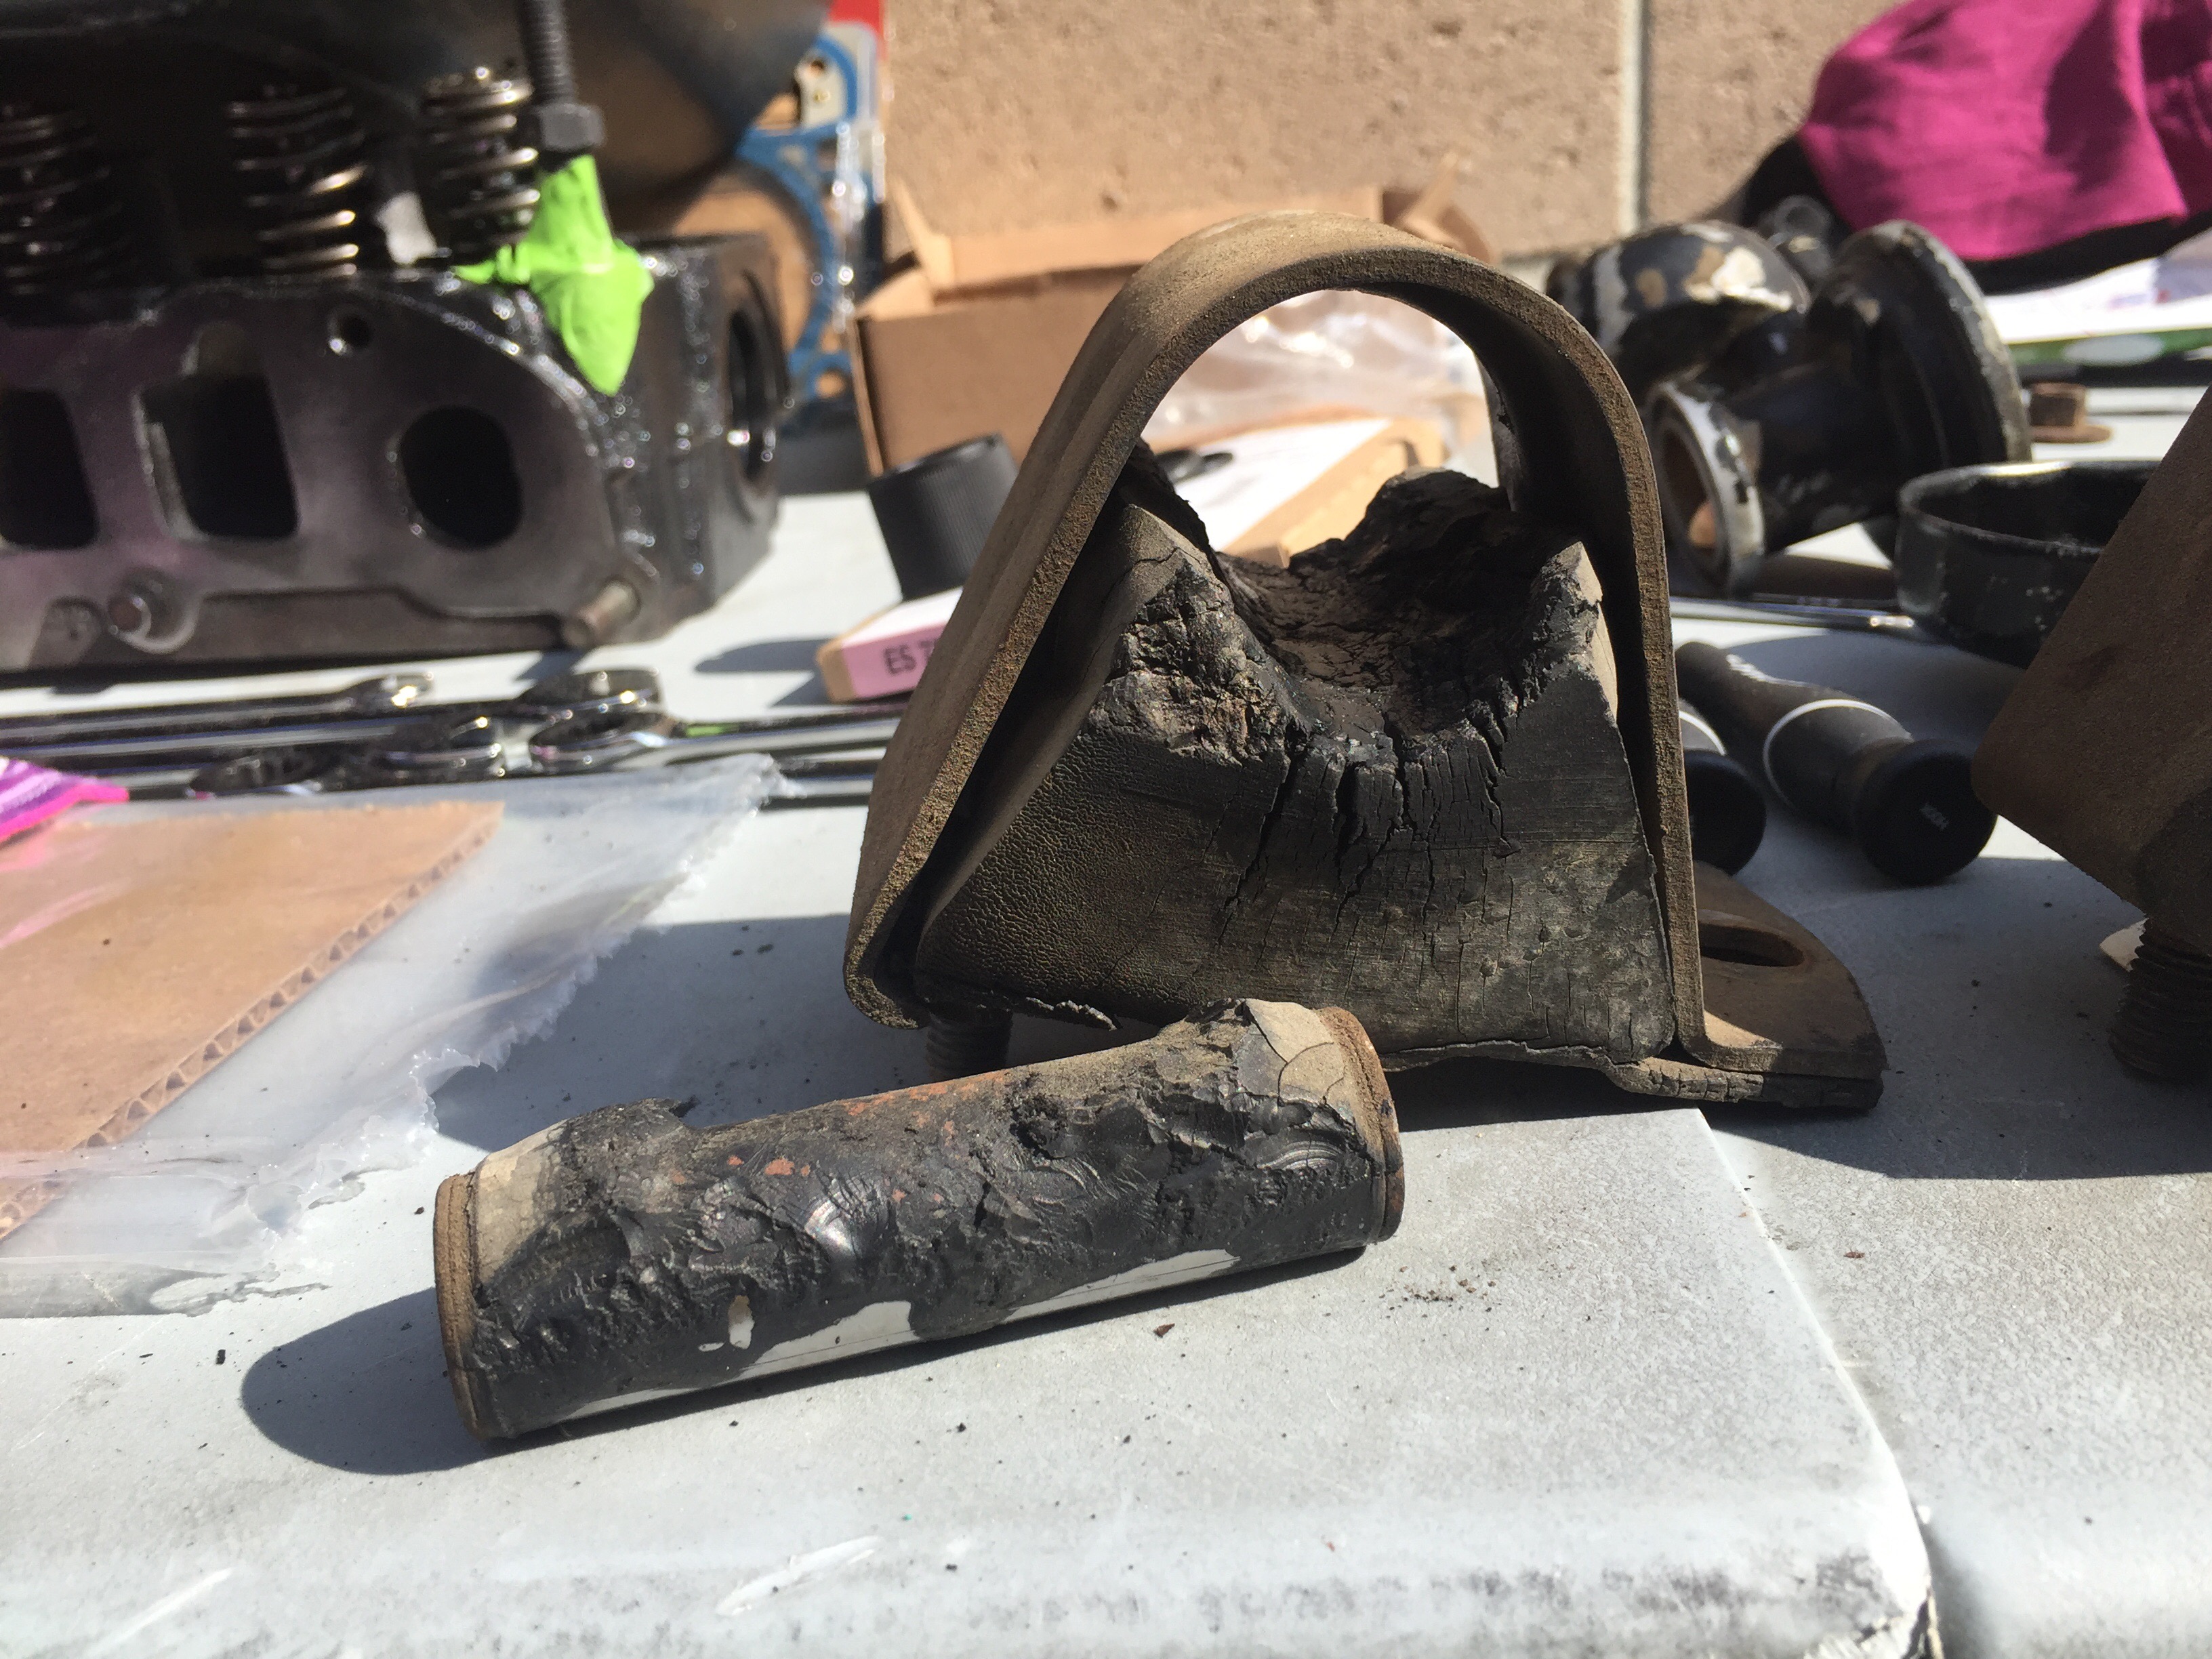
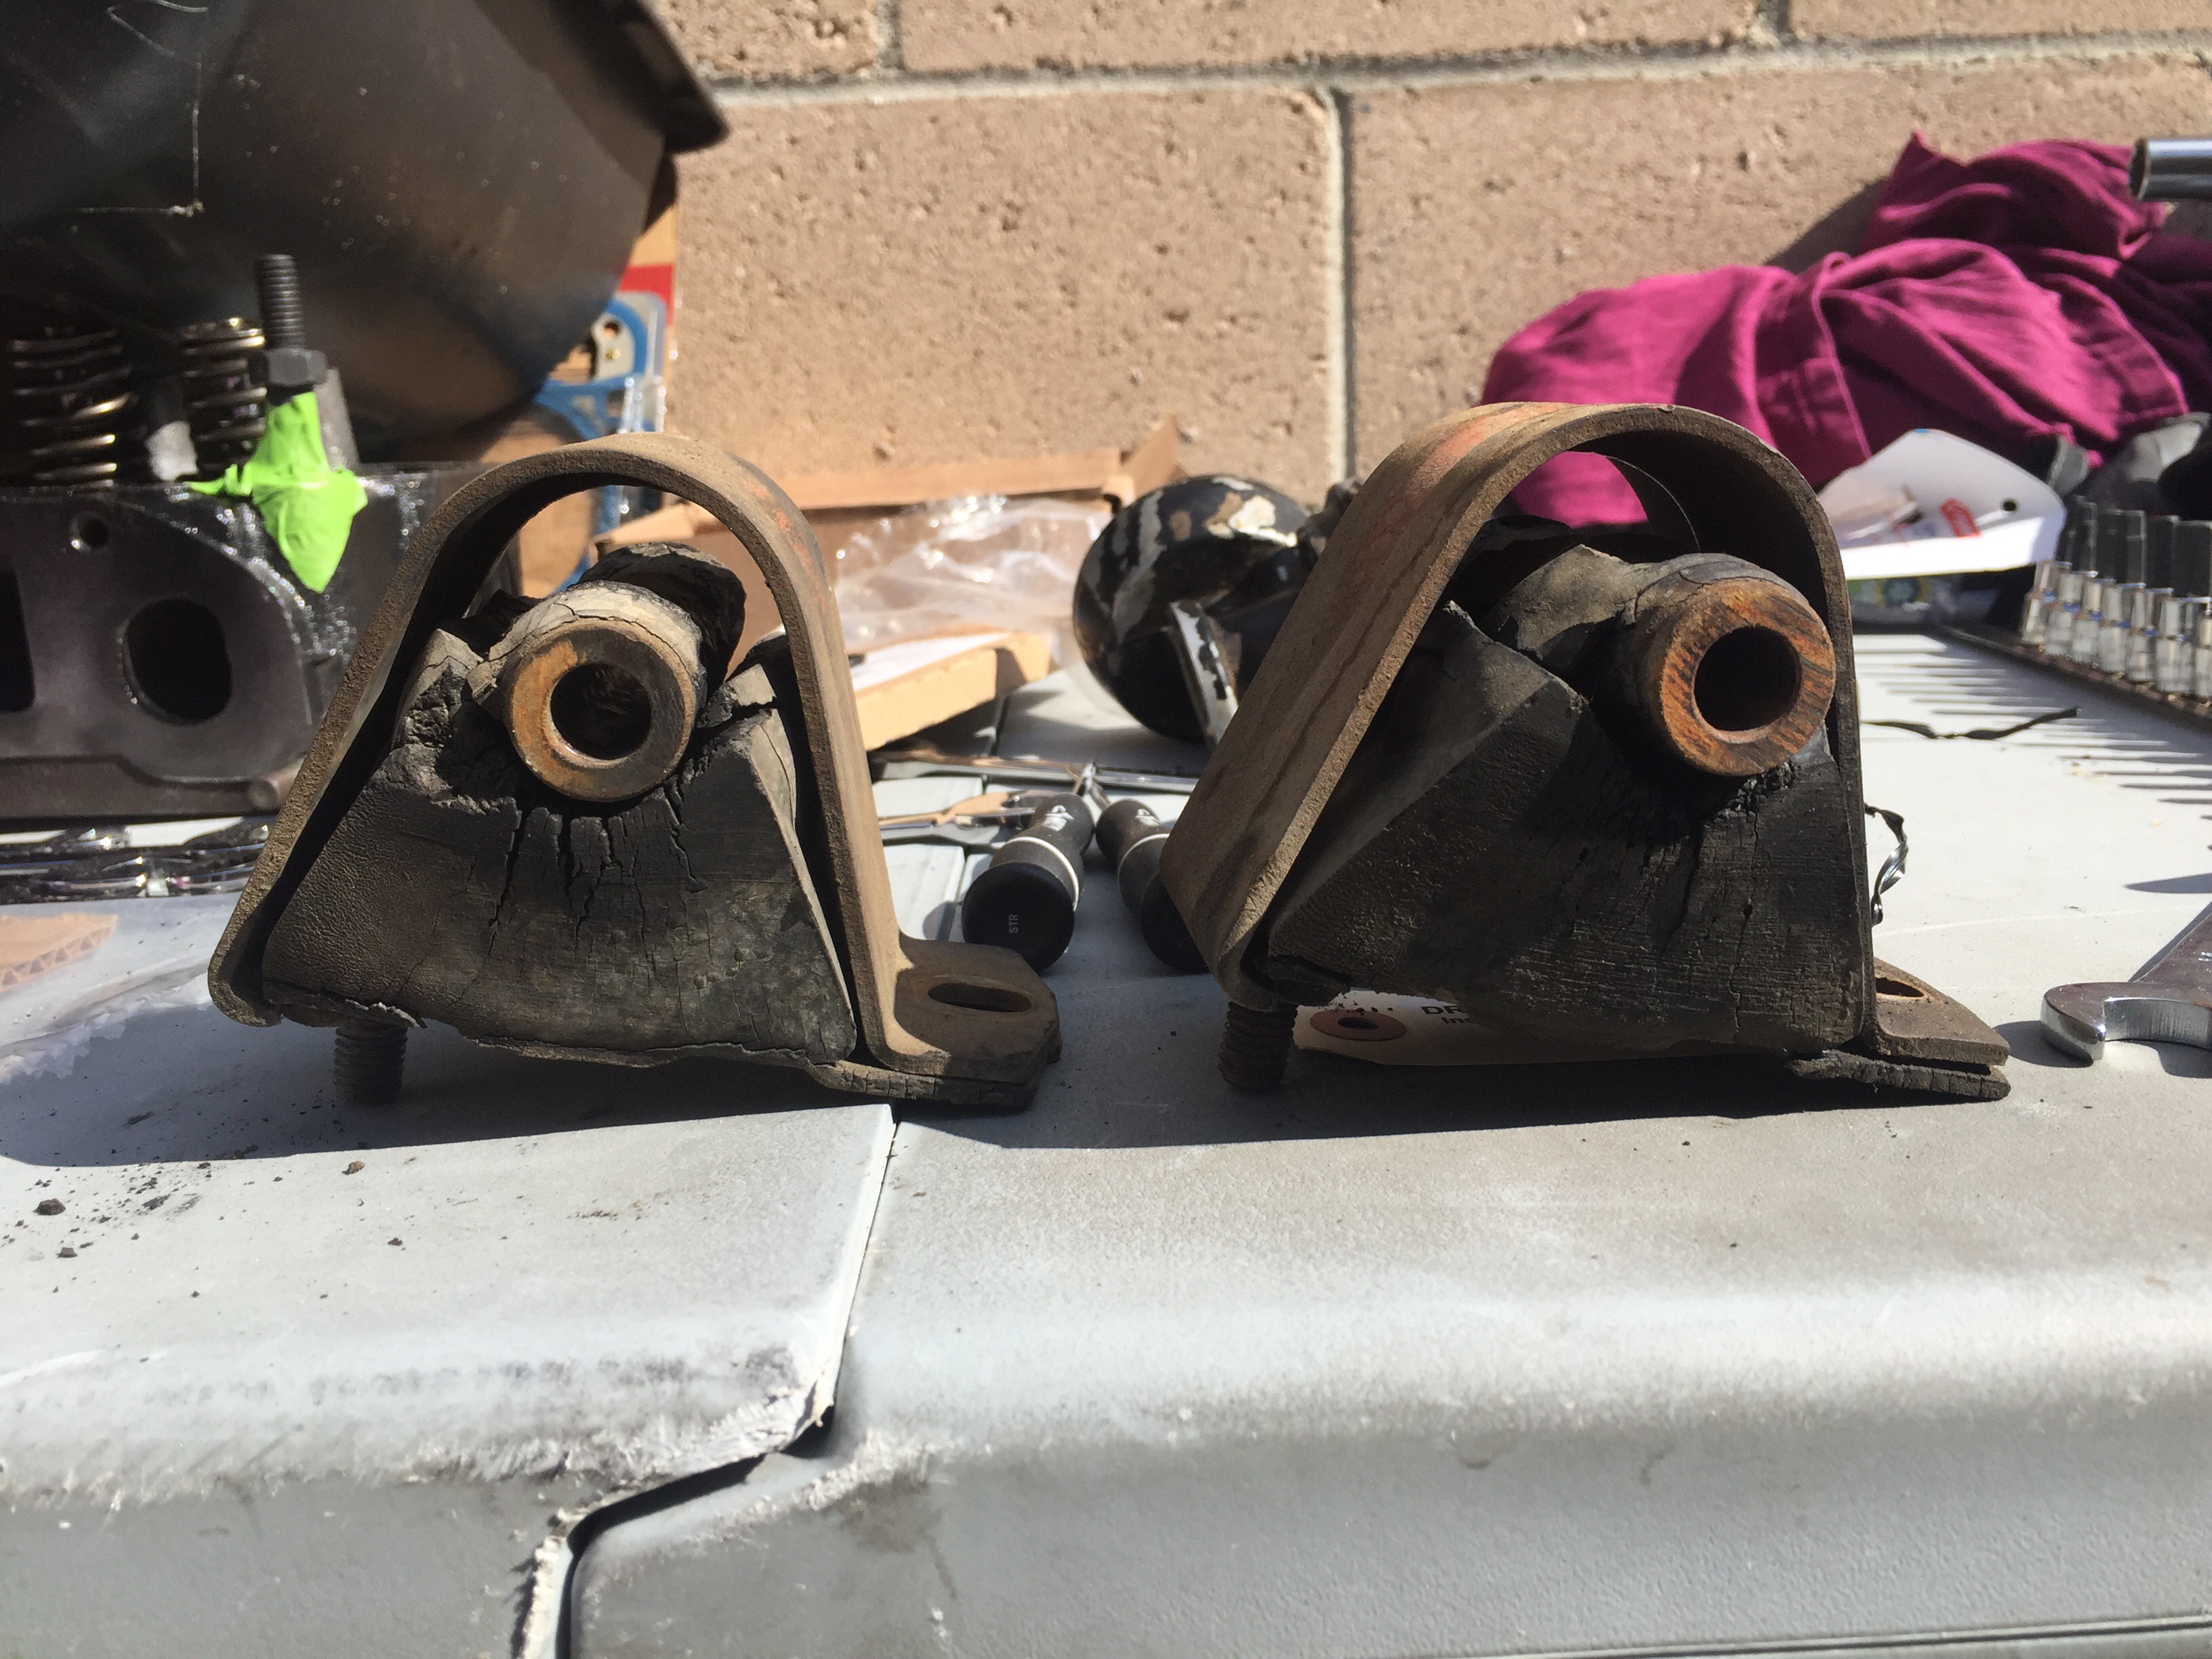
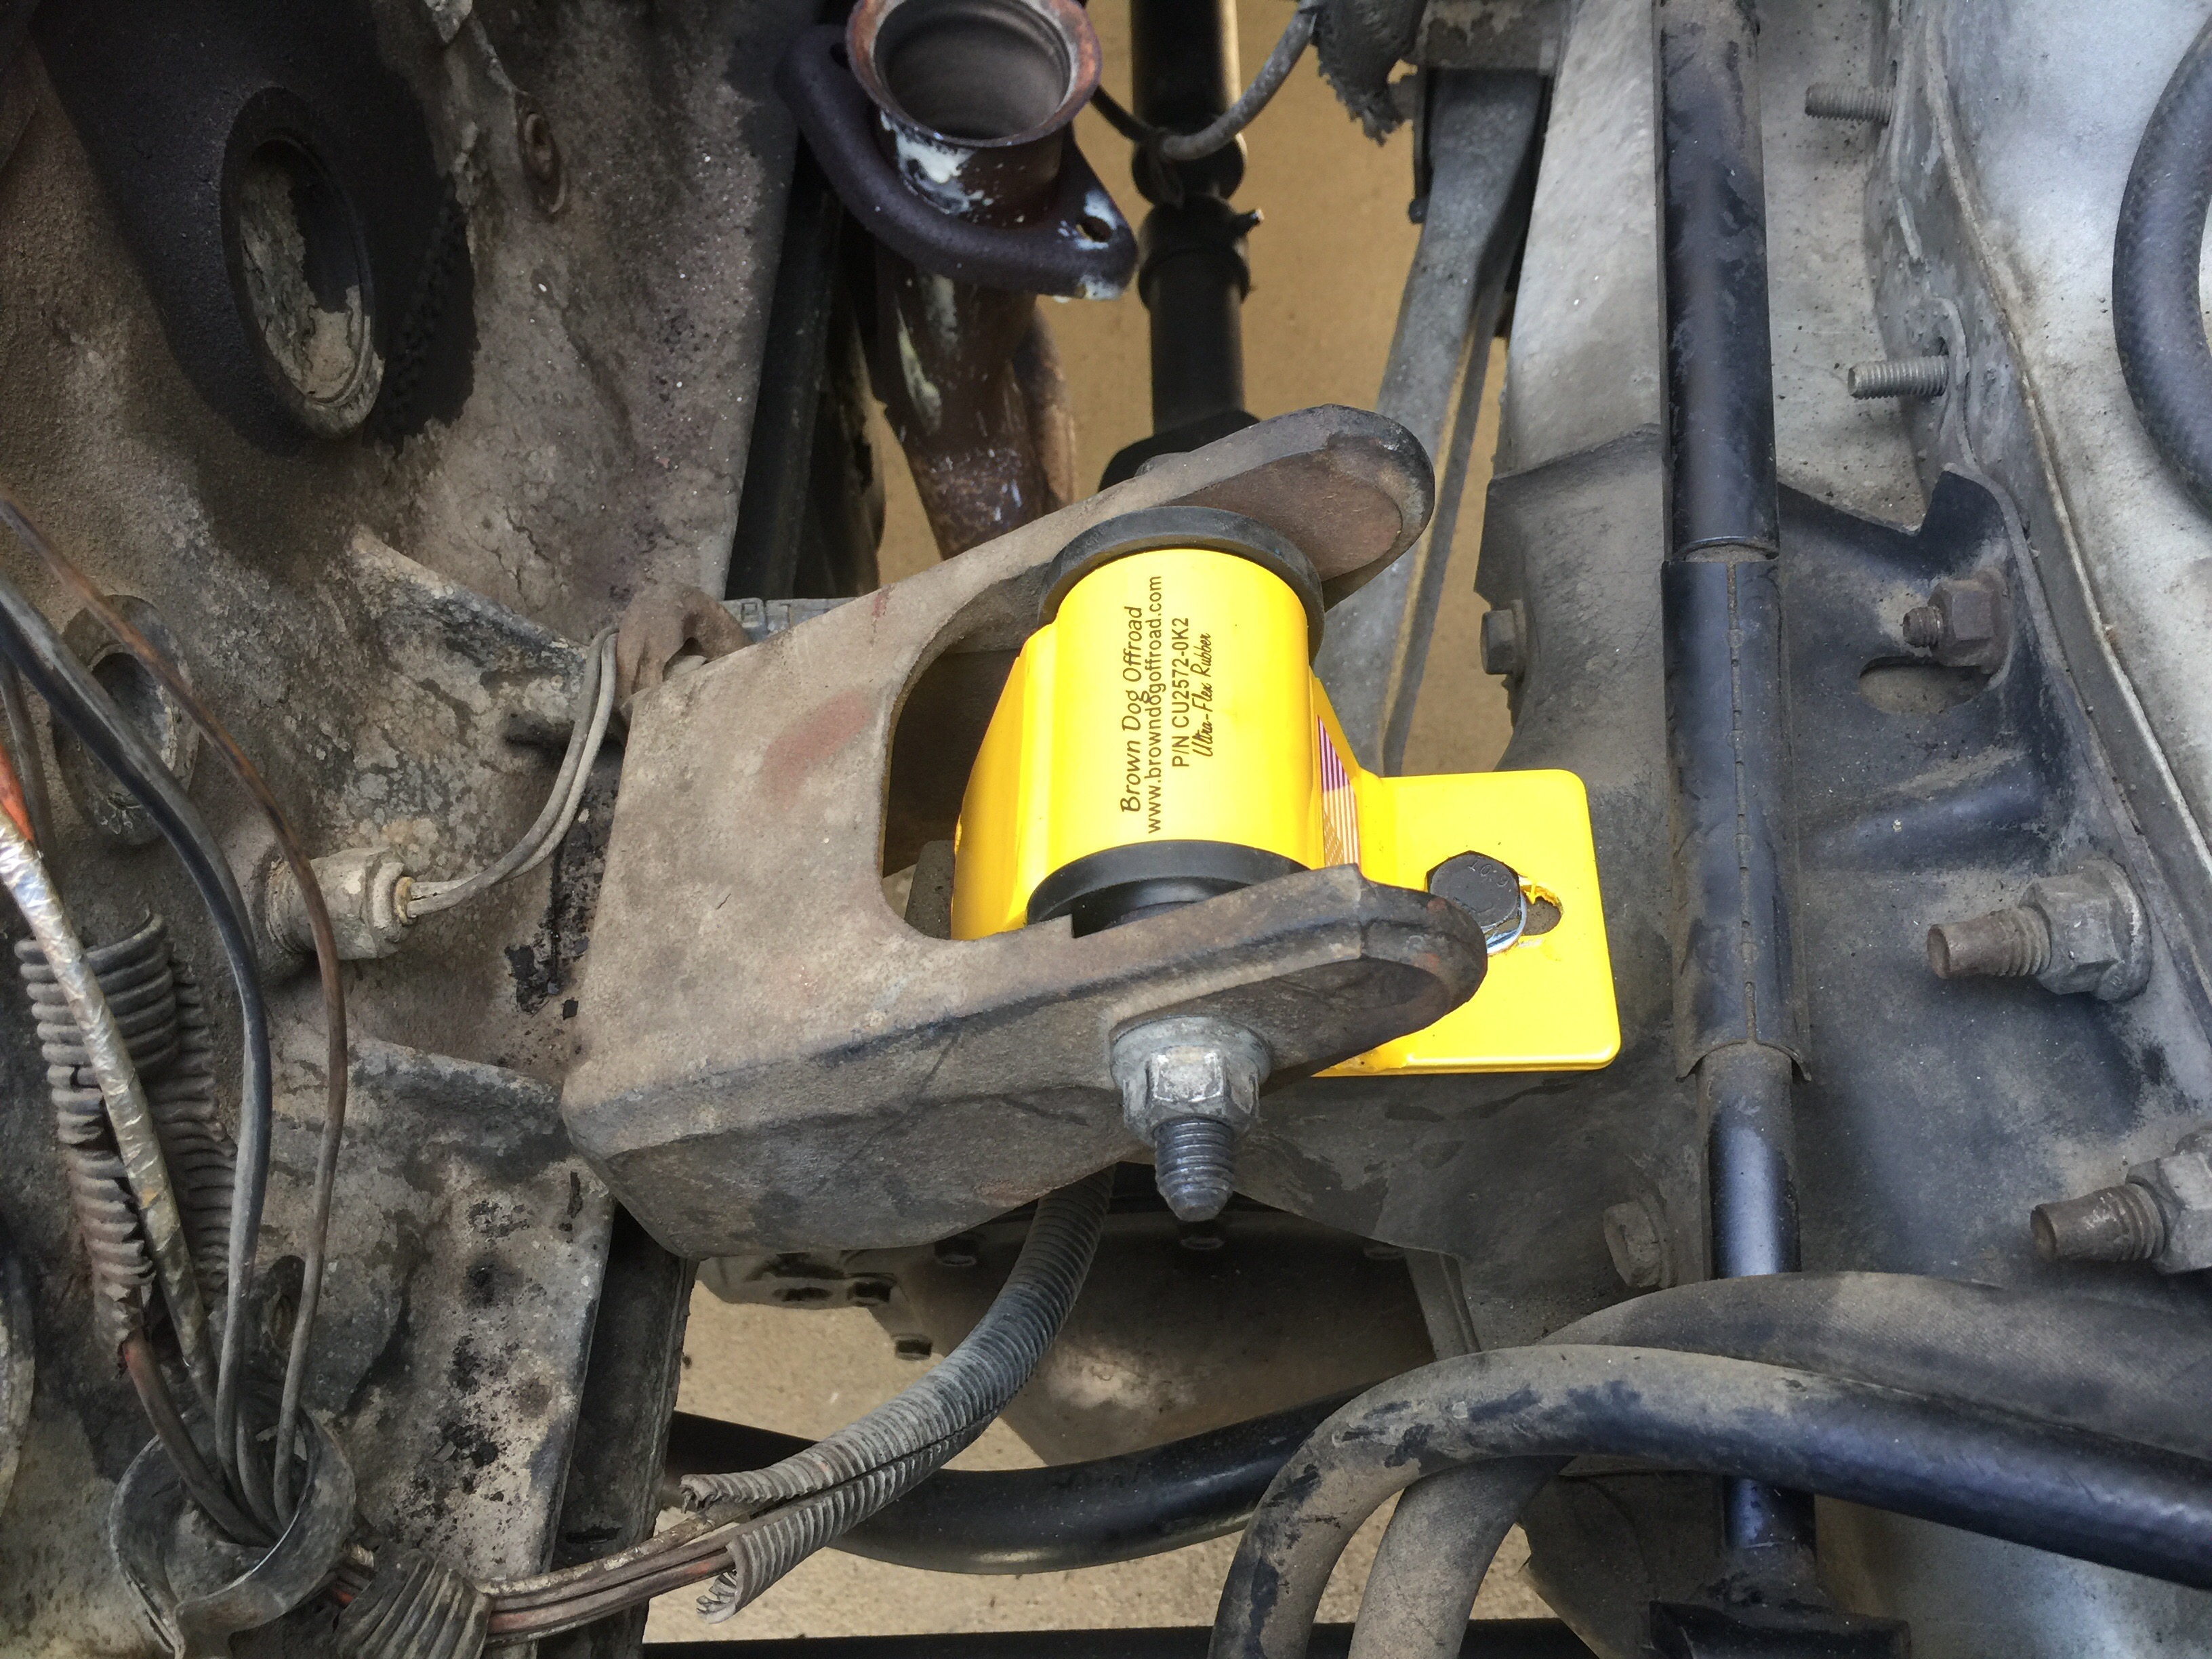
I decided to replace them with some new rubber heavy duty motor mounts from Brown Dog Off-Road.

Installation was a breeze. Take a 2X4 piece a wood and a jack. Place the wood block and jack in the rear hump of the oil pan and lift the engine up just enough to take pressure off the original motor mounts. Loosen original mounts first for quicker removal. Pull out the driver side first. (Easier access) Install the new Brown Dog mount but don’t torque the bolts until the passenger side is in and the engine is sitting on the mounts, not the jack. The passenger side is a little bit more of a pain the butt. Make sure you have a catch can under the Jeep because you will need to remove the oil filter. Once the oil filter is removed, loosen the Oil Filter Adapter bolt enough to clear the guide pin and turn the adapter to the rear of the engine so you can remove the passenger side motor mount bolt. I decided to remove the adapter completely and replace the three O-Rings that are in the adapter because they were probably the originals from 1987.

Once the mounts are loosely installed, drop the jack and and tighten the bottom bolts down and then the long “mount to block” bolt. Don’t over tighten the “mount to block” bolt. It should be snug but don’t murder it. Turn your adapter back inline with the guide pin or change the three seals and reinstall the adapter on the guide pin. Torque adapter bolt back down. Mounts are done.


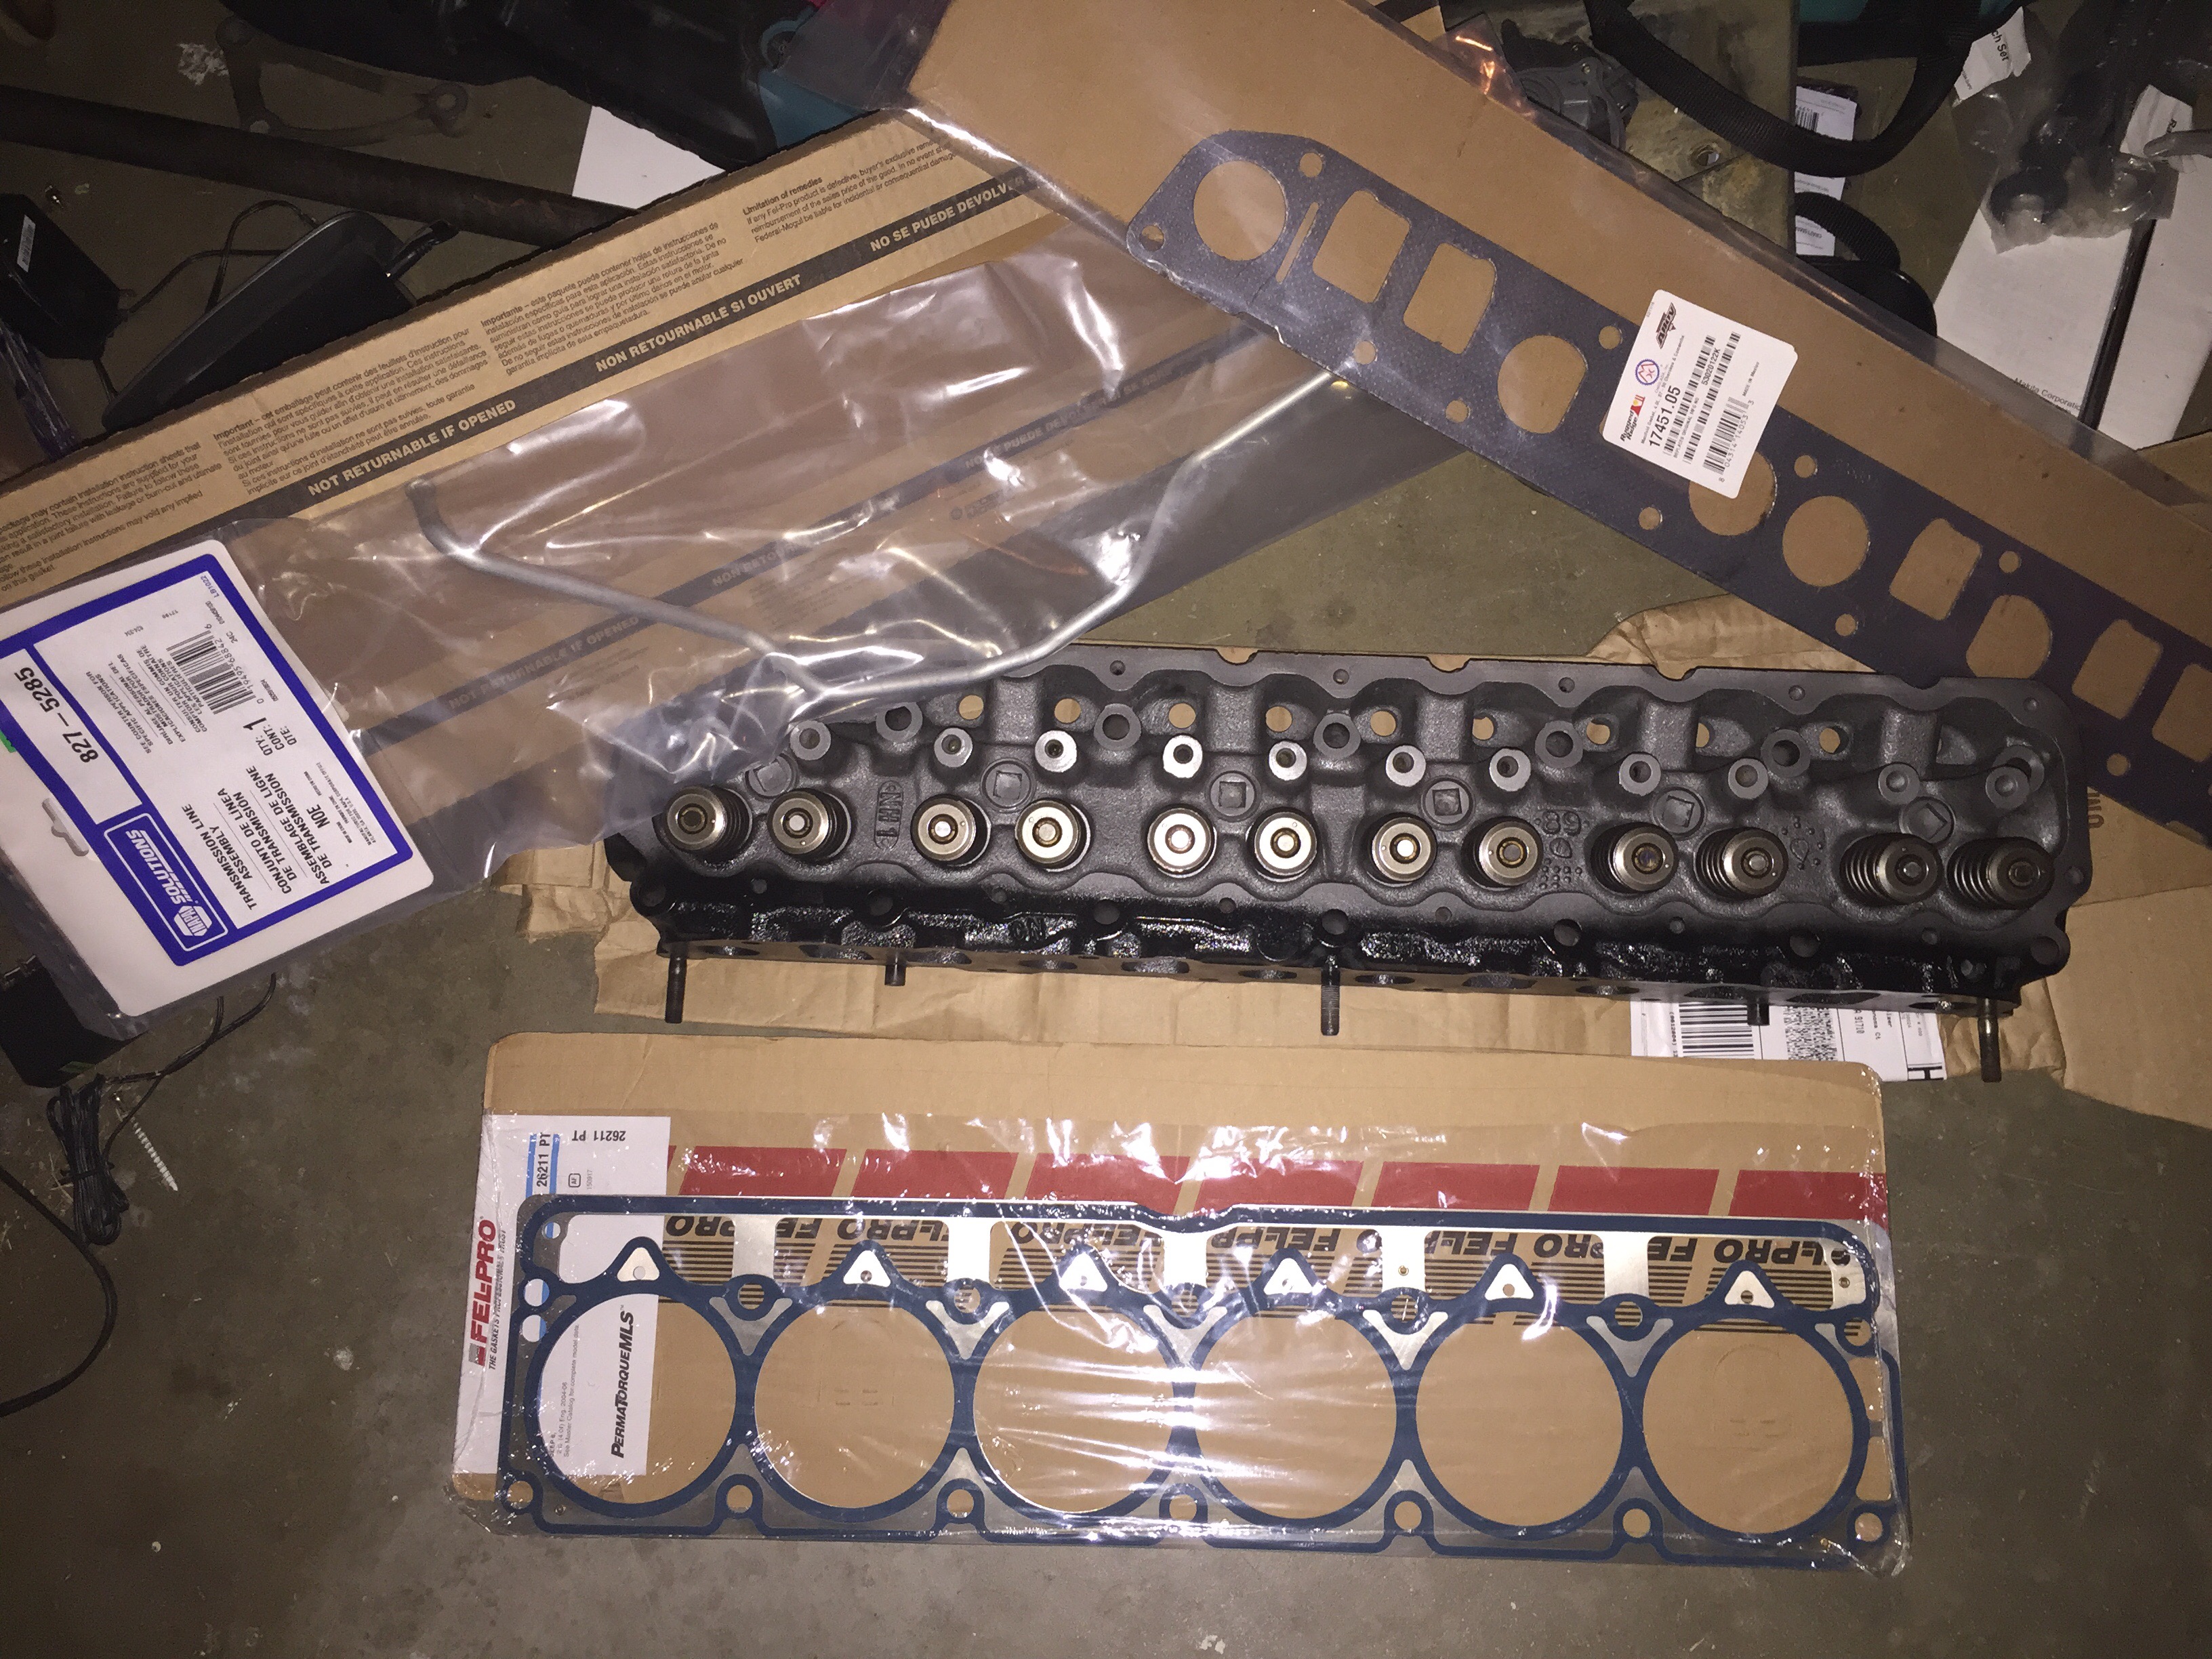
Taking advice from the Renix guru Cruiser54 from CherokeeForum.com, I picked up a stock Renix intake/exhaust manifold gasket and a new FelPro MLS head gasket. I chose the Multi-Layer Steel head gasket for its better sealing power. I figure, diesel manufacturers use them and they hold under all that torque and pressure so 180hp should be no sweat from them. Anyone that has a Renix era Jeep, I recommend visiting Cruiser54’s site and not only checking out his tips and tricks but to do them. Per his advice on Tip 17 – HO into Renix Swap, I retained my Renix intake/exhaust manifolds, rocker arms, and push rods. I used the original Renix style intake/exhaust manifold gasket. The ports don’t exactly match but it’s not a big deal if you don’t port match the head to the gasket.

I didn’t want to reuse the head bolts a third or forth time so I tracked down some new grade 8 head bolts and studs from EngineQuest, Part #: HB259N on EBay. The price was fair and they fit perfectly. I torqued the bolts in the proper rotation and in the proper stages.


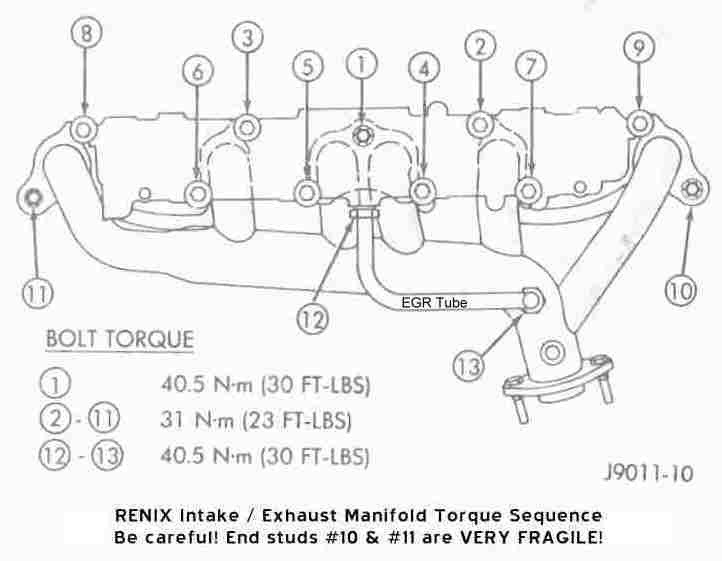
The original intake/exhaust manifold bolts looked far beyond their life cycle. Though they were grade 8 bolts, I didn’t want to take the chance of snapping one when I torqued them down. The manifolds bolts are 3/8″-16 x 1 1/4″ long course thread. The nuts on the manifolds studs are 3/8″-24 fine thread. Reuse the cup washers that were on the original bolts and nuts. If you don’t have them on yours, go to the junk yard and snag some from a donor vehicle. These are needed for maintaining proper torque evenly across the manifolds. I recommend installing the EGR tube in the intake manifold before putting all your bolts in. It can be a nightmare to get in after all you bolts are in and once you have the bolts in, you won’t want to remove them again. Be prepare to contort your wrist to get all the bolts in on the bottom. While the exhaust manifold was out, I also replaced Oxygen Sensor and exhaust seal (Dount Seal). Follow the torque sequence and torque steps and you’ll be good.
The next post I’ll show and explain some of the other parts I changed and upgraded.
